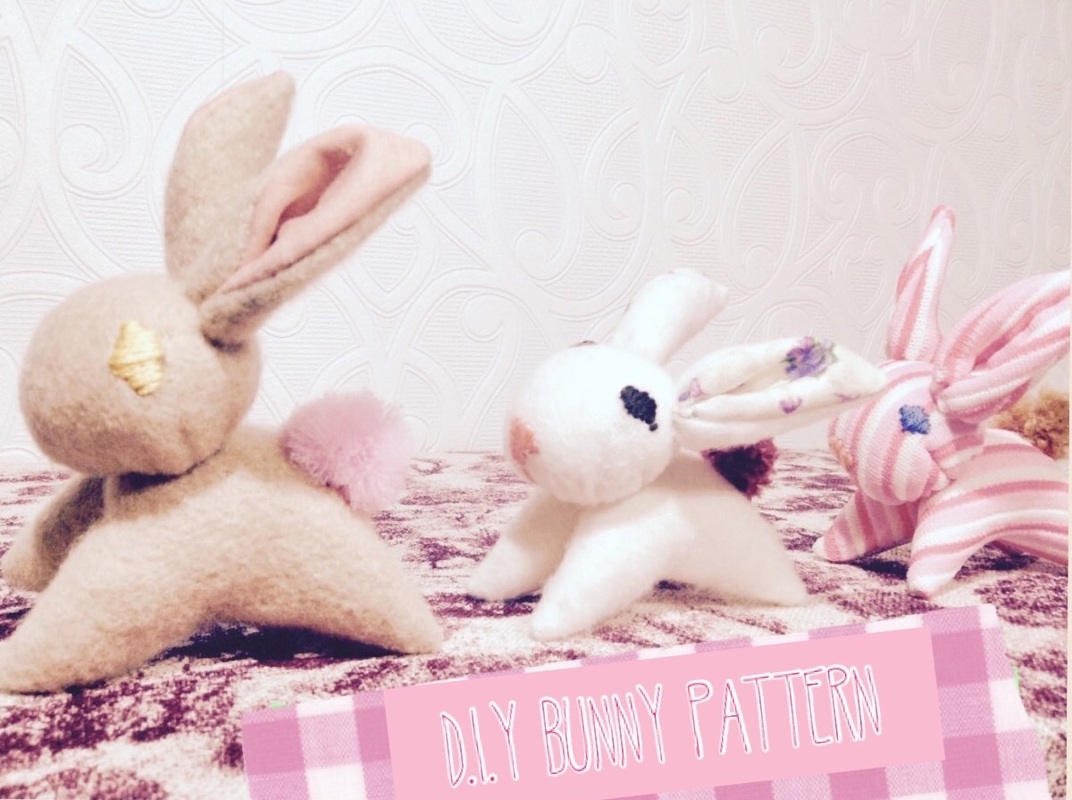
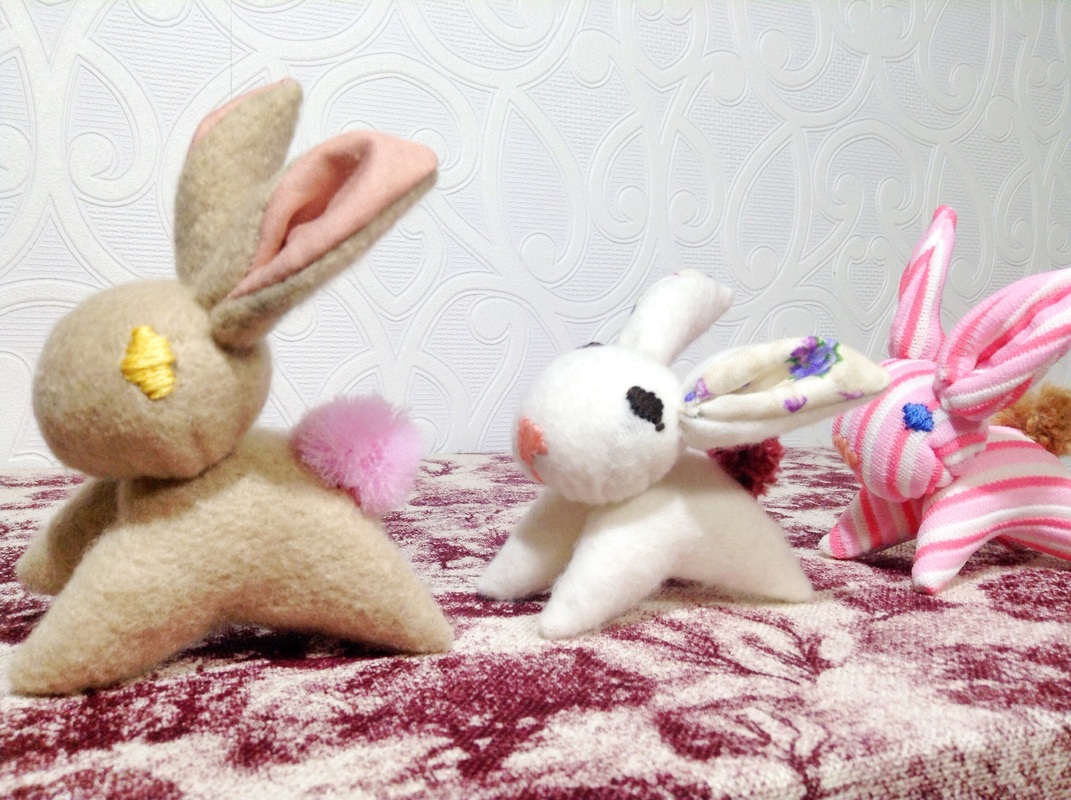
D.I.Y BUNNY
Its coming up to Easter, that means its time for decorative eggs, little chicks, bunnies and other cuties that frolic through Springtime. Actually it means Autumn, cold mornings and diminishing light. Bunnies are now crop munching rabbits, chicks having long since lost their yellow fluff.
Since there aren't any fluffy young'uns running around I suppose I'll have to make my own.
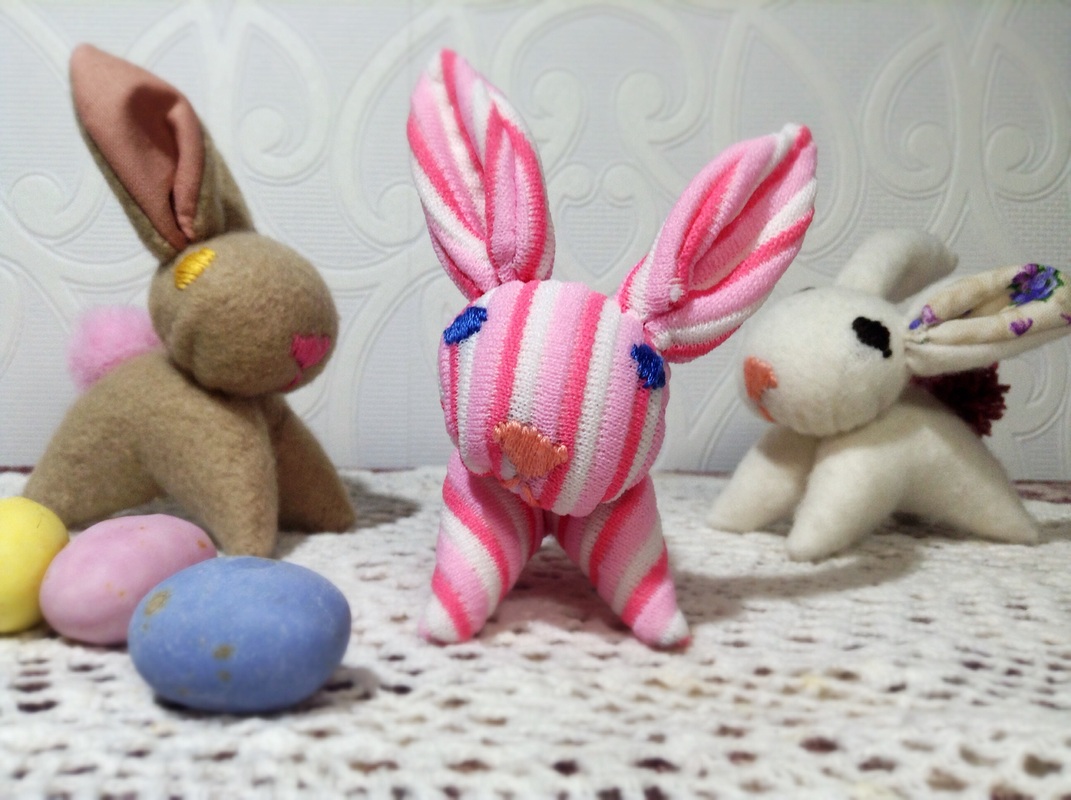
Todays project is a sewing project. Bunnies!! Standing at just under 10cm, they can be made out of almost any material, sewn by hand or using a sewing machine. You also make them bigger or smaller if you wish.
Since there aren't any fluffy young'uns running around I suppose I'll have to make my own.
Todays project is a sewing project. Bunnies!! Standing at just under 10cm, they can be made out of almost any material, sewn by hand or using a sewing machine. You also make them bigger or smaller if you wish.
You Will Need:
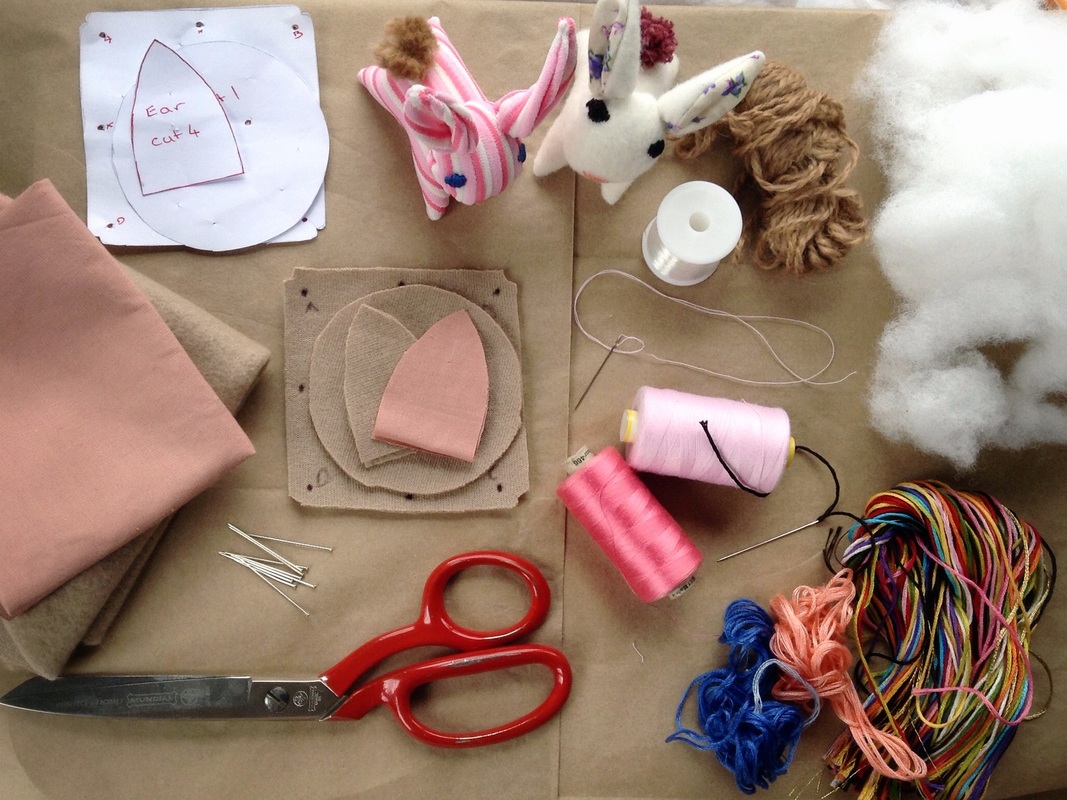
| - Fabric - Stuffing - Cotton thread - Embroidery thread - Invisible thread - Wool - Pen, paper, ruler - to make the pattern |
Making The Pattern
Draft the pattern
I have no idea how turn a file into a downloadable PDF so I'll just explain how to make the pattern.
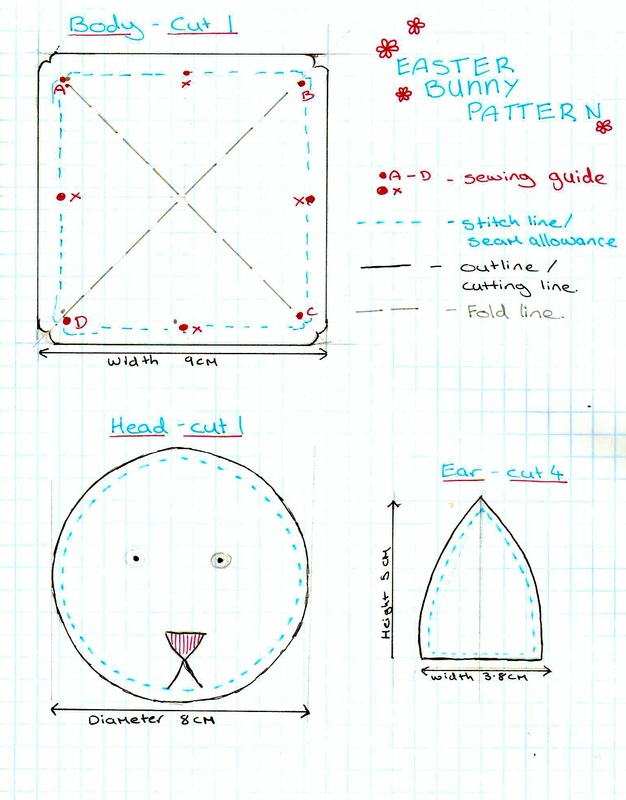
All you need to make these bunnies is: a square, a circle, and a triangle, that marks out the body, the head and the ears.
I drafted my pattern in a checked math book (as seen above)
You can make these bunnies any size you wish, the general rule is to measure out the square (body) first, then mark out the circle (head) 1 cm smaller, make the triangle (ear) about half the length of the body.
Don't worry too much about it, rough measurements work just fine.
On the body you'll notice I've marked out some dots labelled A, B, C, D and X. Transfer these to your pattern.
You also might want to draw/mark out your bunnies face on the head.
Also there is no need to add a seam allowance as you normally would to a dress pattern, the seam allowance has been included.
Placing the Pattern

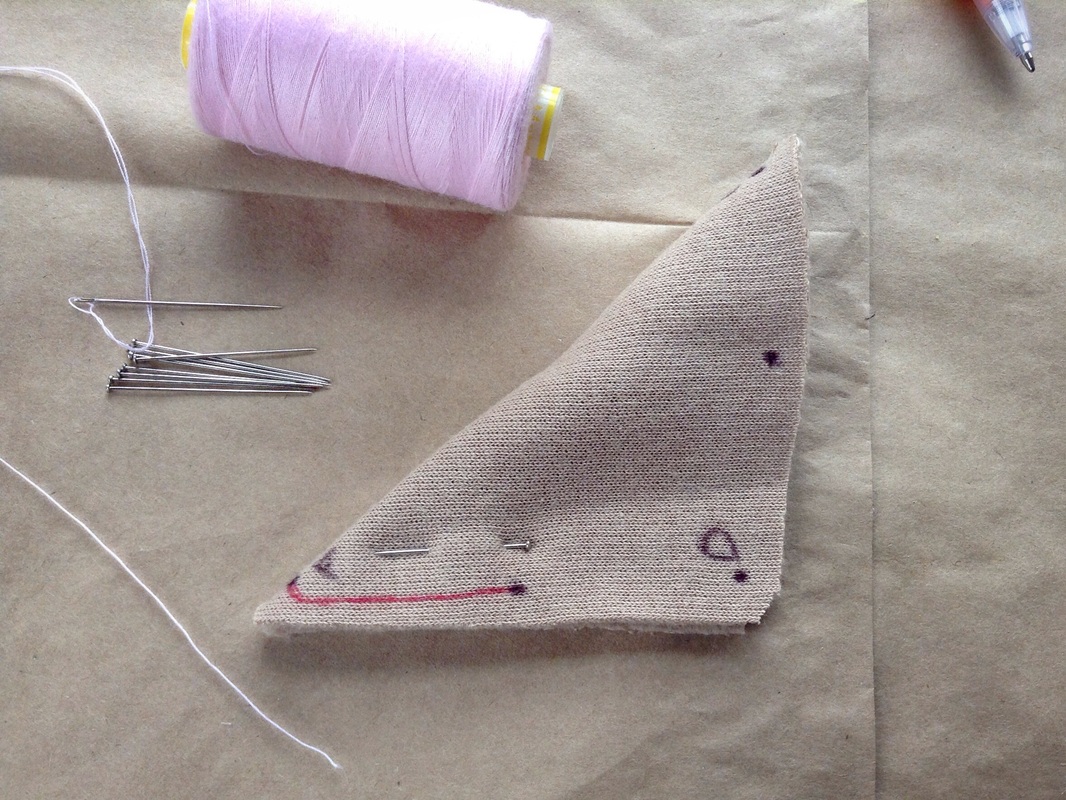
Using some pins place your pattern onto the WRONG side of the fabric you chose to use.
Cut one body, one head, and four ear pieces.
Cut one body, one head, and four ear pieces.
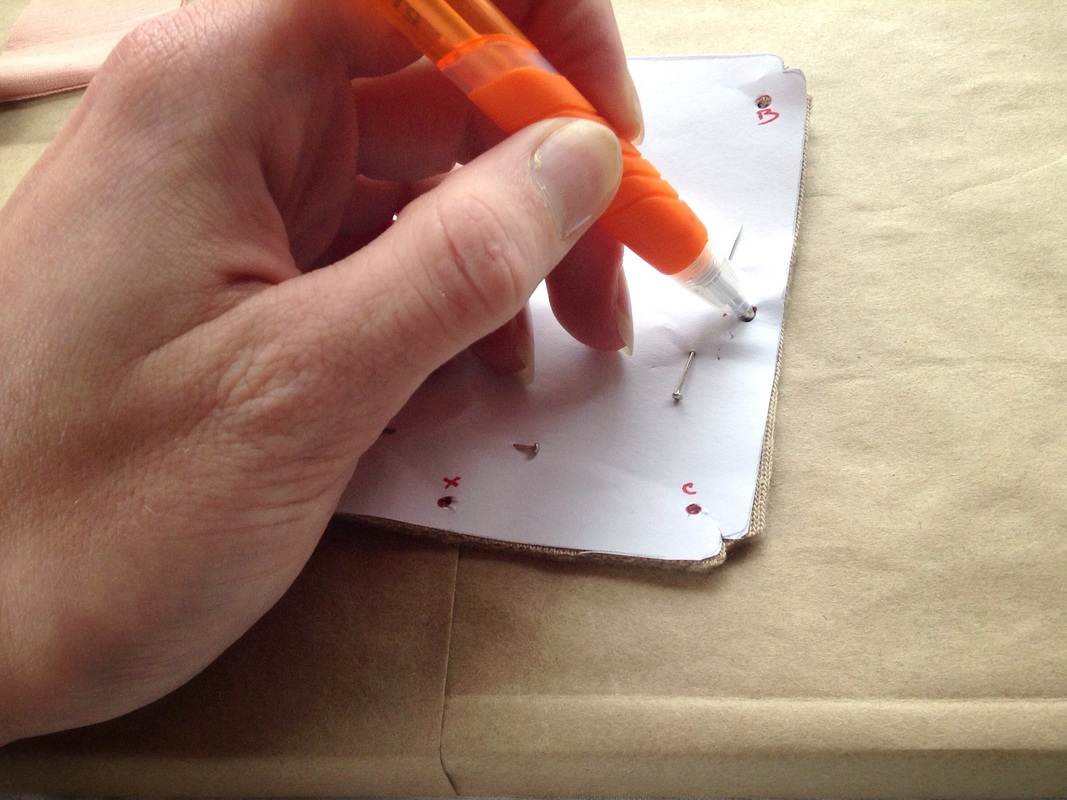
Using a pen transfer the dots A, B, C, D, and X onto the wrong side of the body piece.
And the two eye dots on the head.
And the two eye dots on the head.
Sewing The Body
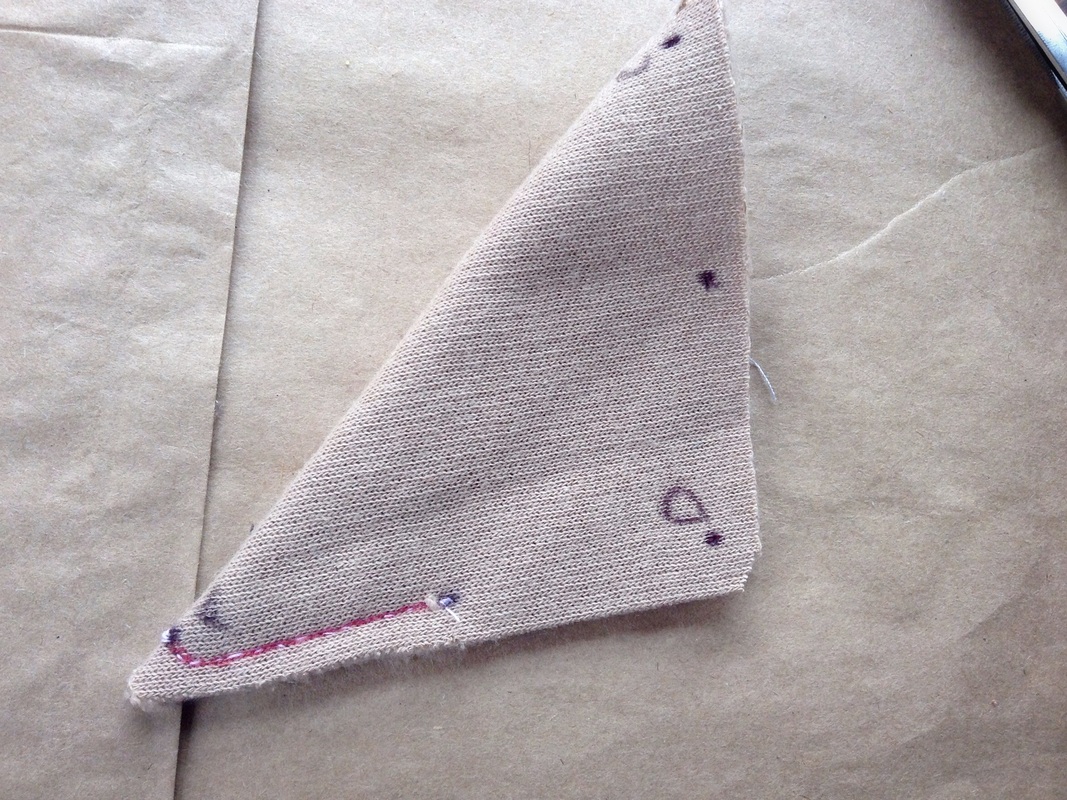
Fold the body piece in half diagonally at corner A - Good sides of fabric together, wrong side facing out.
Sew from mark A to mark X. Once sewn it should look like a J. Above I have marked the sewing line red.
Do the same for corners B and C.
Sew from mark A to mark X. Once sewn it should look like a J. Above I have marked the sewing line red.
Do the same for corners B and C.
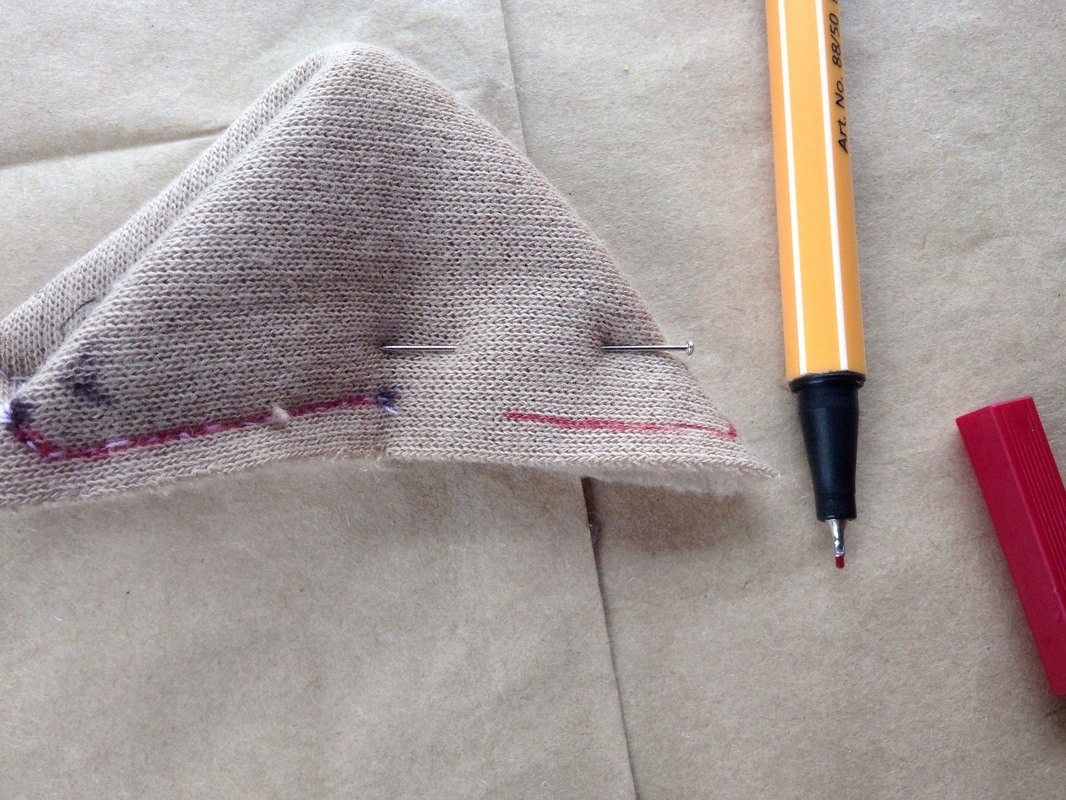
Once you get to corner D leave a gap of a couple of centimetres, so that the body can be turned through.
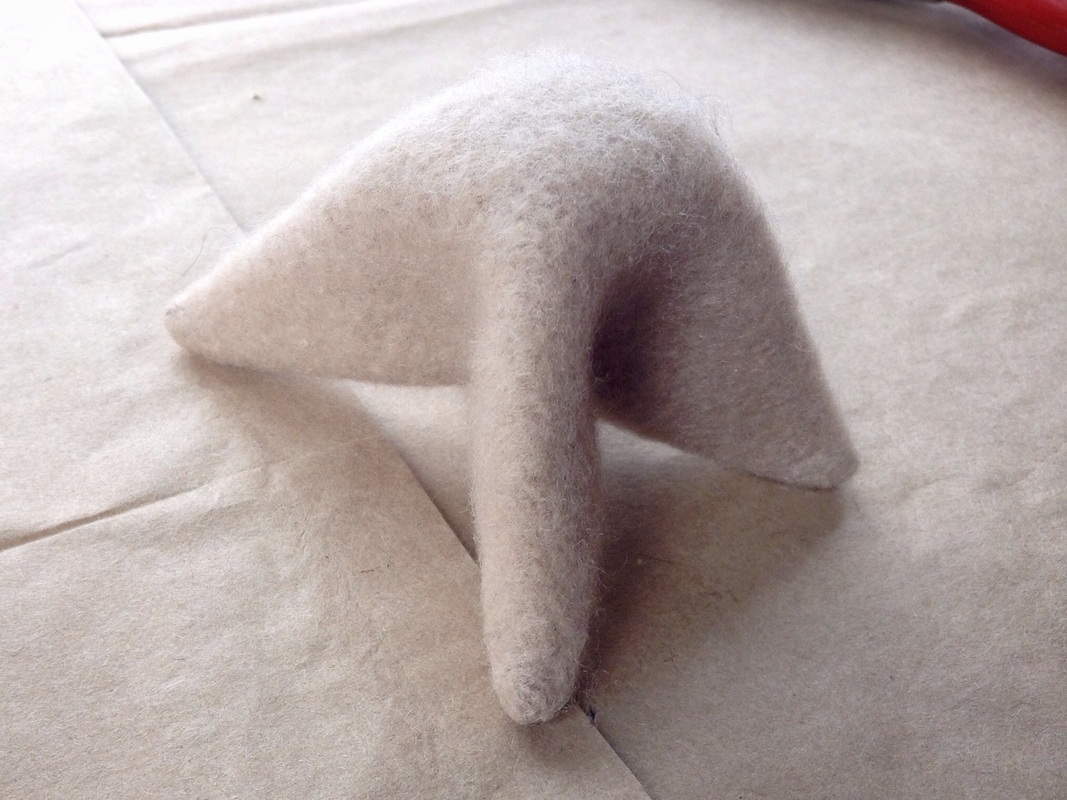
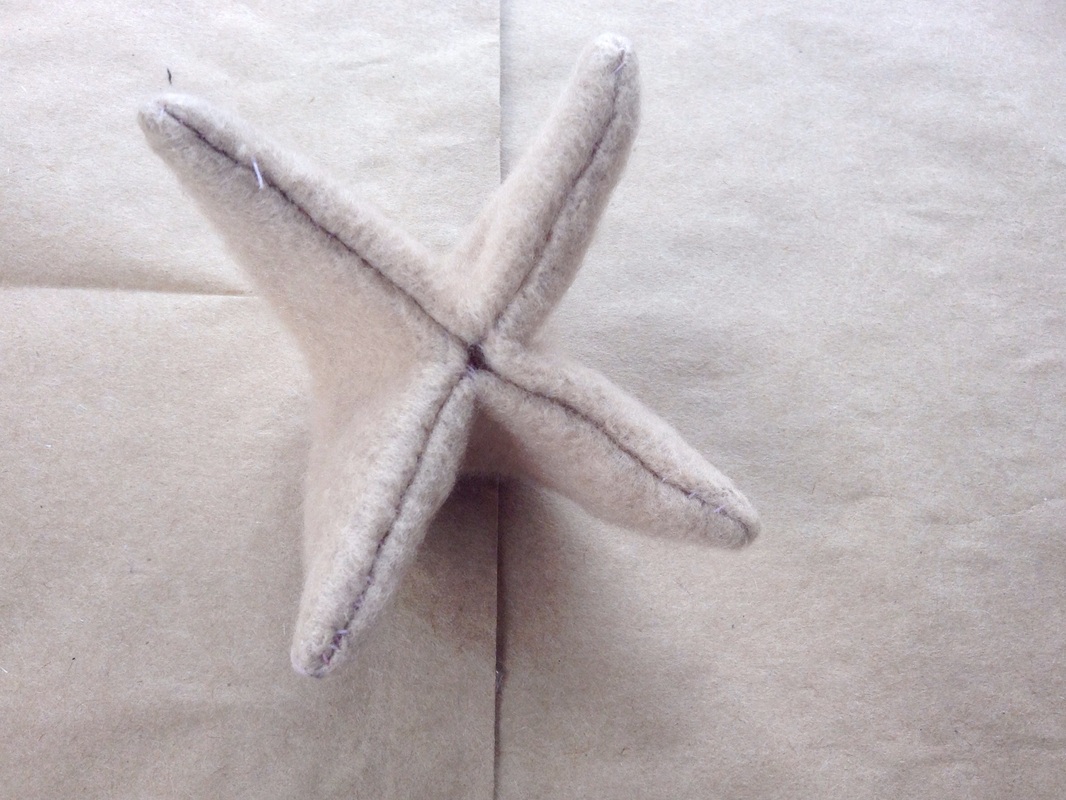
Trim up the corners and turn the body through. The body should look like a four pointed star.
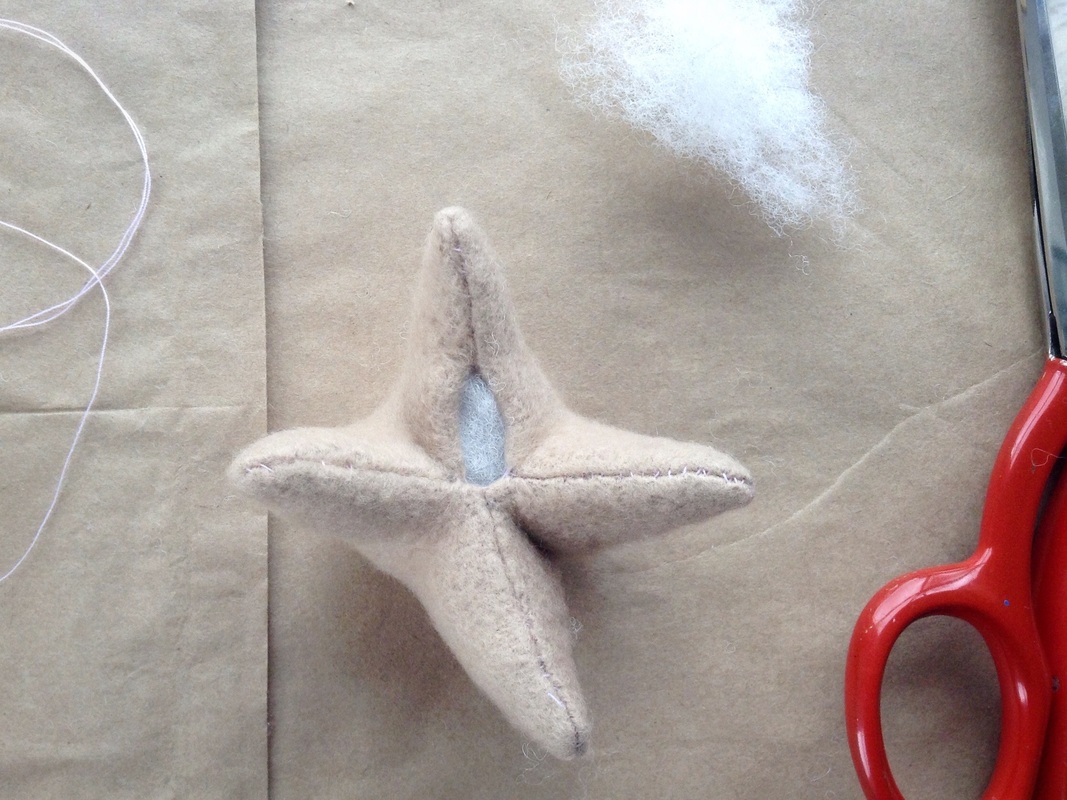
Stuff the body. I reused the stuffing out of an old pillow but you could use rice, beans, sand, whatever you want, really.
Sew up the gap - I use an invisible tread for this because it is almost impossible to see, if you don't have invisible thread use a cotton that matches the colour of your fabric.
Sew up the gap - I use an invisible tread for this because it is almost impossible to see, if you don't have invisible thread use a cotton that matches the colour of your fabric.
The Head
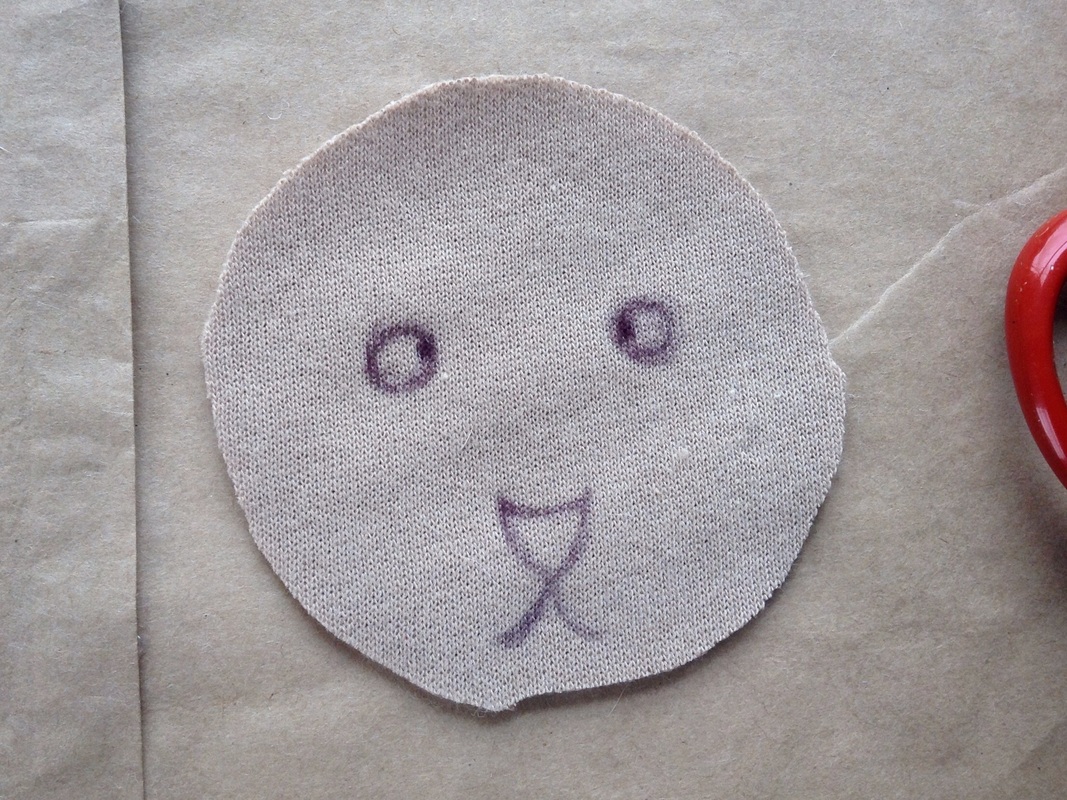
On the wrong side of the fabric draw out the bunny's face.
Embroider the face. - I must admit I have no idea how to embroider, luckily for this you need to have any sort of skill. Do your best following the outline you drew.
If embroidery really isn't your thing use fabric markers or paint to give your bunny some cute features, just remember to draw them on the good side of the fabric.
You could also give your bunny button eyes.
Use what you've got.
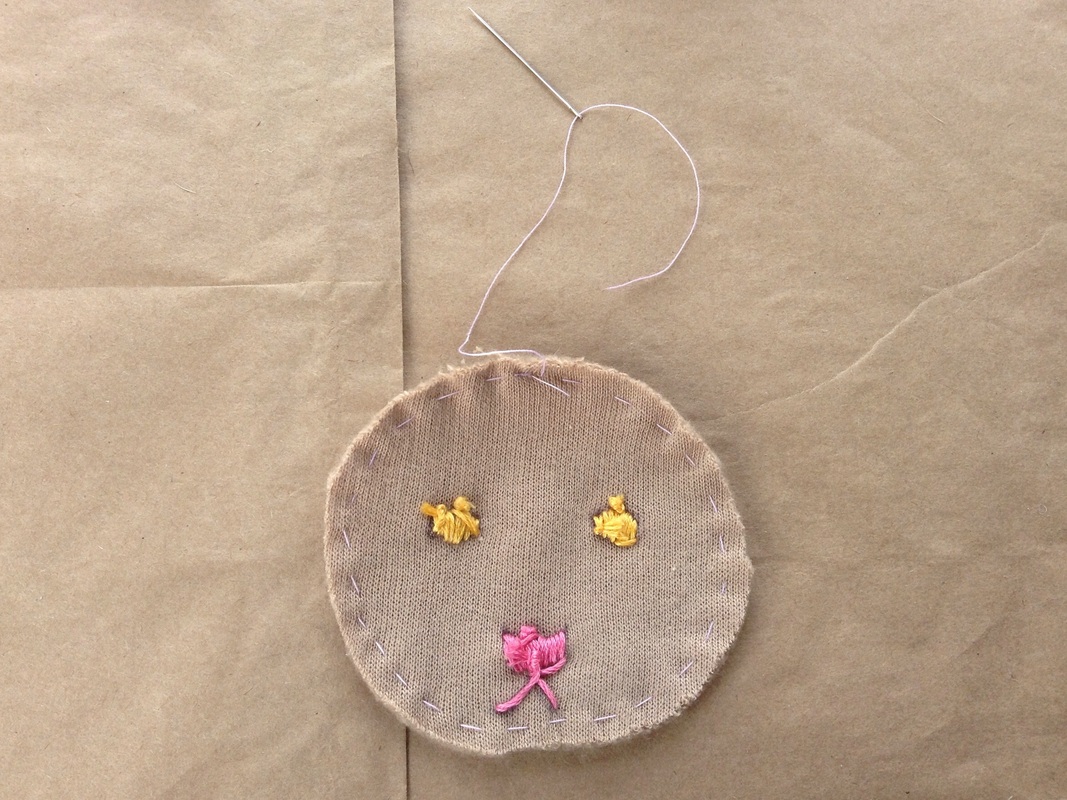
Sew around the circumference of the head, creating gathers.
Pull the gathers while turning the head right side out.
Pull the gathers while turning the head right side out.
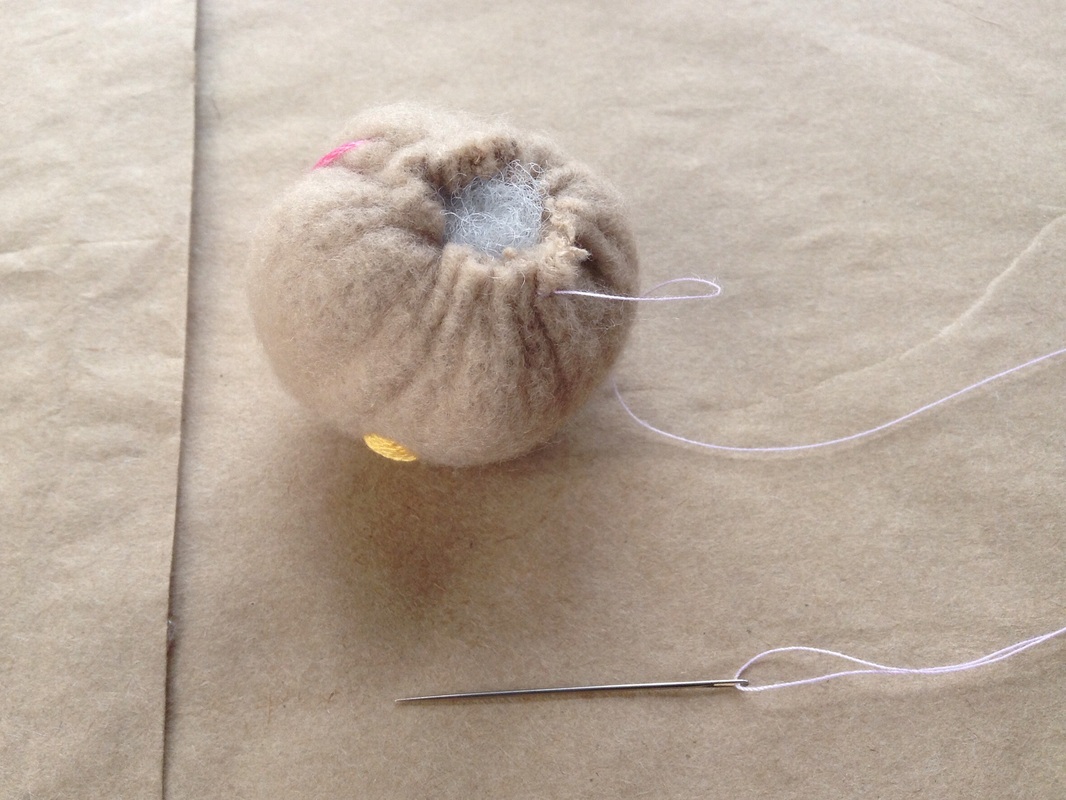
Stuff the head and tie off thread, making sure the head won't pop back open.

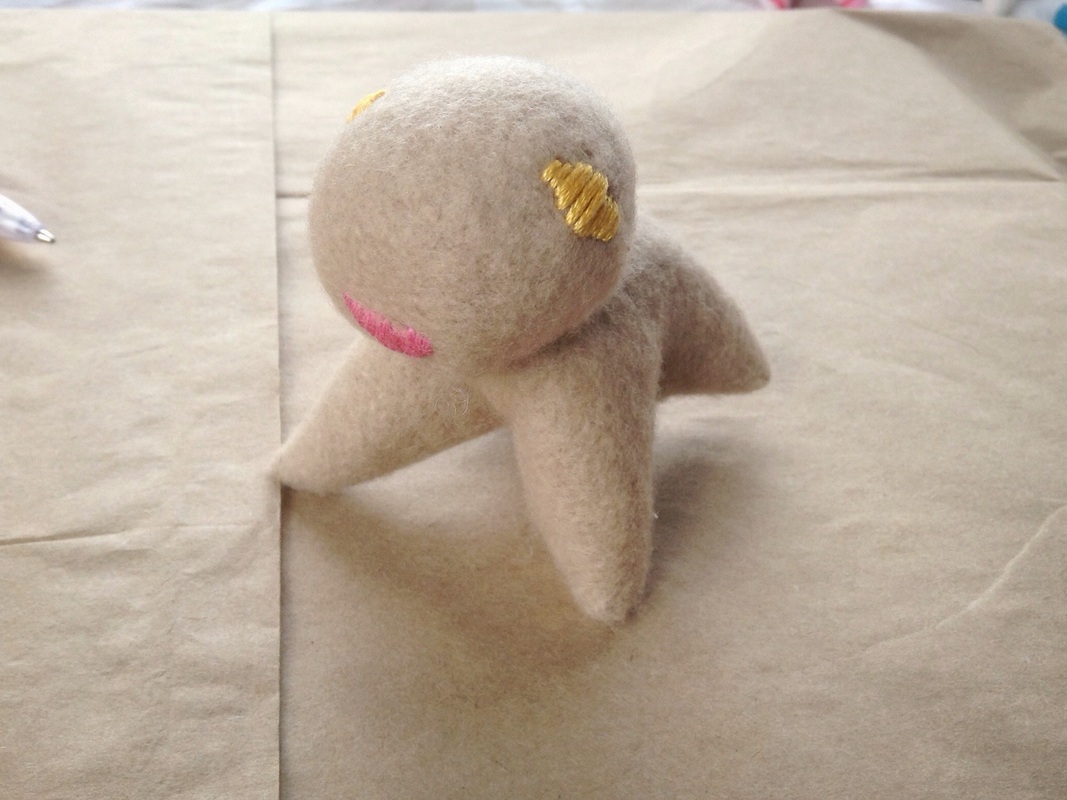
Sew the head to the body.
Again I use invisible thread for this.
Again I use invisible thread for this.
The Ears
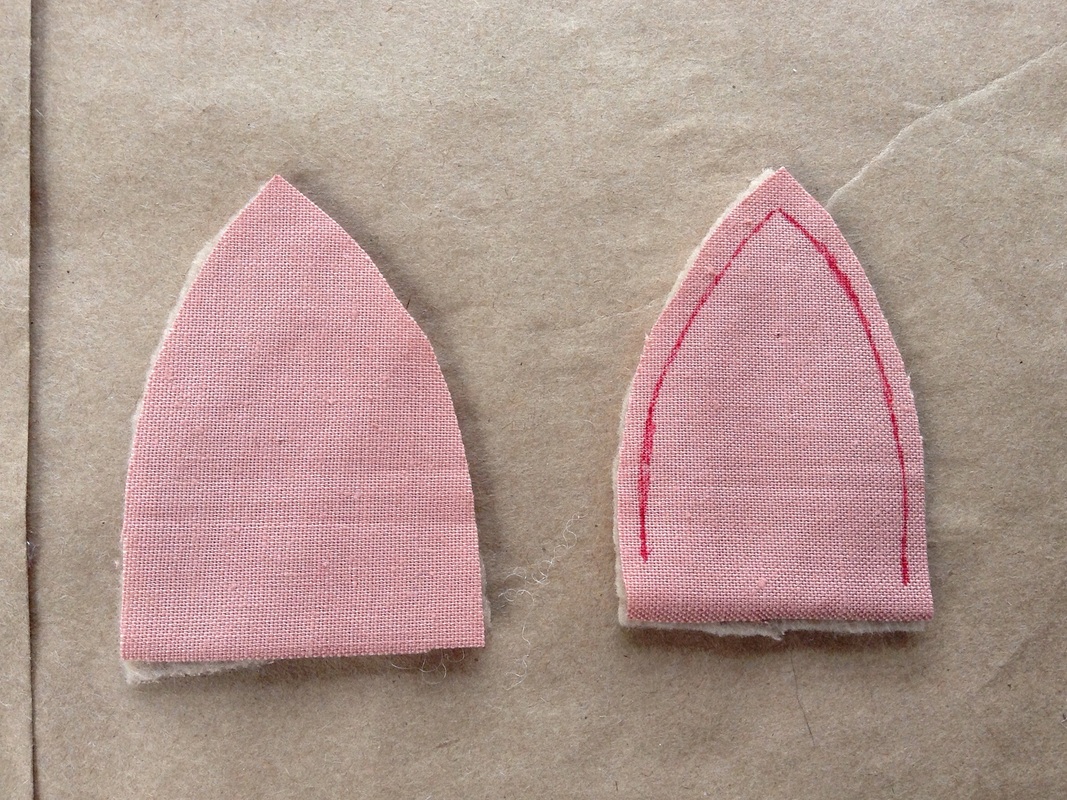
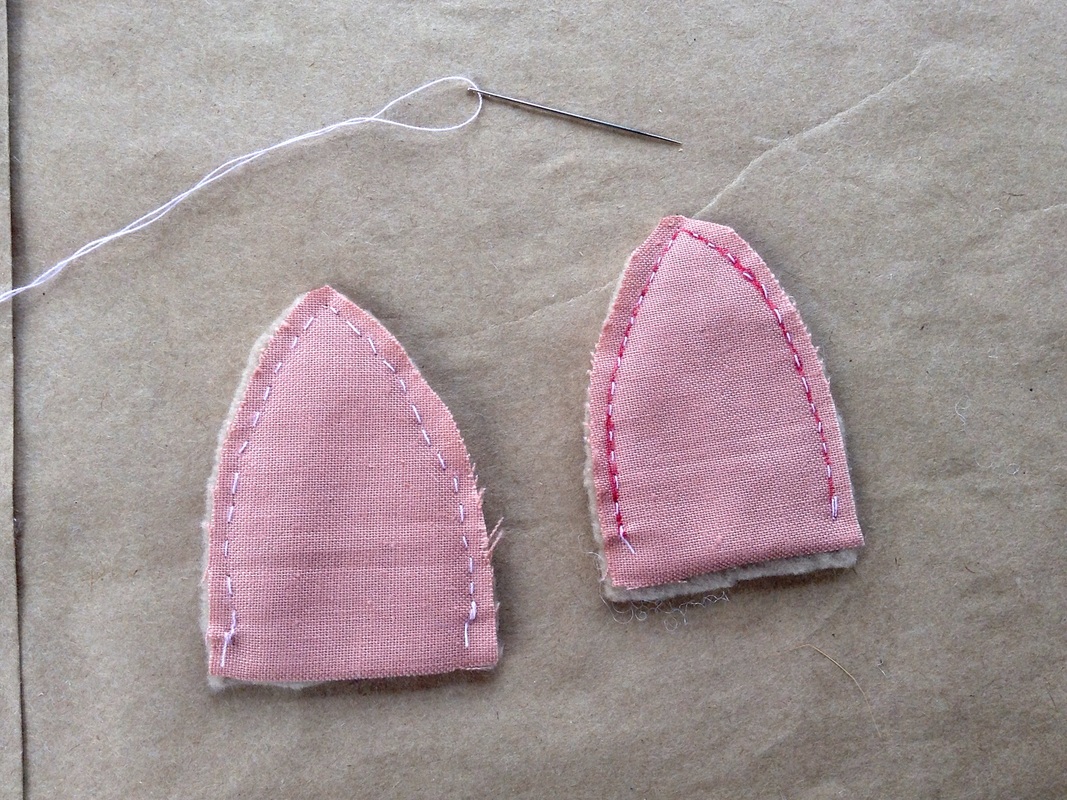
Sew up the ears, good sides together. leaving the bottom open - sewing line marked out above.
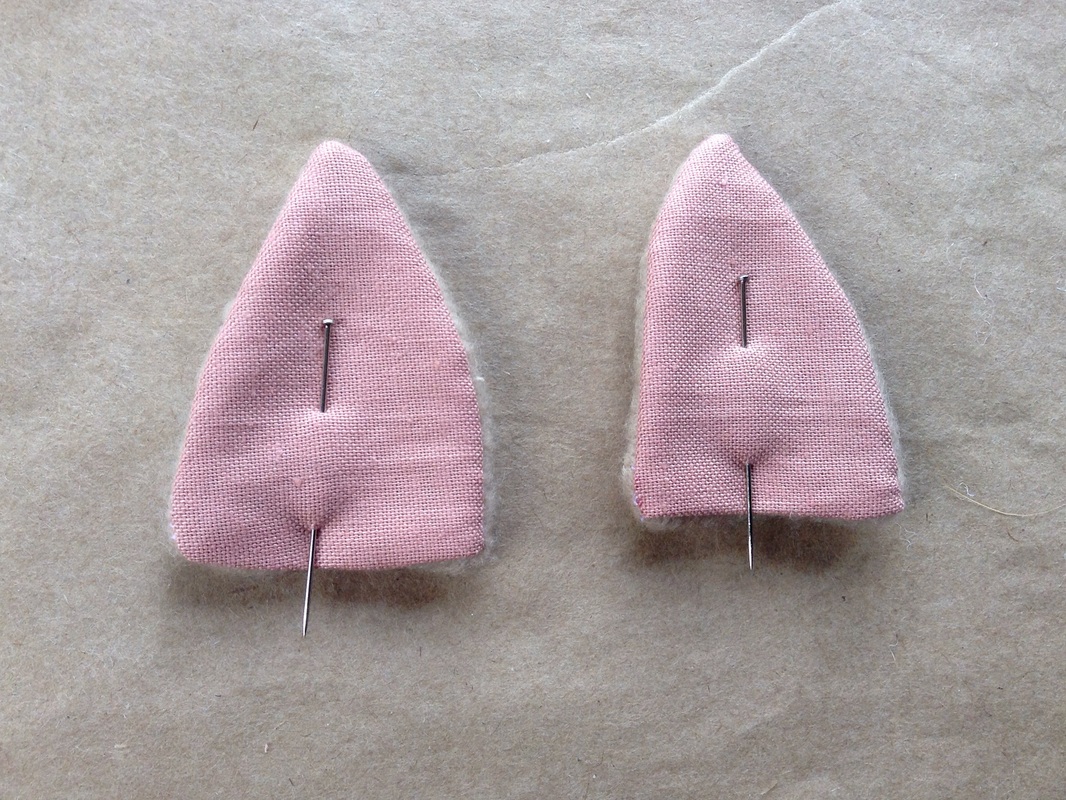
Trim up the ears and turn through so right sides face out.
Turn the bottom of the ears over so the rough ends are tucked away out of sight.
Turn the bottom of the ears over so the rough ends are tucked away out of sight.
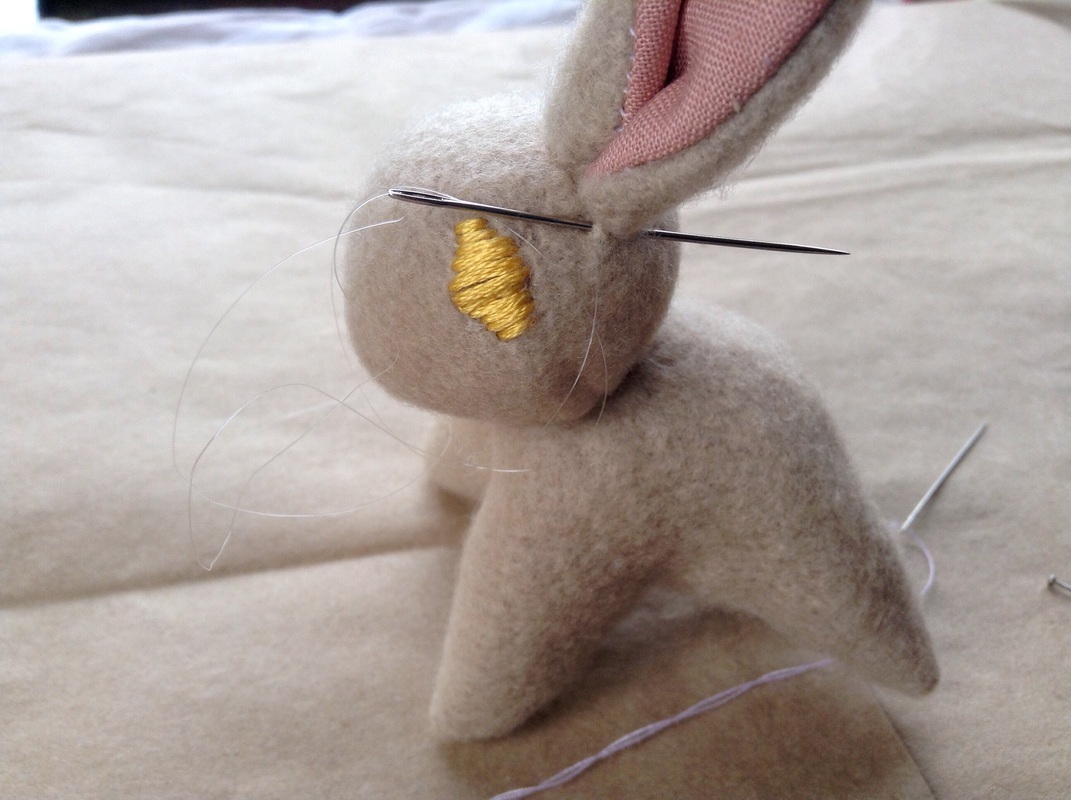
Fold ears in half and sew to the head. You can pin them in place as you play around with placement.
Yep, here, again, I use invisible thread but, again, nothing wrong with cotton.
Yep, here, again, I use invisible thread but, again, nothing wrong with cotton.
Tails End
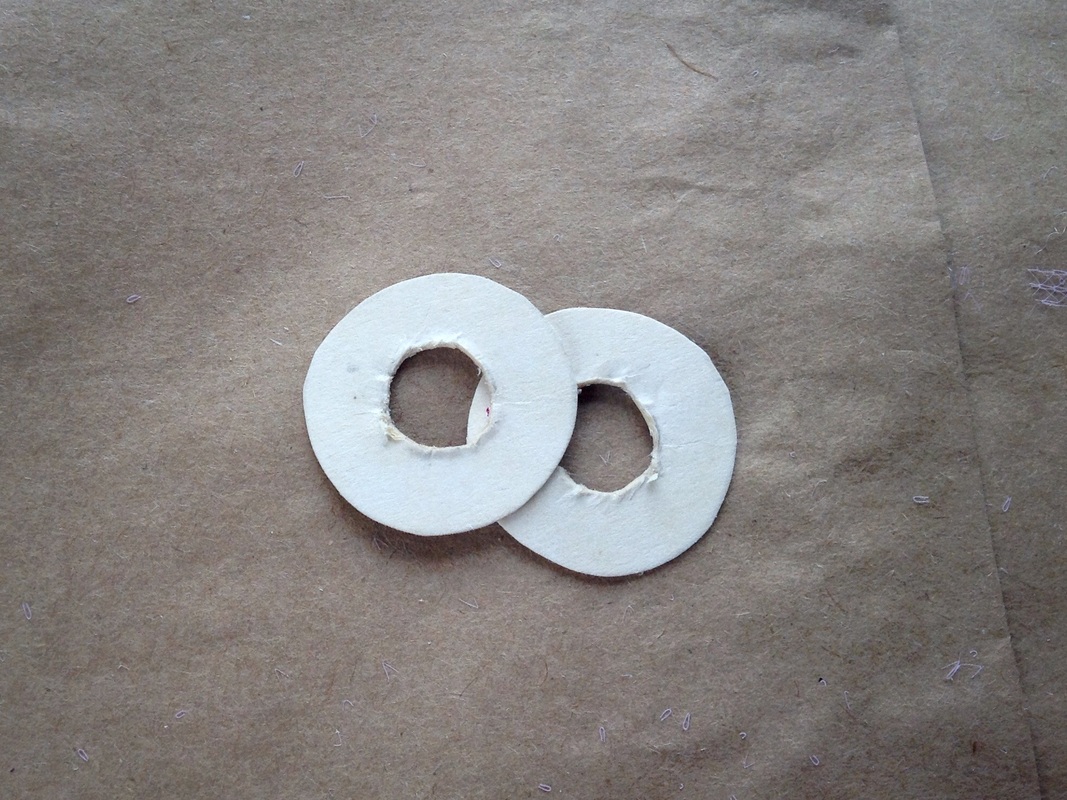
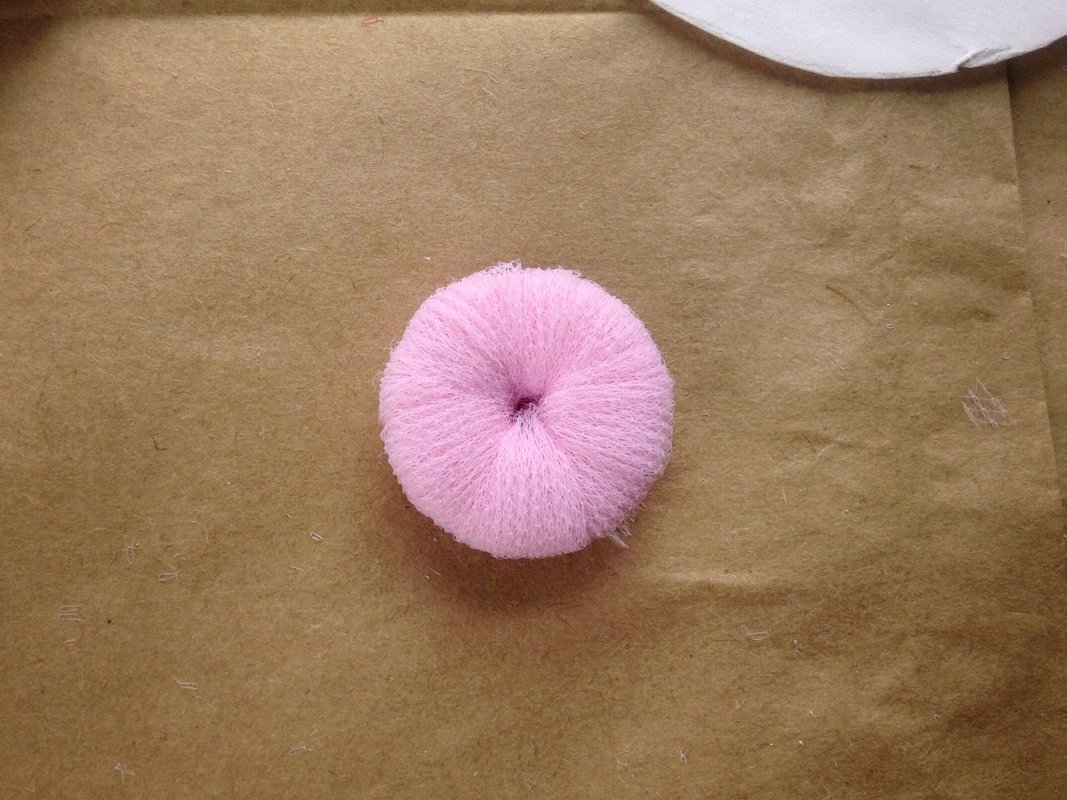
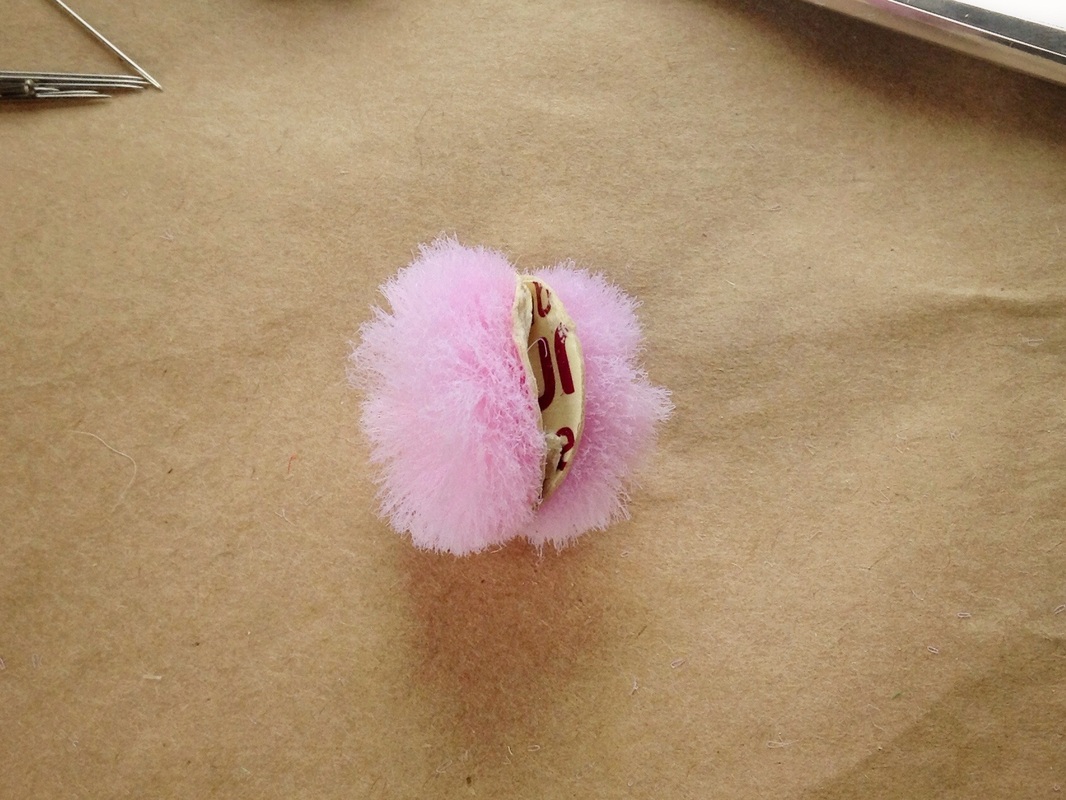

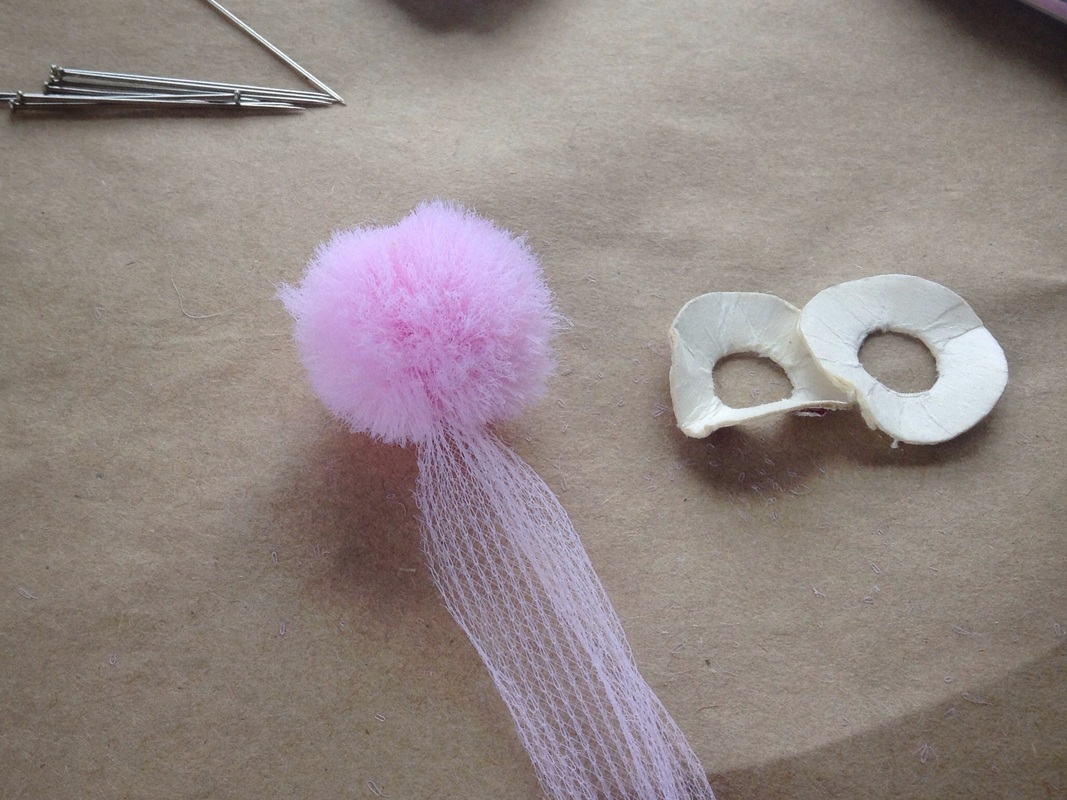
Nothing left but to add the tail. make a small (miniature) pompom.
In case you've forgotten, a little rusty, or don't know how to make a pompom I have added the process in pictures above.
Start by drawing out two discs (the size you want your pompom to be) out of card, add a smaller circle to the centre, looks like a donut. Wrap wool round and round the donut discs until you can't wrap any more.
Cut the wool along the outer edge of the donut circle, moving scissors between card discs.
Tie a piece of wool between discs and tie tight.
Remove discs and trim pompom.
- This is a great pompom method because it allows you to make a pompom in any size
Cheats pompom
I think this is called the finger method, probably because instead of using card discs you wrap the wool around your fingers.
This is a useful method when you want to make a small pompom, such as a rabbits tail. It is not, however, a foolproof method, I find the pompoms come out a little scruffy, needing more of a trim, it can also be difficult to predict the size the pompom will be, making uniformity an issue.
This is a useful method when you want to make a small pompom, such as a rabbits tail. It is not, however, a foolproof method, I find the pompoms come out a little scruffy, needing more of a trim, it can also be difficult to predict the size the pompom will be, making uniformity an issue.
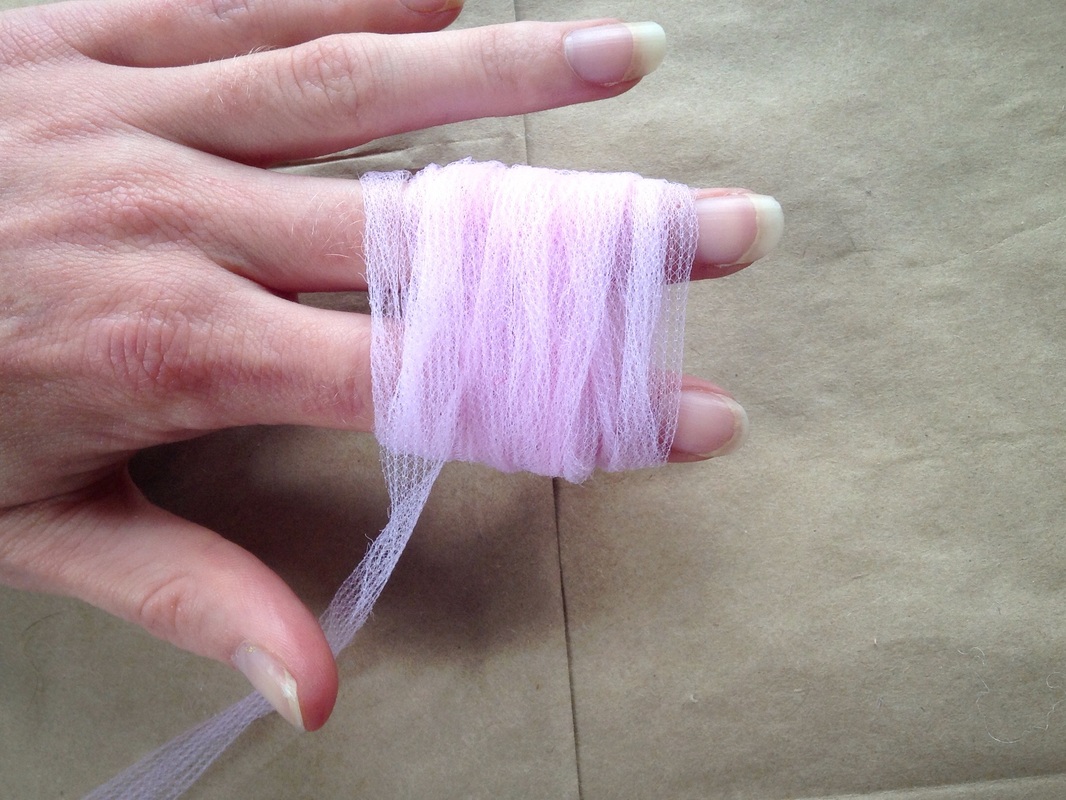
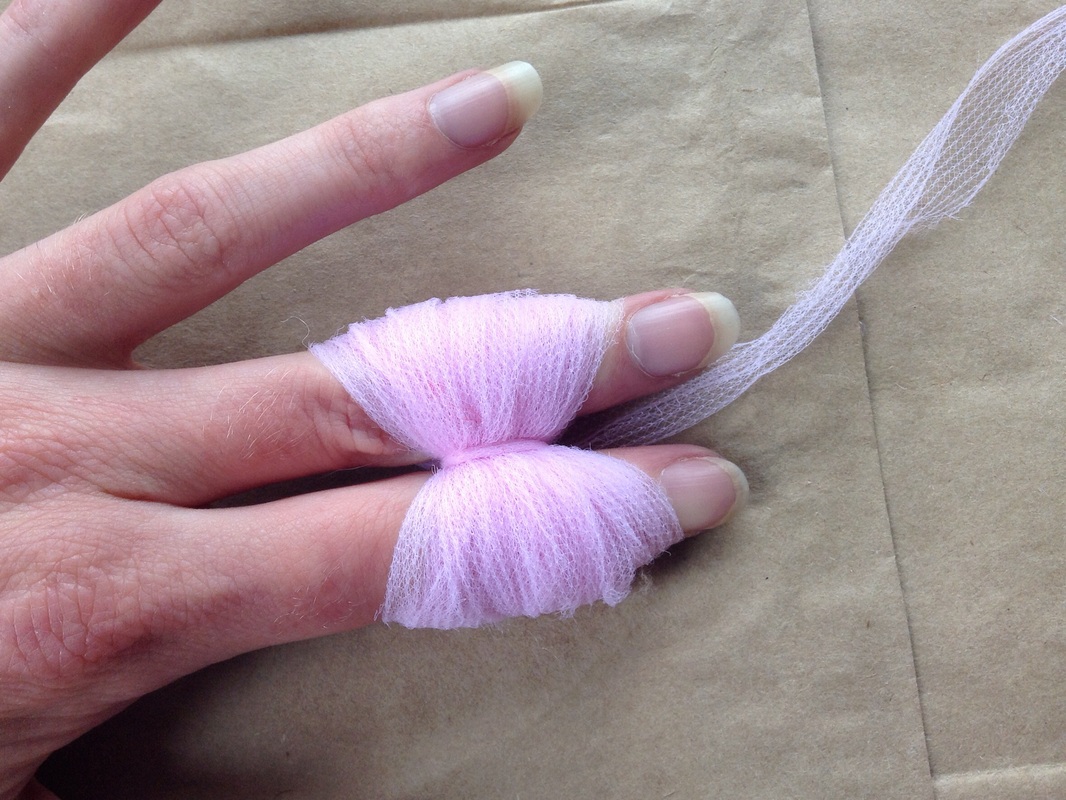
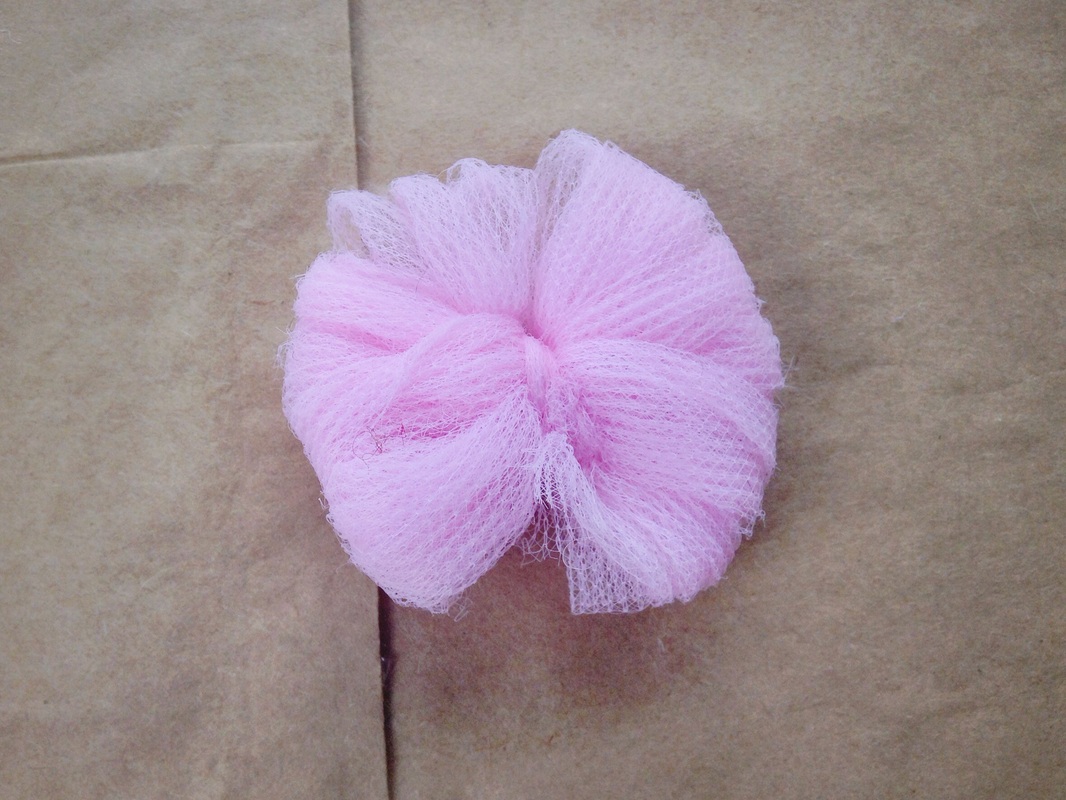
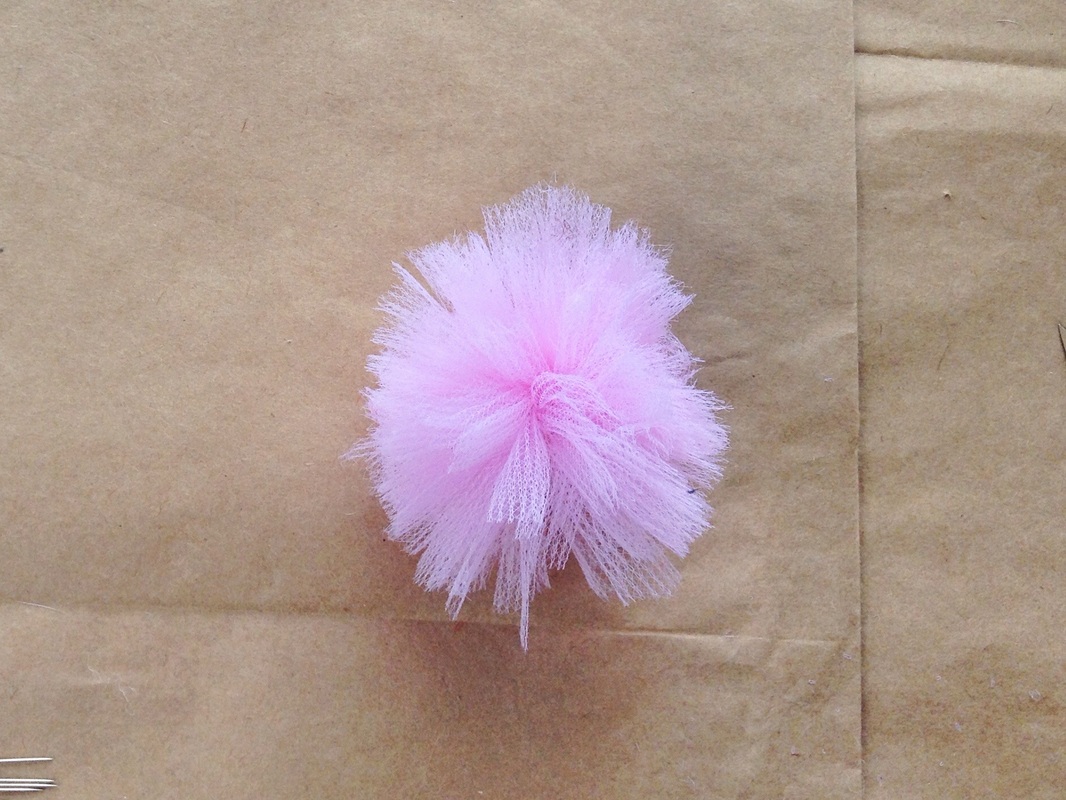
Holding index and middle finger slightly apart wrap wool around, making sure to create a thick layer. Tie a piece of wool between fingers, knotting tight. Remove wool from fingers and cut edges. A pompom!!
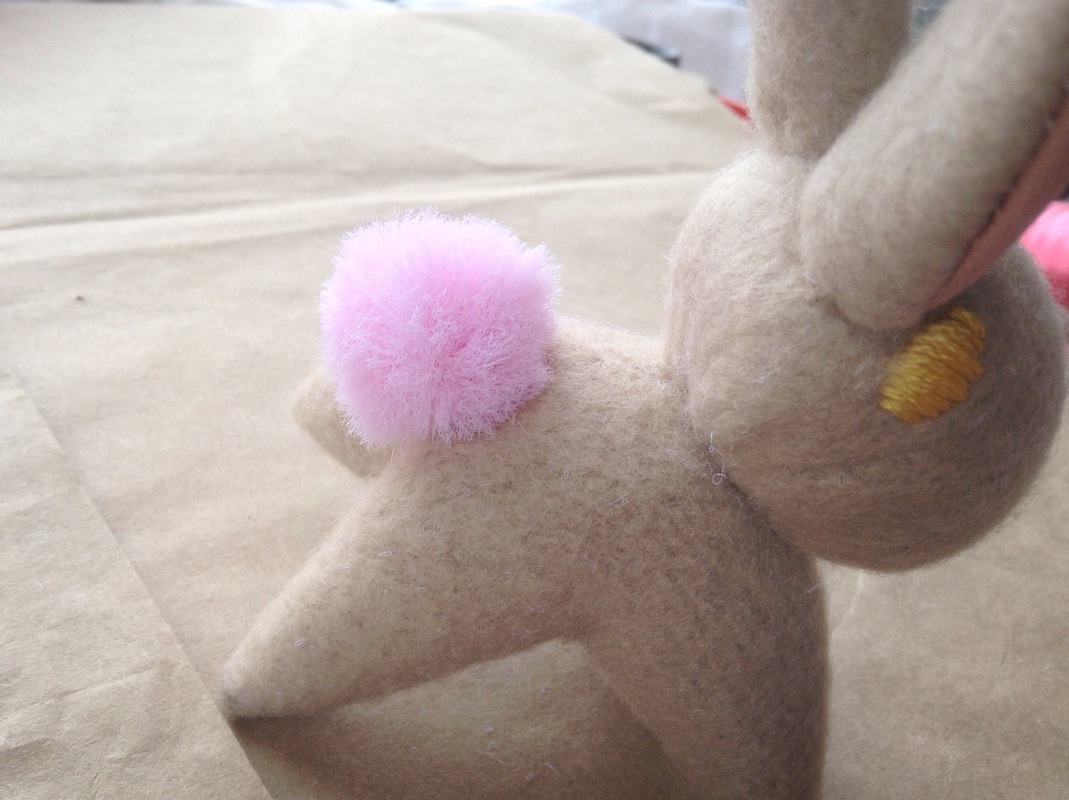
Sew pompom tail to bunny. Yes using invisible thread, seriously people will think you're so cleaver, they can't even see any stitches.


 RSS Feed
