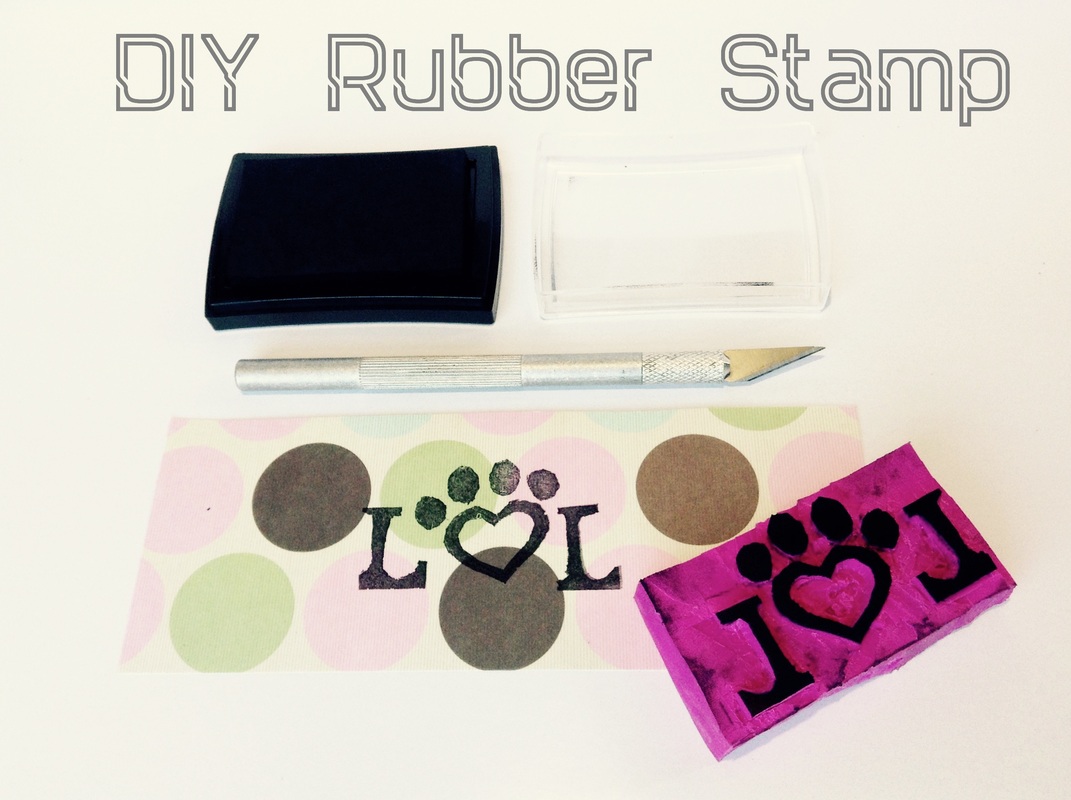
A little while ago I bought a small business, selling pet accessories and products. We have our first market coming up and I wanted to make a stamp to go onto our tags.
Using our logo LOL (love on a leash) I made one out of a rubber eraser.
Using our logo LOL (love on a leash) I made one out of a rubber eraser.
What you need
- Eraser
- Pencil
- Craft knife
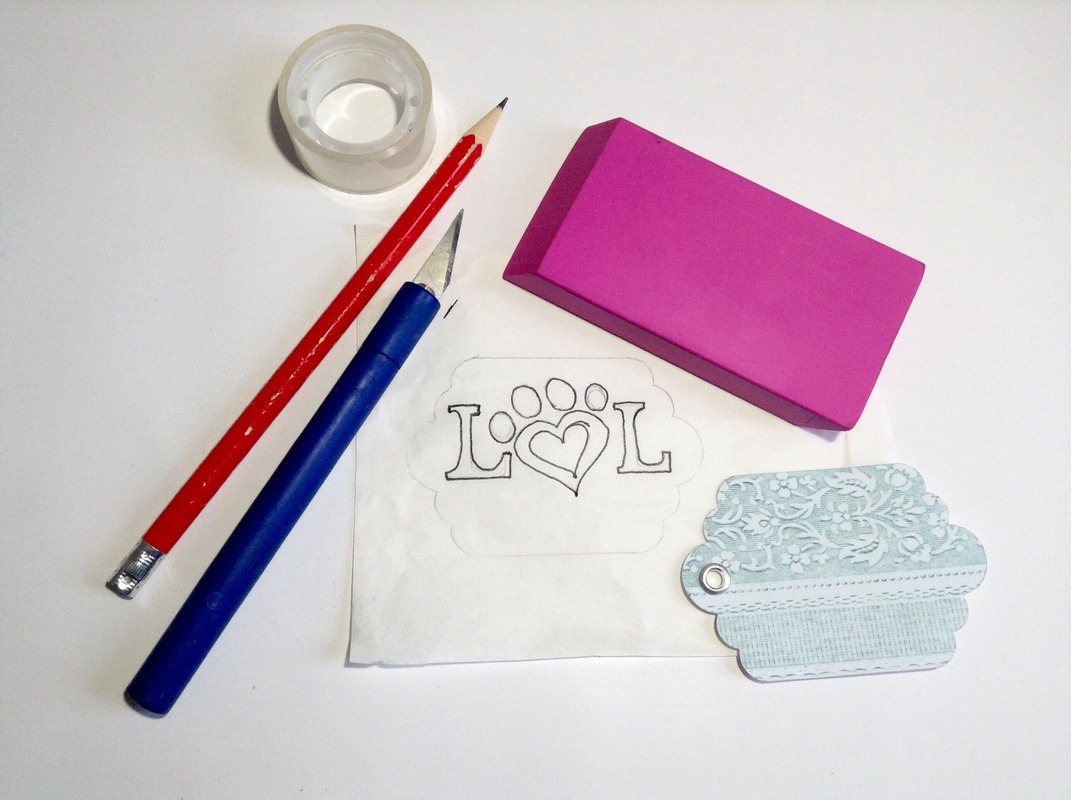
Method
Draw your image onto the eraser.
Do not do what I have done above. Everything on a stamp MUST be written out backwards. Important note, write it backwards.
Do not do what I have done above. Everything on a stamp MUST be written out backwards. Important note, write it backwards.
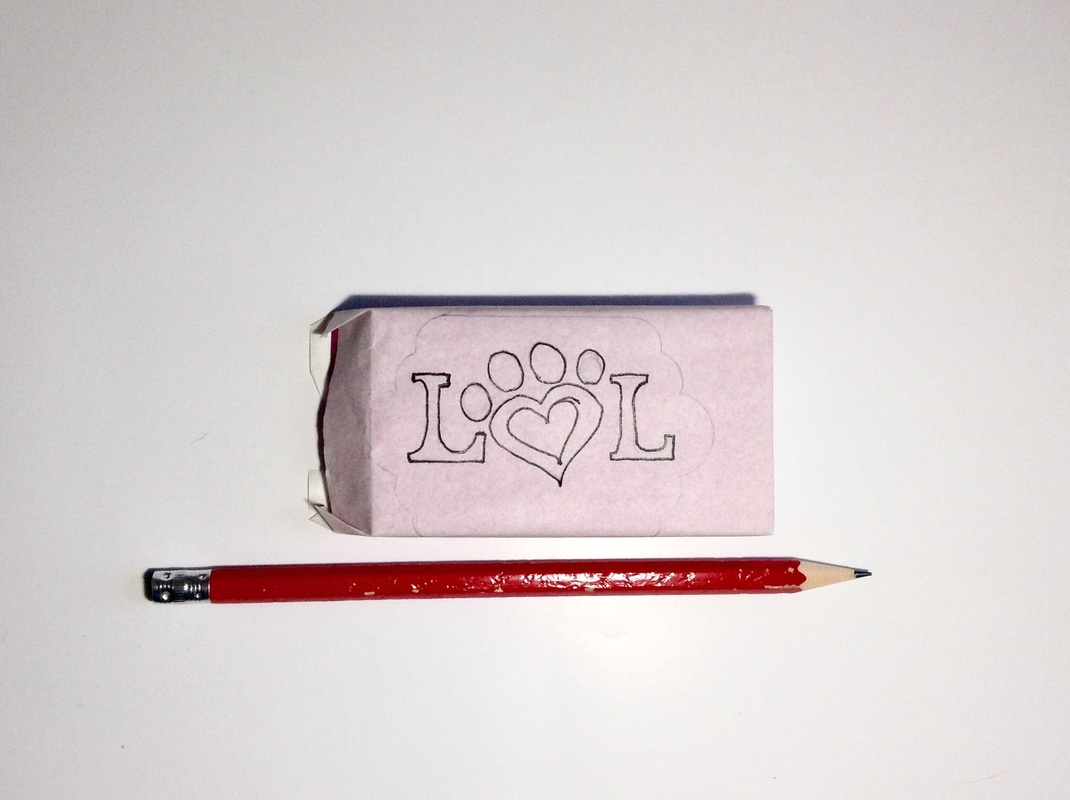
Ahh better, backwards.
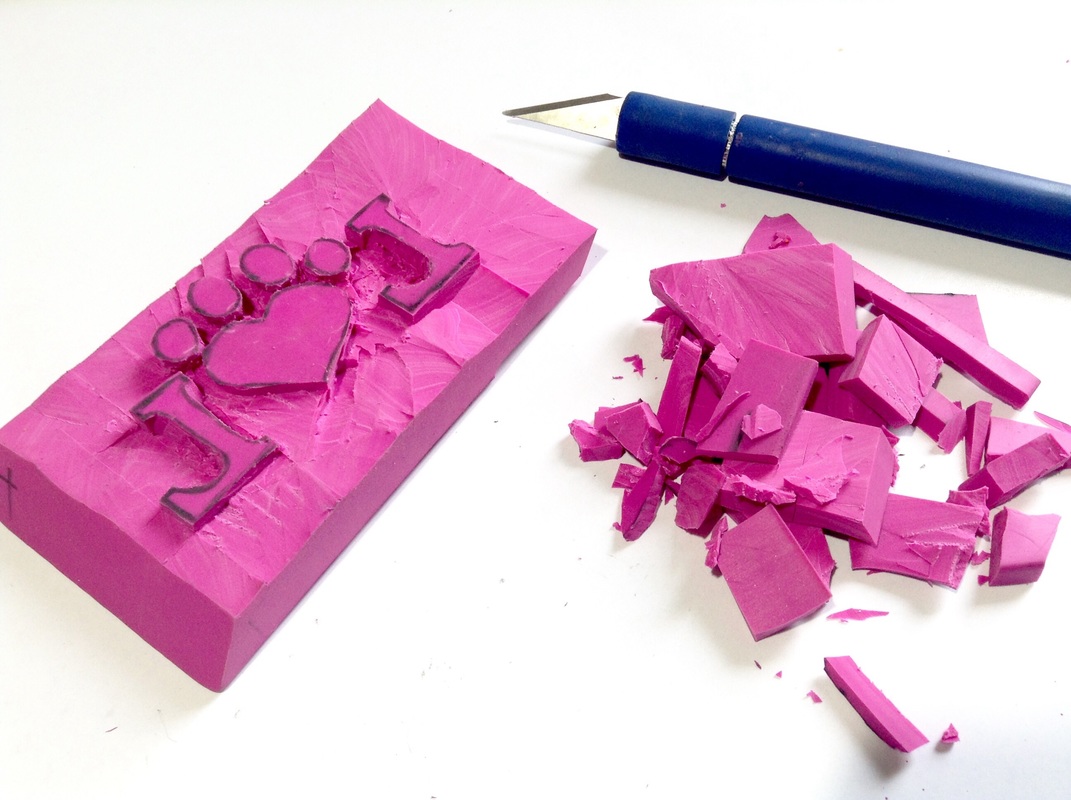
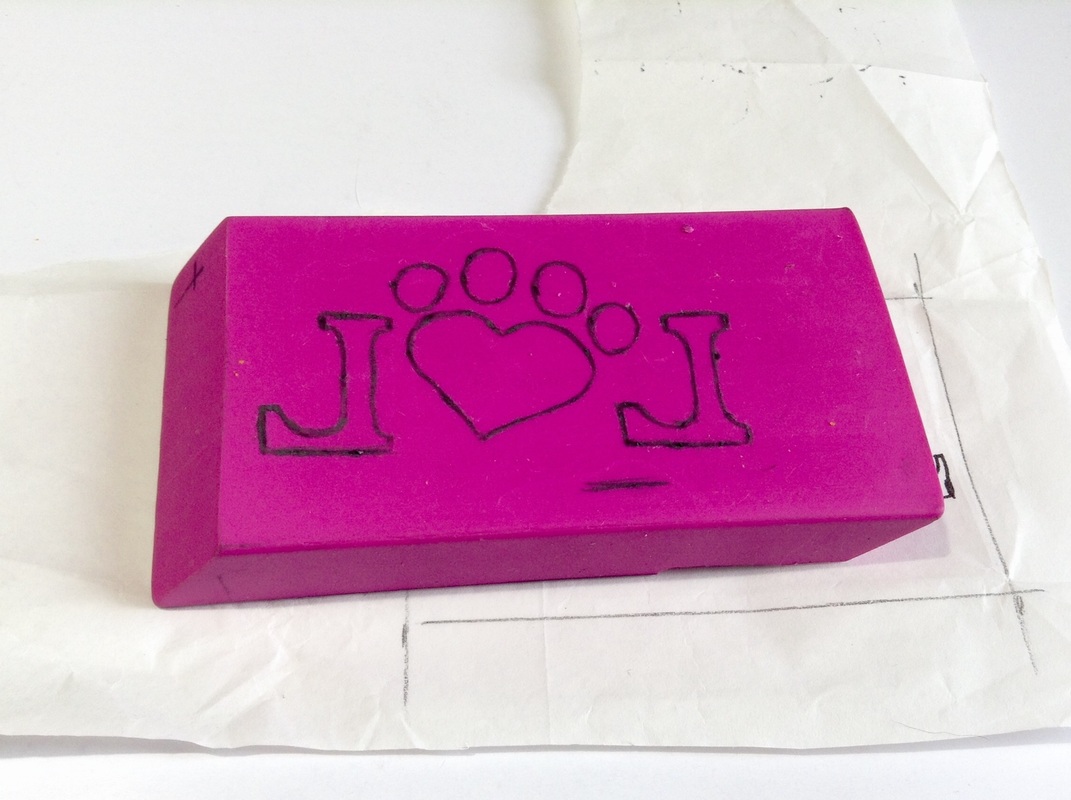
Grab a craft knife and cut away the eraser you don't need.
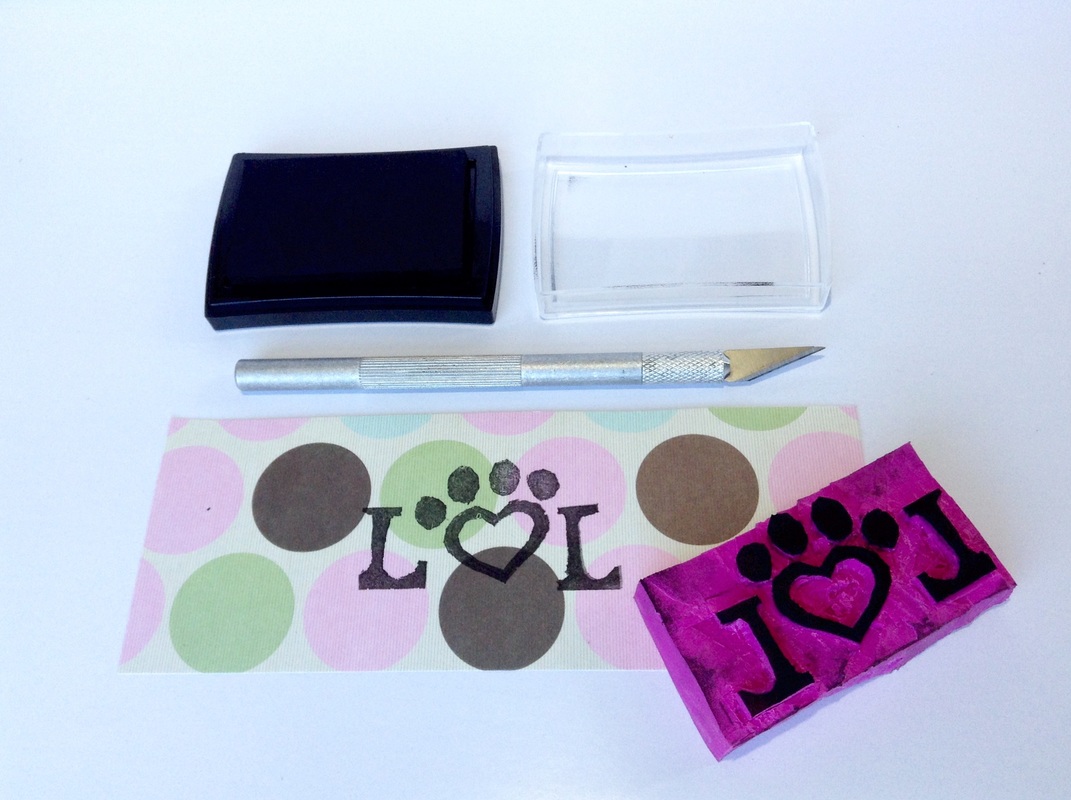
Use as an ordinary stamp.

 RSS Feed
