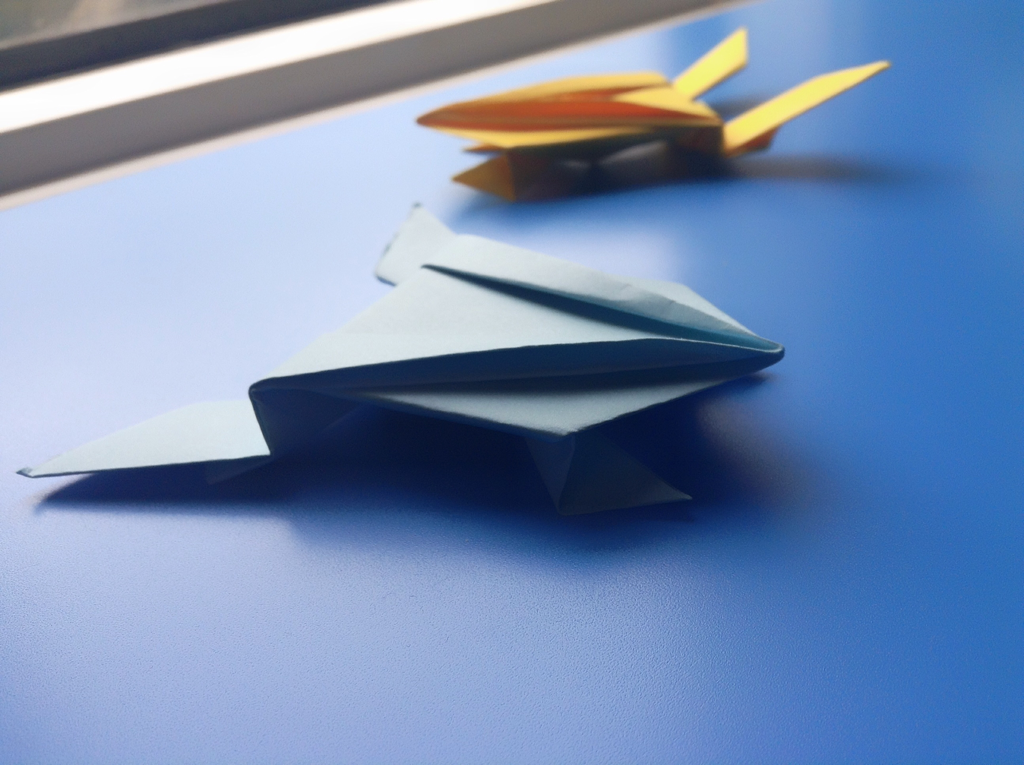
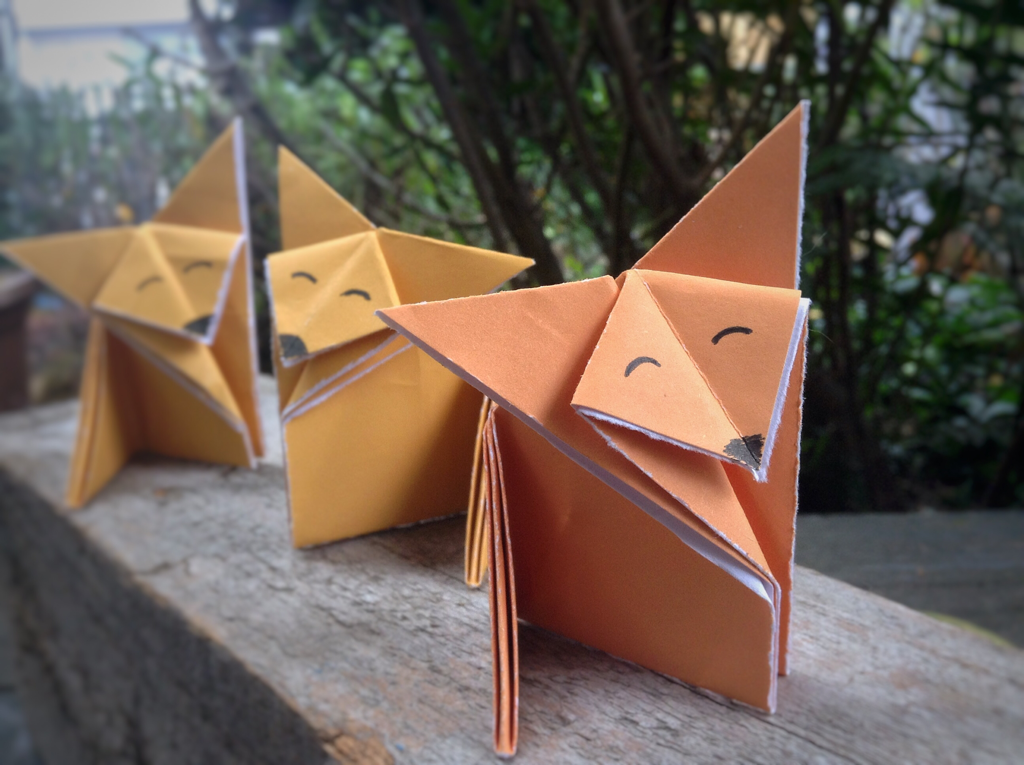
The Jumping Frogs are here
These are one of my favourite origami projects. Interactive origami is too fun! I remember making these as a kid, they have led to many hours of nonsensical fun.
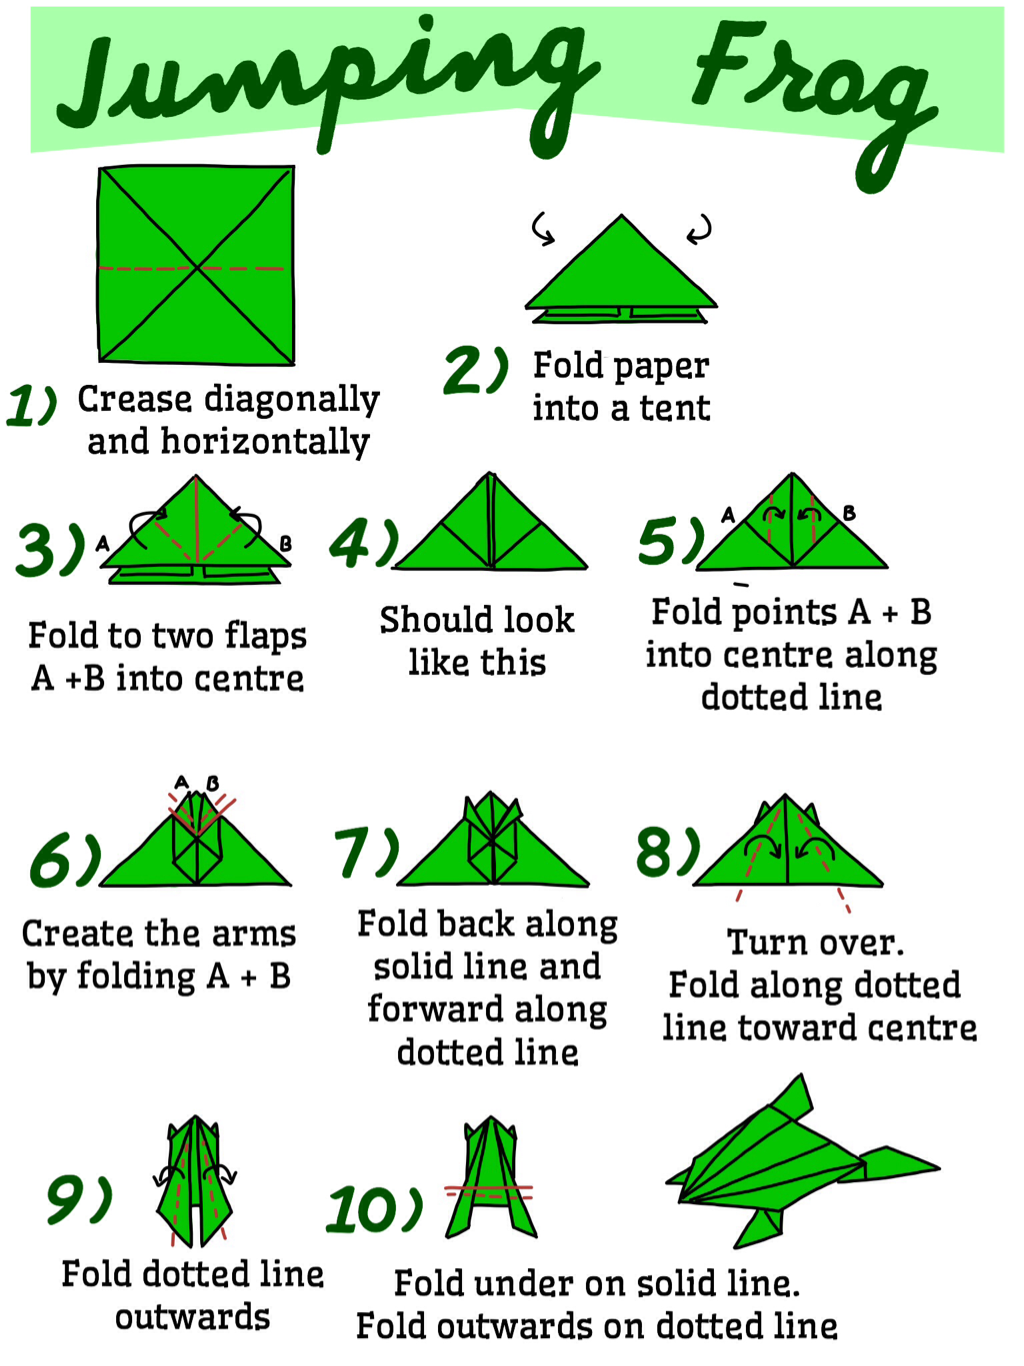
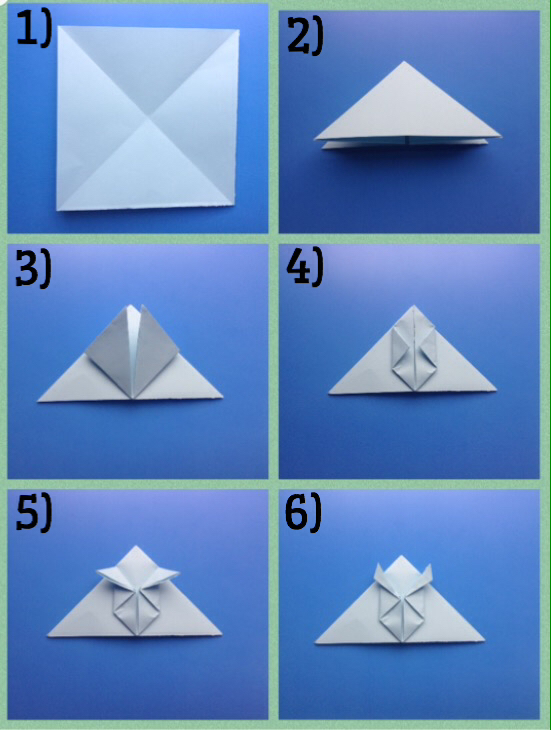
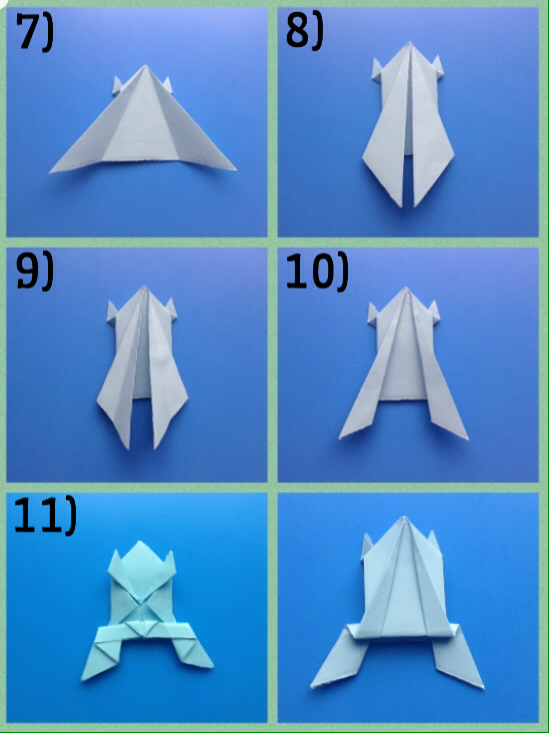
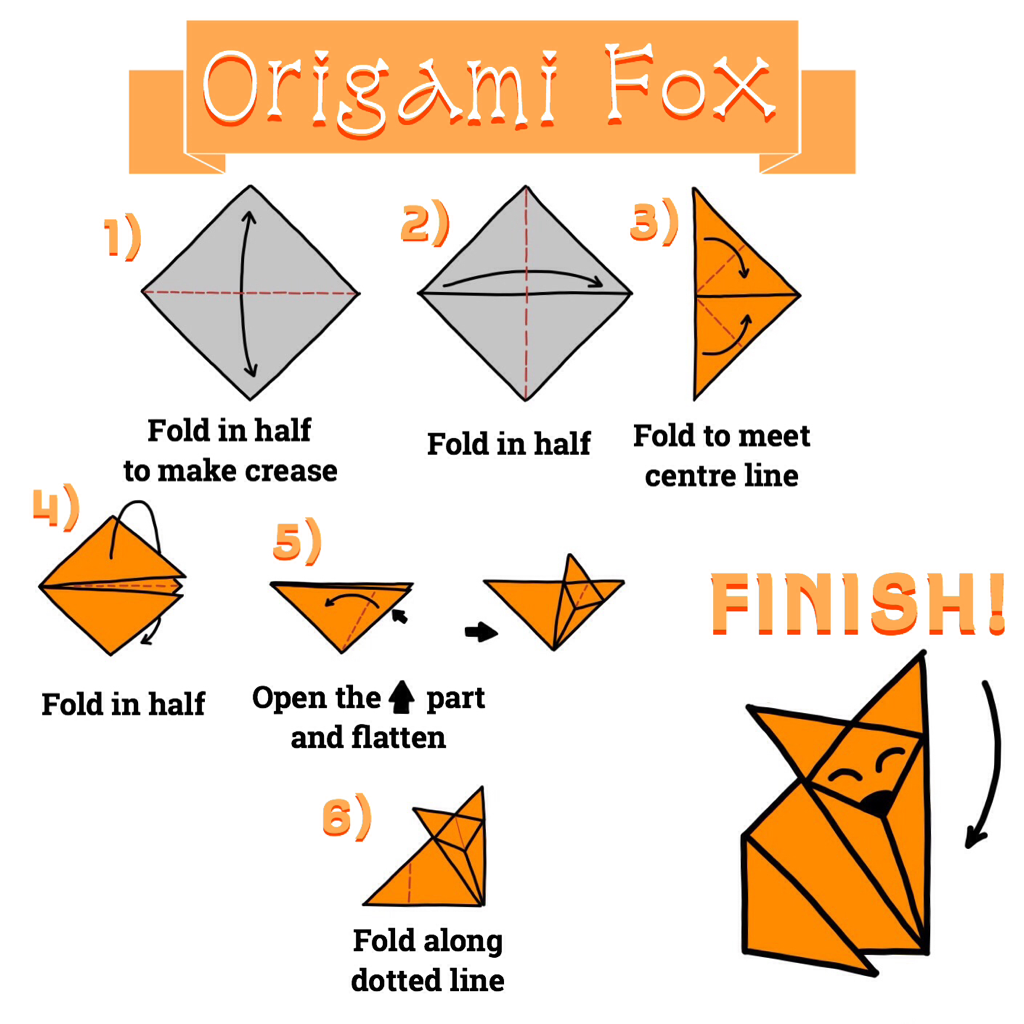
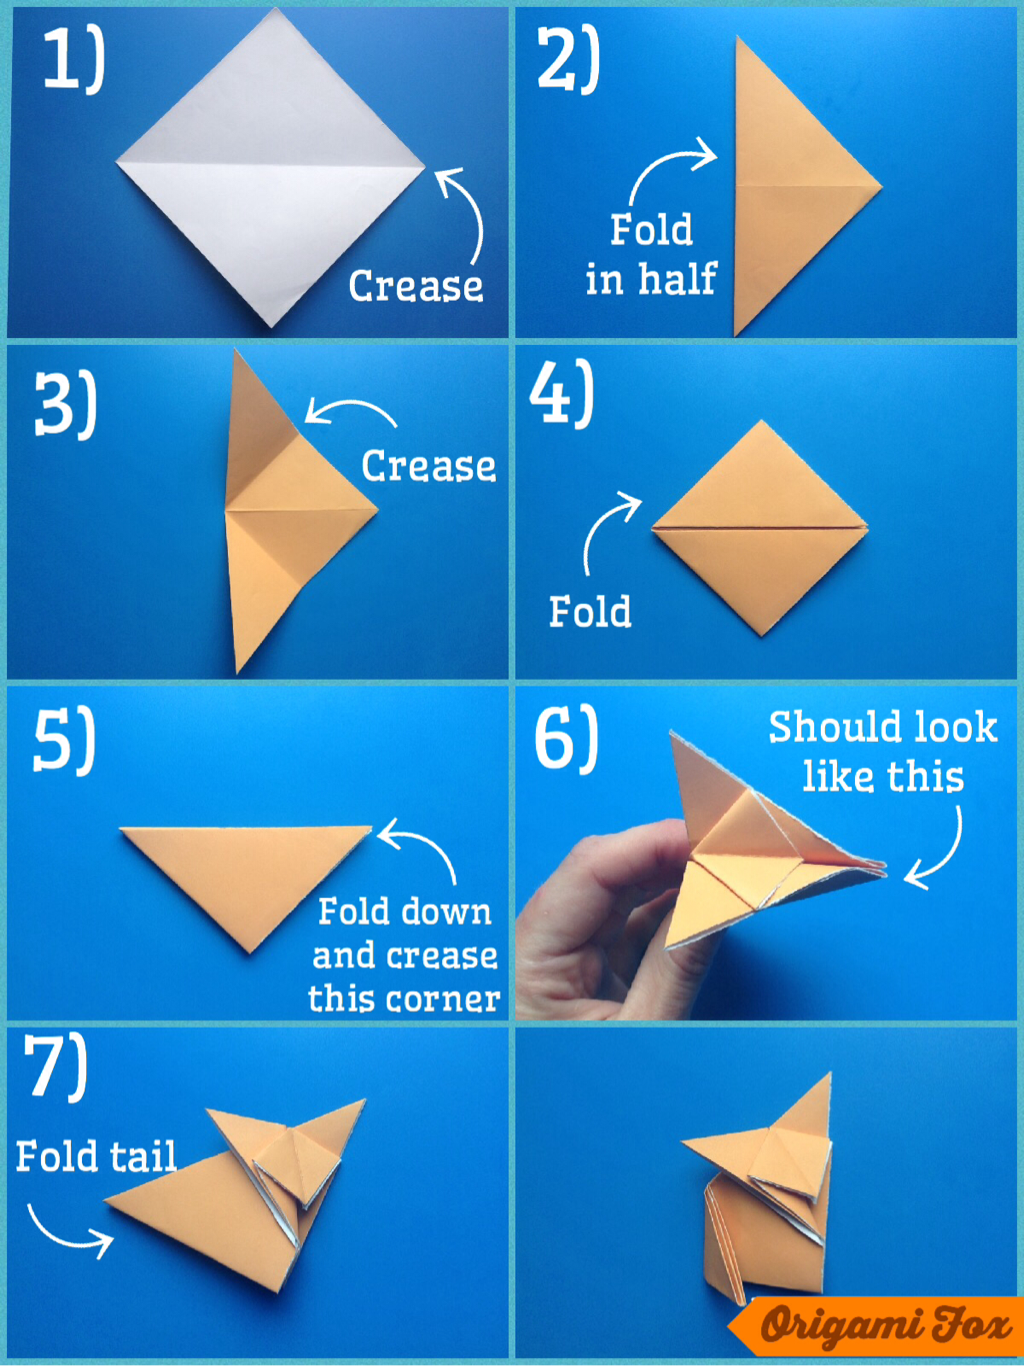
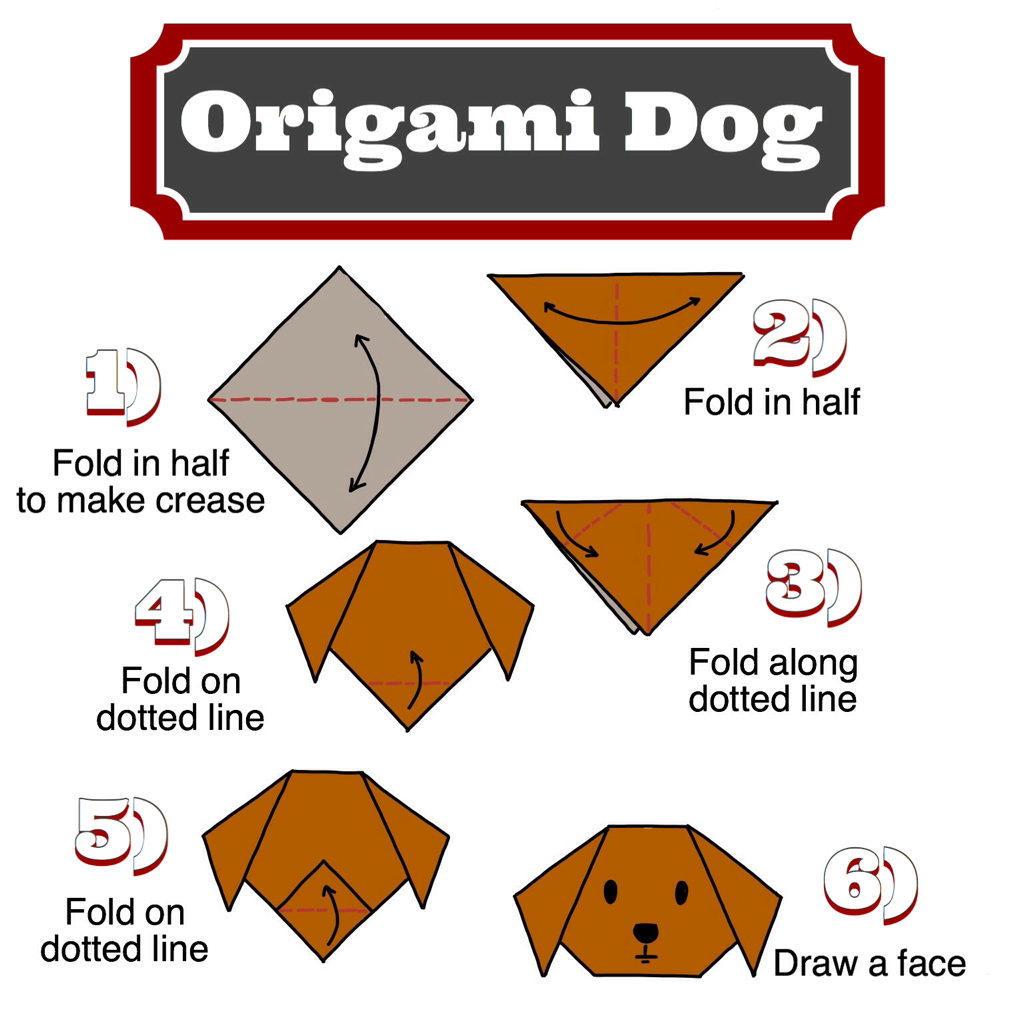
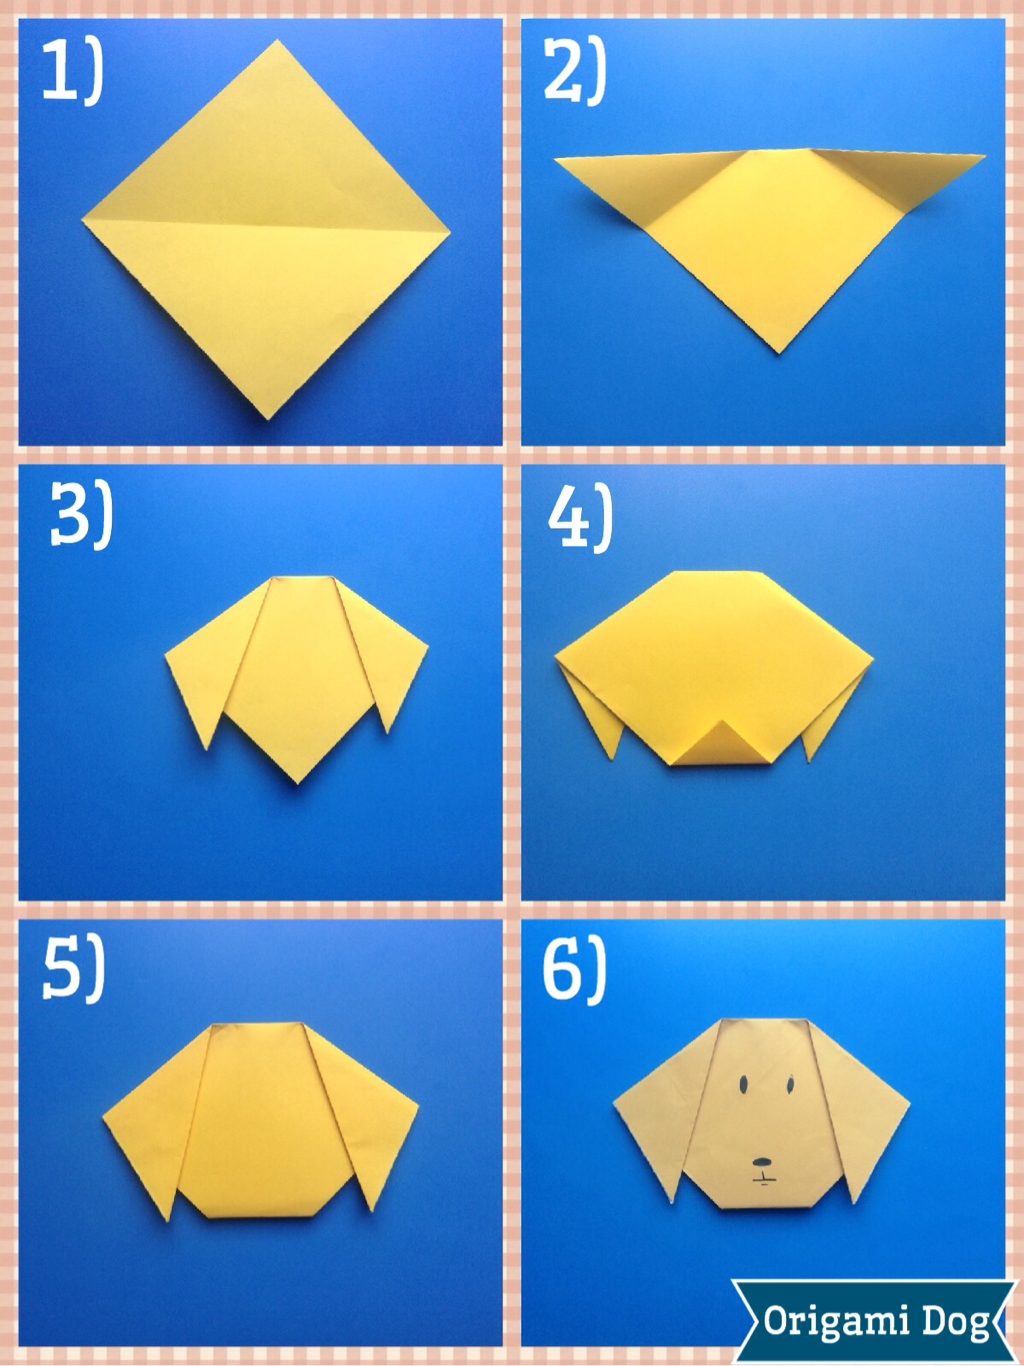
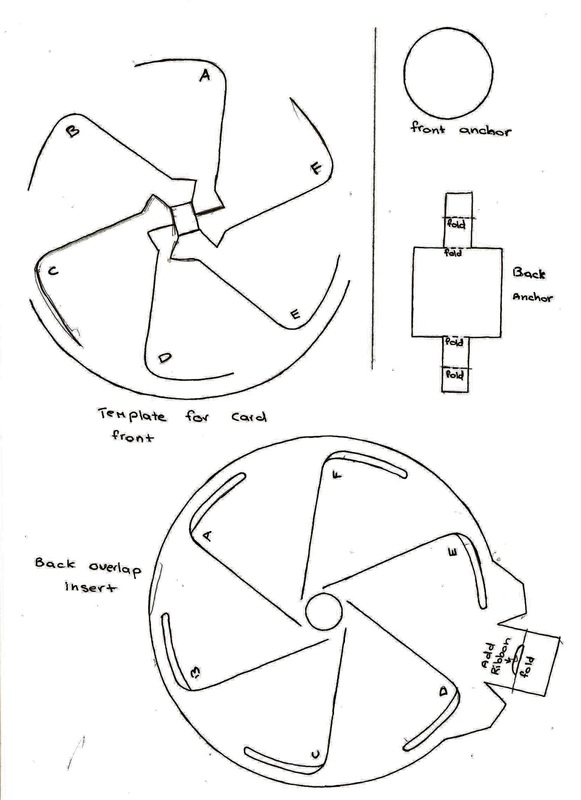
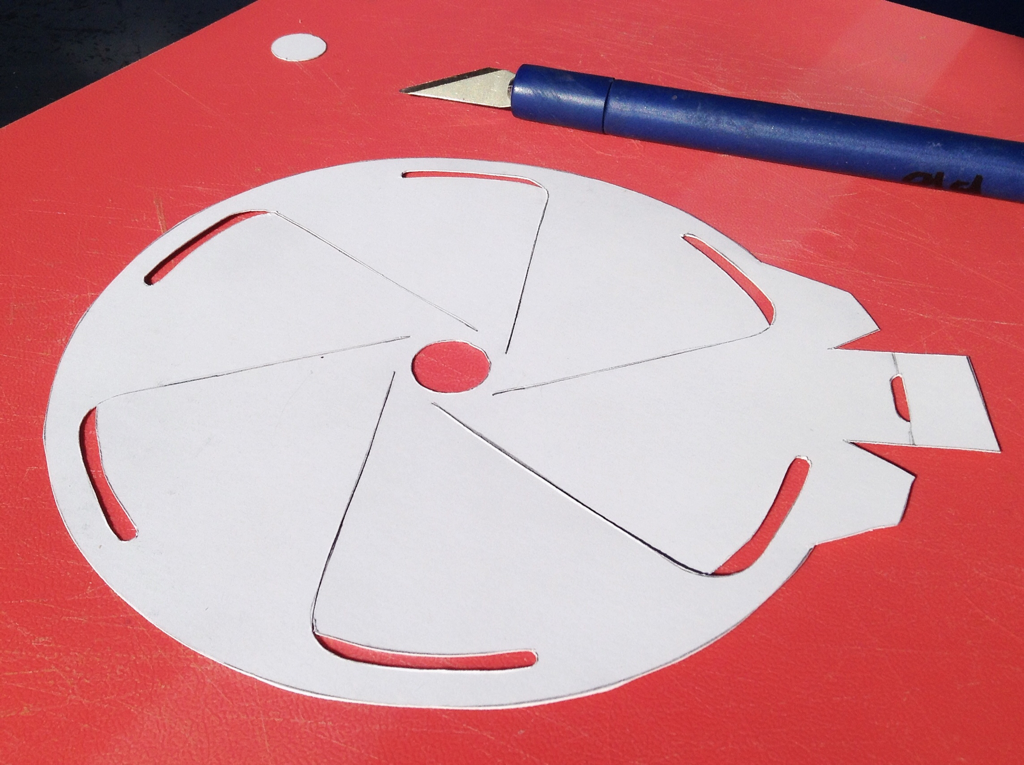
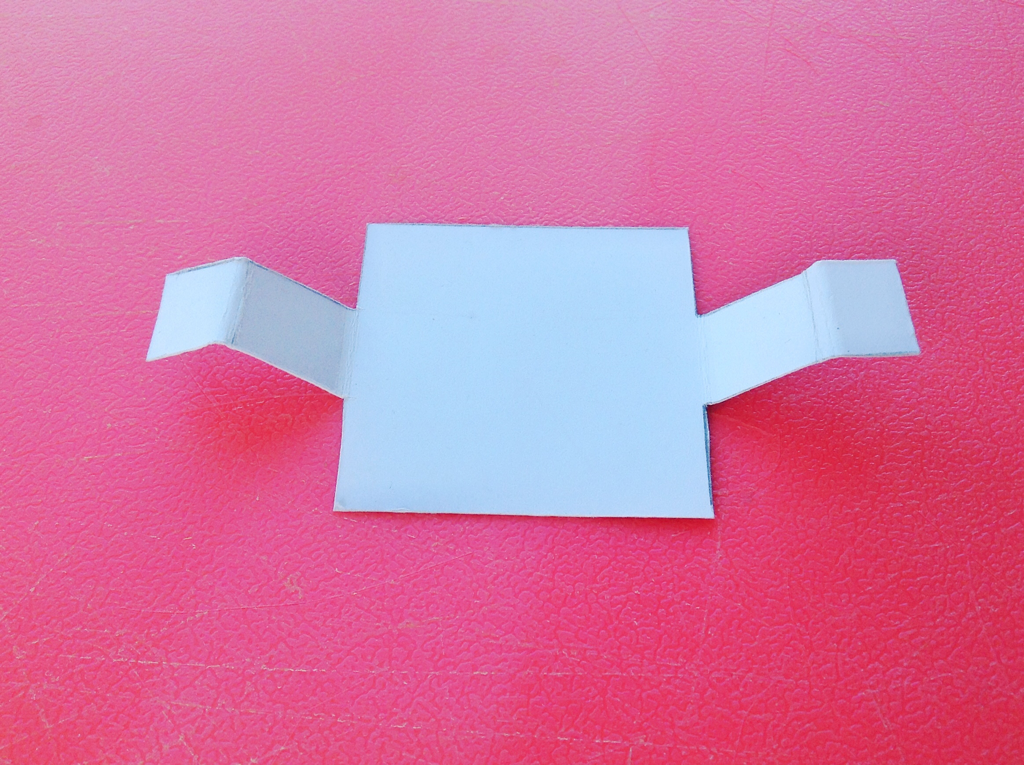
As with all the previous origami tutorials I have provided both a drawn instructional infographic and a photoset.
-Feel free to save/download/print either photoset.
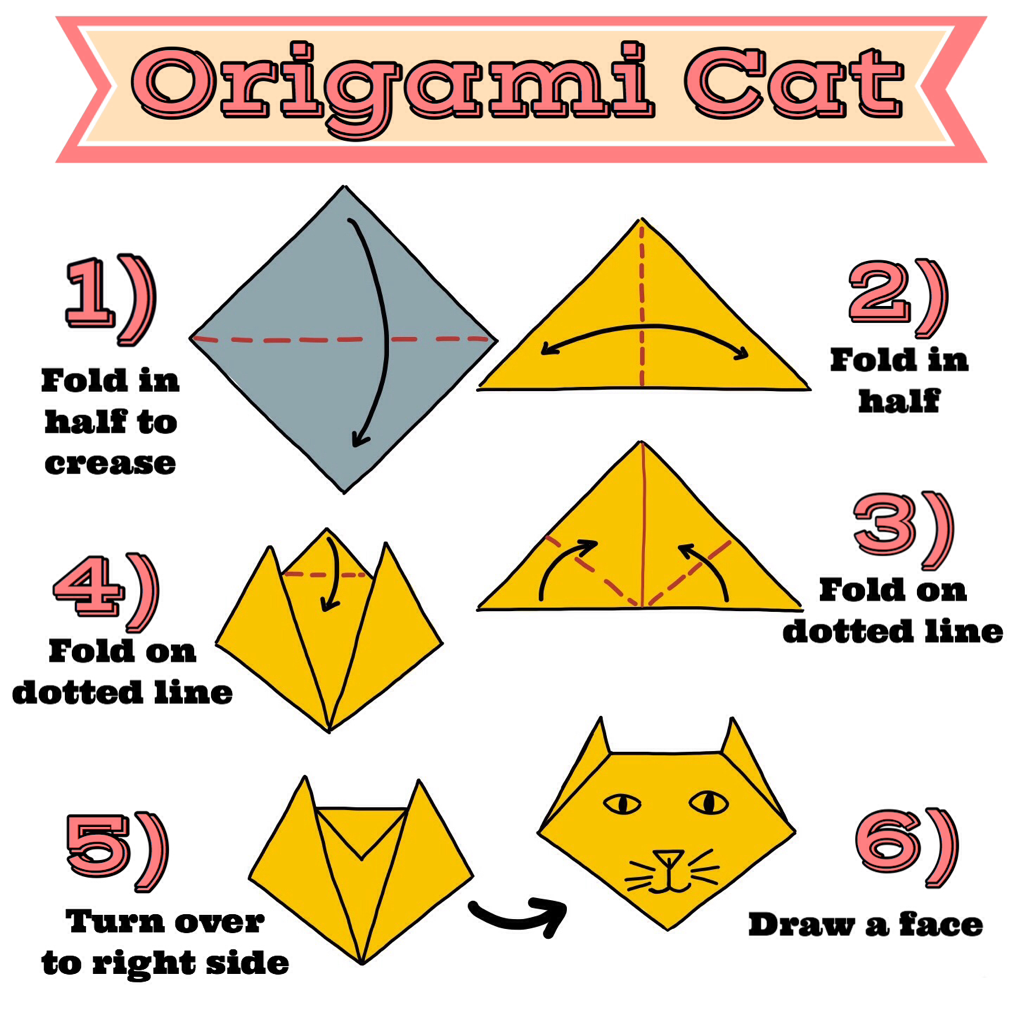
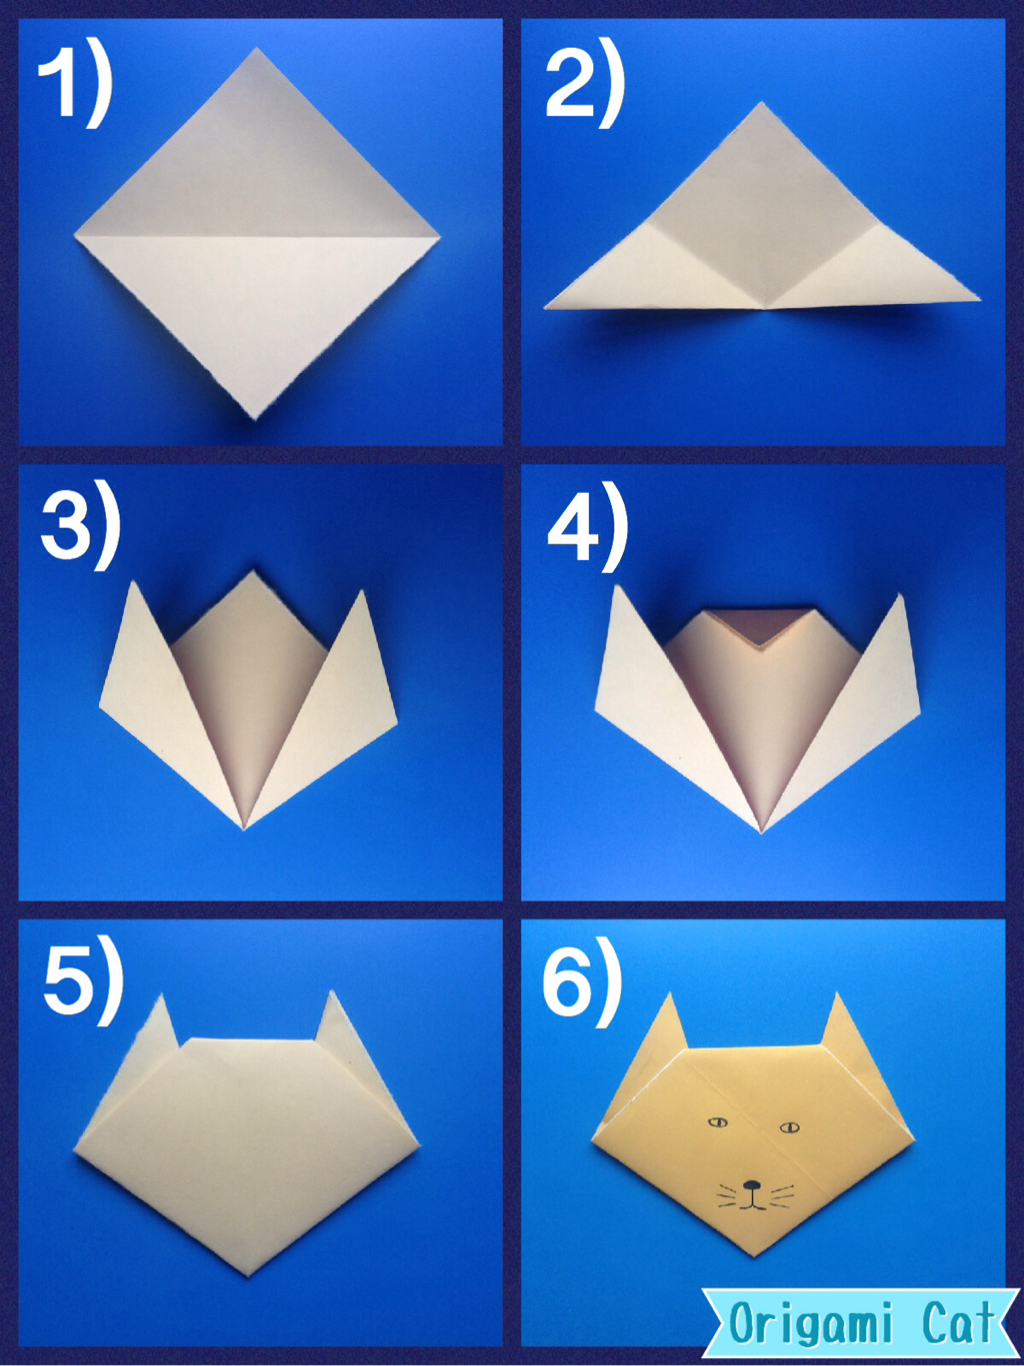
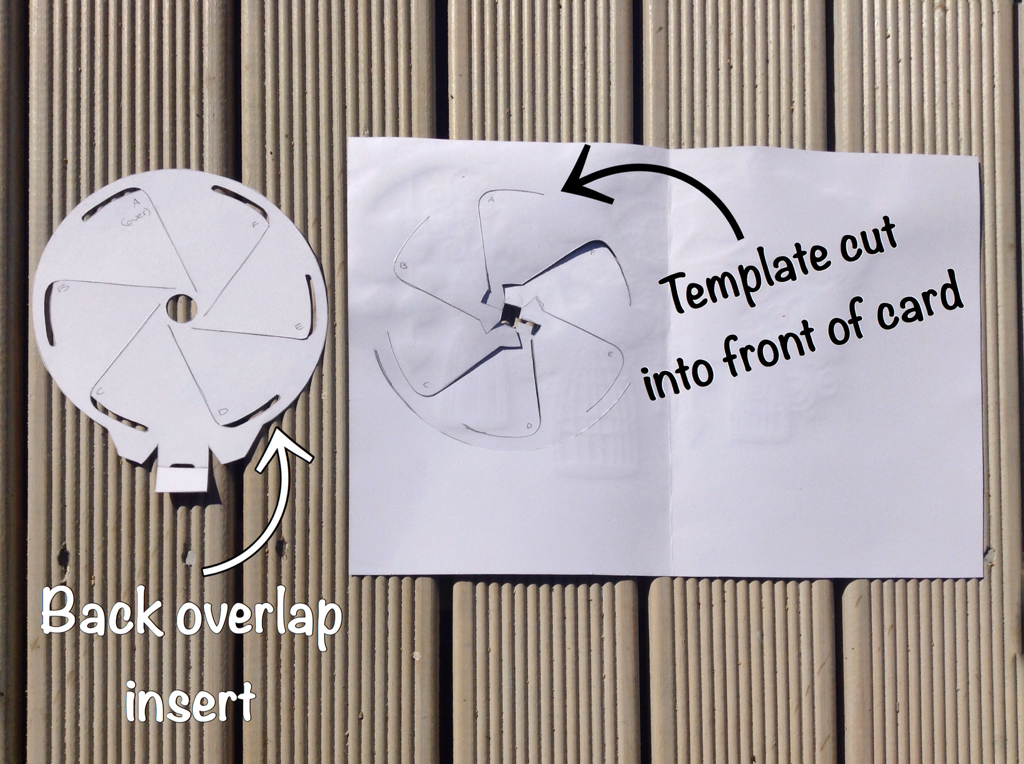
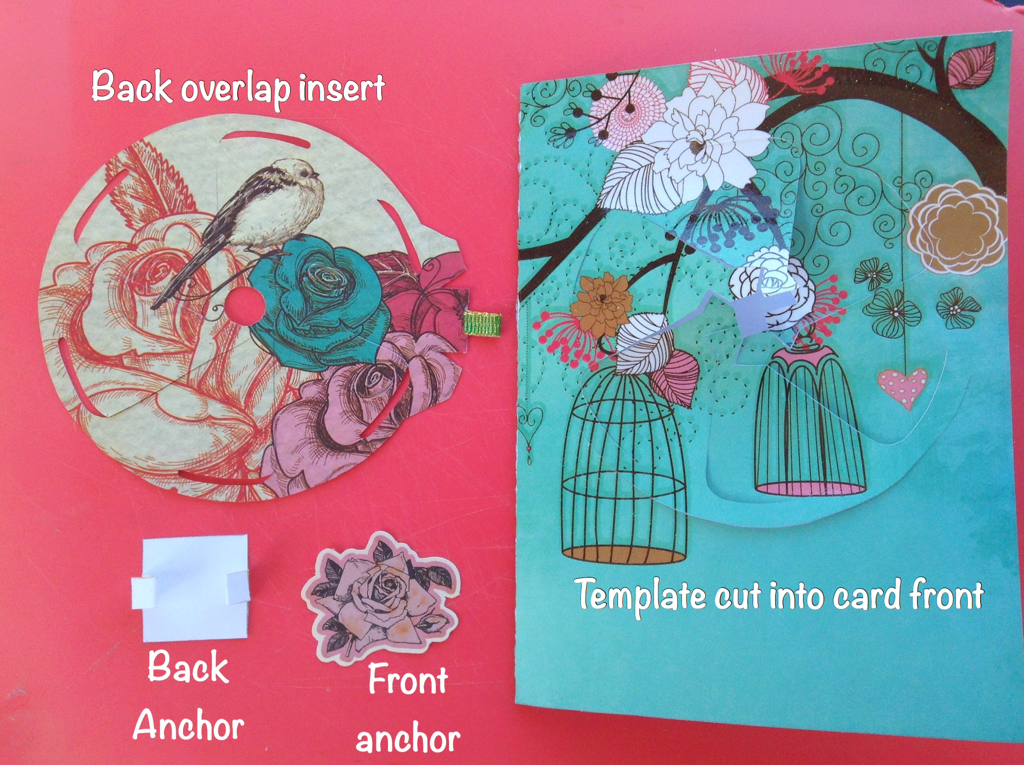
As with all the previous origami tutorials I have provided both a drawn instructional infographic and a photoset.
-Feel free to save/download/print either photoset.
 |  |
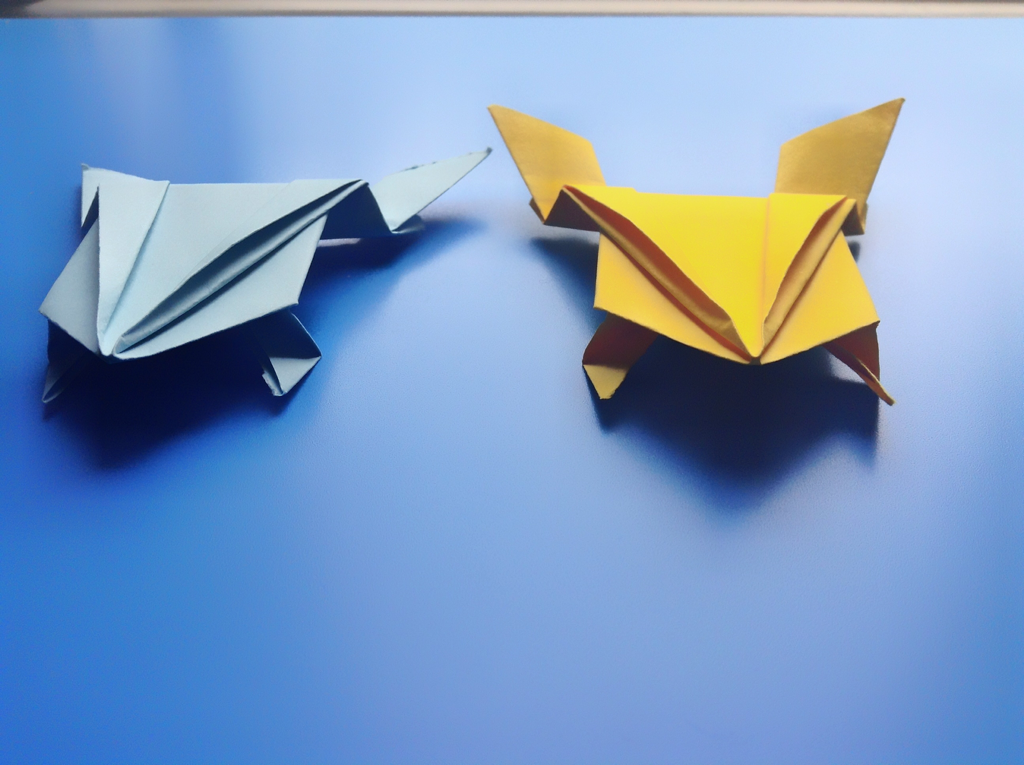
Jumping good FUN!


 RSS Feed
