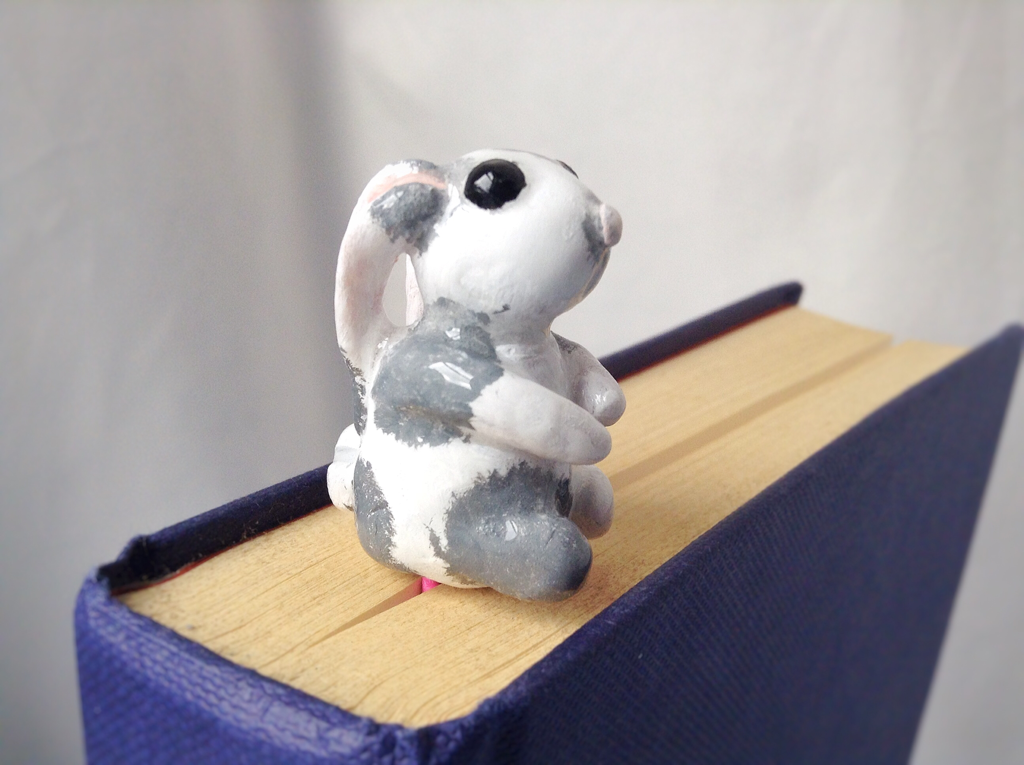
Paperclip Little Bunny
An alternative bunny sculpt. A how to polymer clay sculpt.
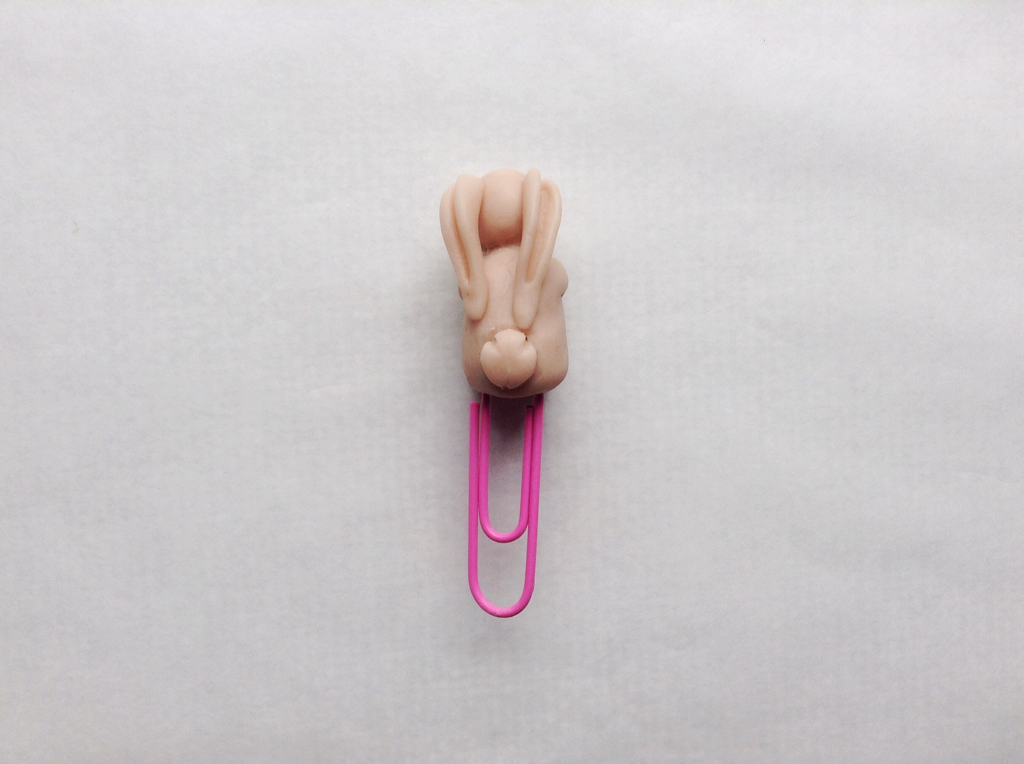
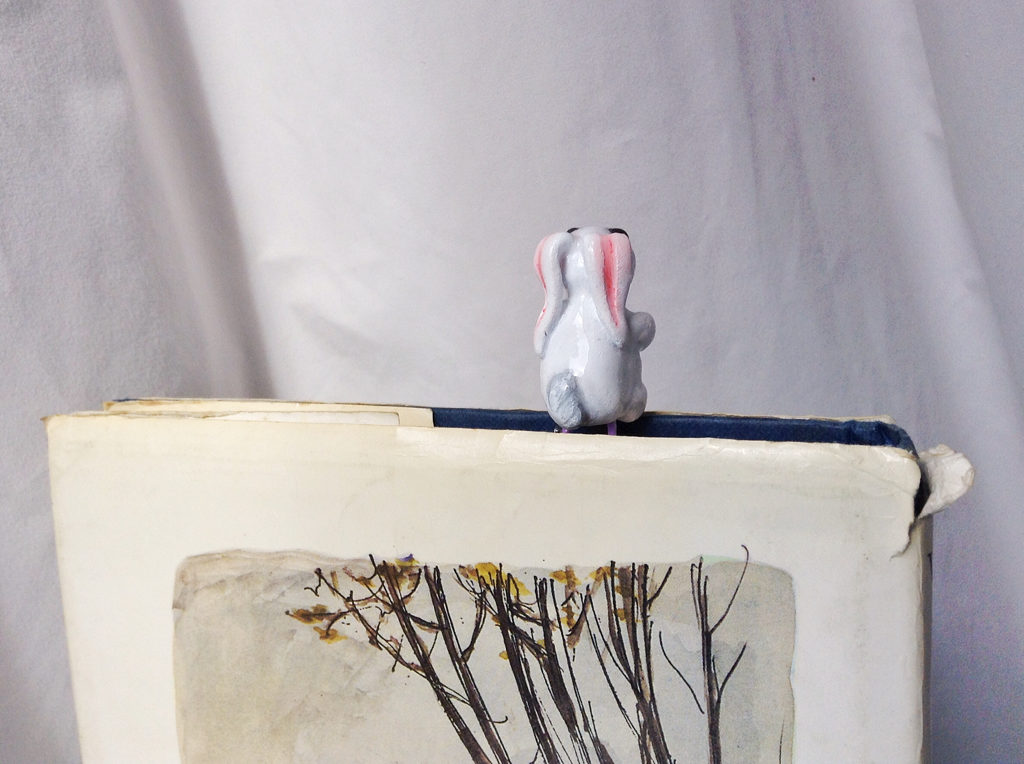
This little guy has been baked onto a paperclip to make a charming little bookmark. What bonny delights await in inside Mr Bunnys book?
This little guy has been baked onto a paperclip to make a charming little bookmark. What bonny delights await in inside Mr Bunnys book?
Cottontail Nedds To Collect . . .
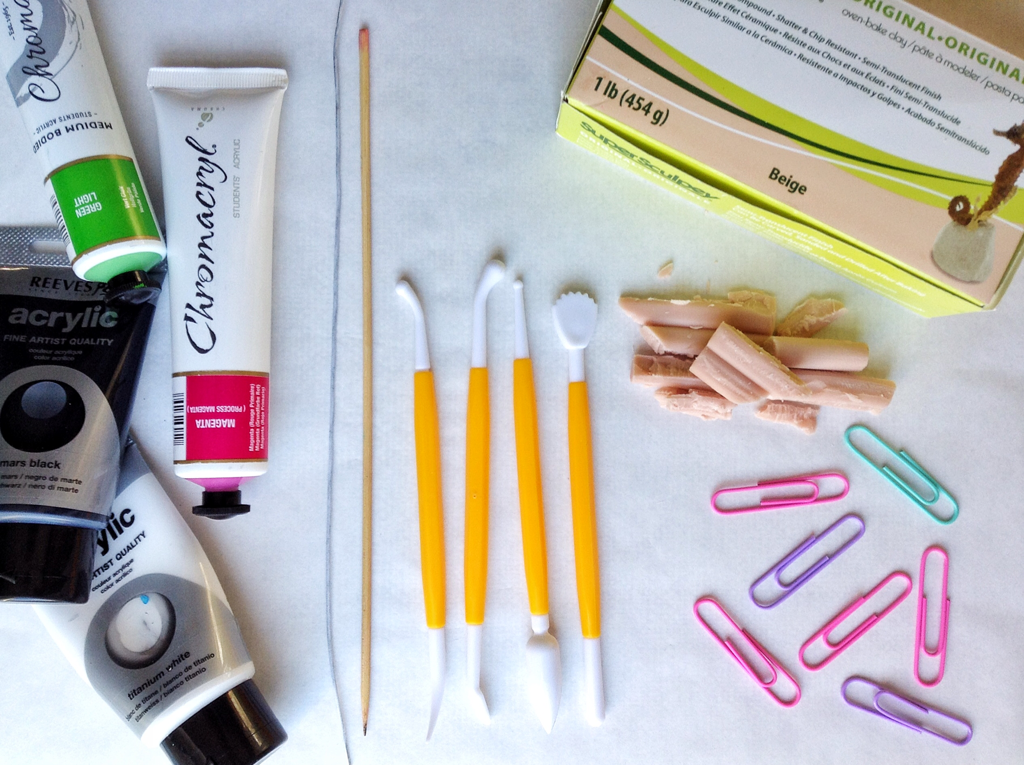
- Polymer clay*
- Acrylic paint and bushes
- Varnish/resin**
- Sculpting tools - my two favourite sculpting tools to use are: a skewer and a sewing pin.
- Paperclips
*Obviously any polymer clay can be sculpted but I prefer to use Super Sculpey (beige) It's lovely and soft and creamy, and I find it isn't as brittle as the smaller squares you can buy. It's not coloured but I prefer to paint polymer clay rather than use/blend different colours.
** A clear coating of varnish will always improve the look of your sculpt. I use a two part resin varnish. Some varnish won't work on polymer clay. The oil in the clay causes the varnish to split and dry in patches. This is another reason I paint my clay.
Hopping Along . . .
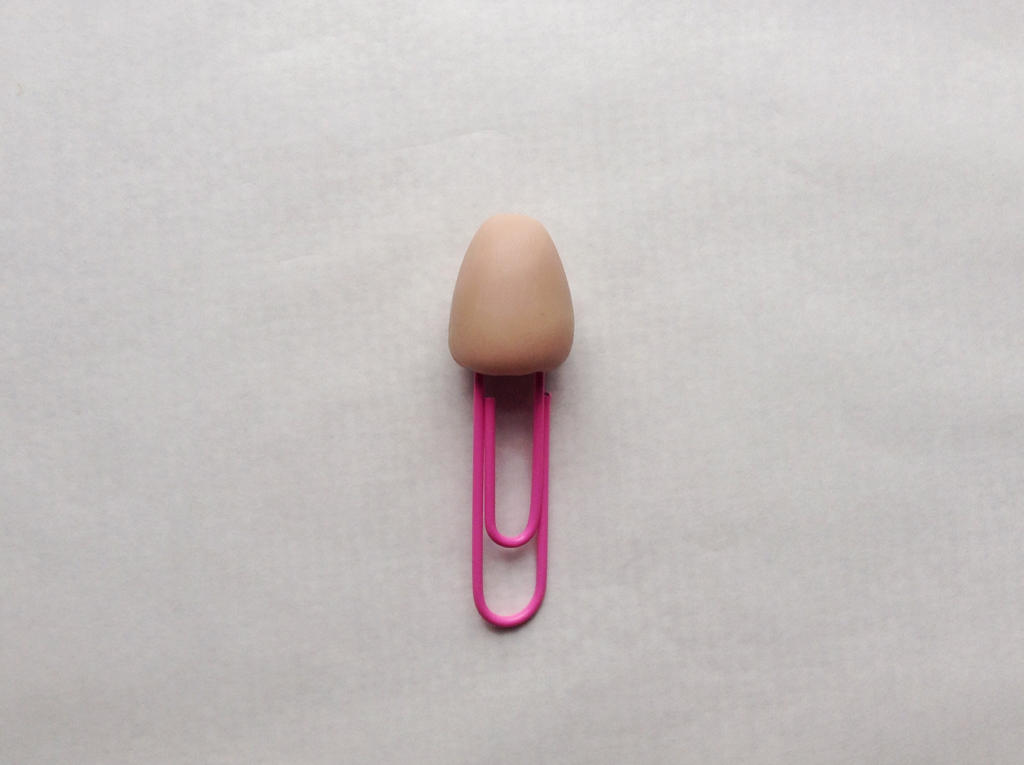
Condition some polymer clay until smooth.
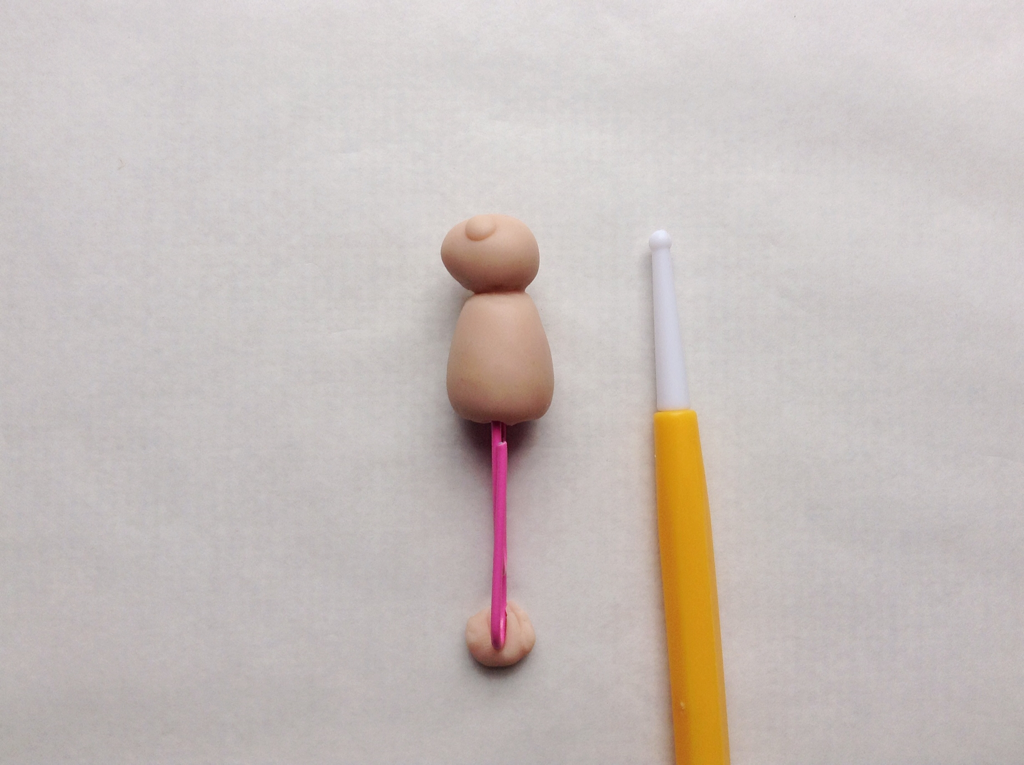
Create a flat-bottomed oval, add a paperclip to the flat end.
Create a flat-bottomed oval, add a paperclip to the flat end.
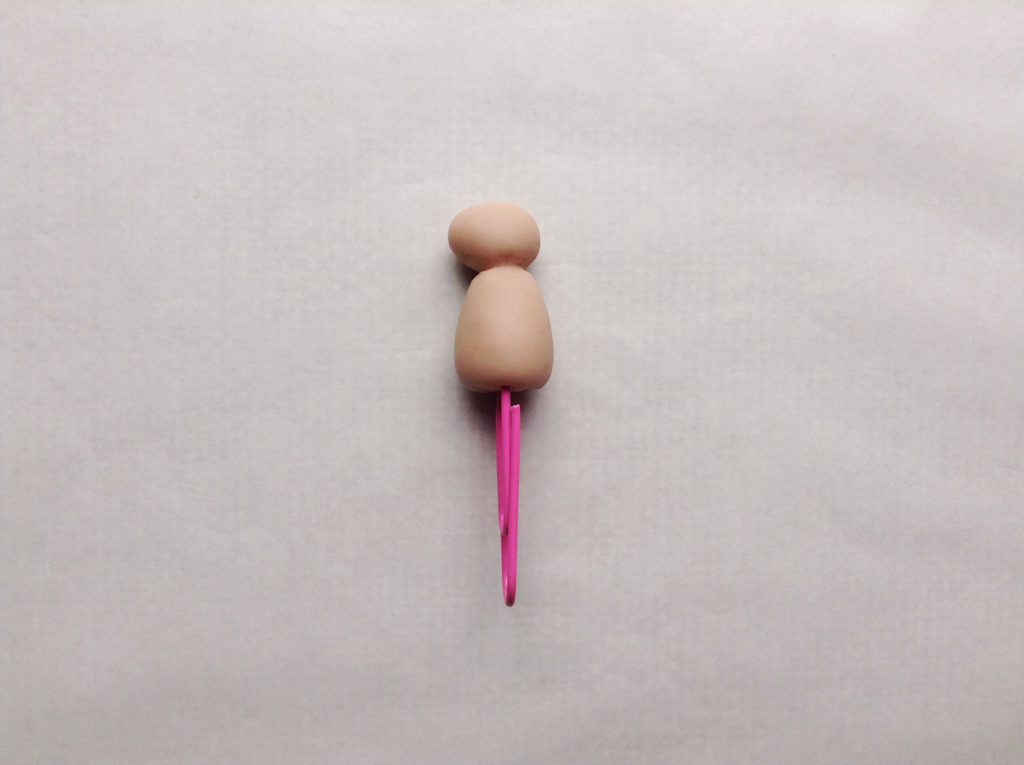
Roll out a ball for the head. Pinch and elongate one end for the face.
Add the head to the body, blending the two pieces together.
Add the head to the body, blending the two pieces together.
Press two eye sockets into the head, using a small fondant sculpting tool, or the end of a paintbrush.
Roll out two balls for the eyes and add the head.
Roll out two balls for the eyes and add the head.
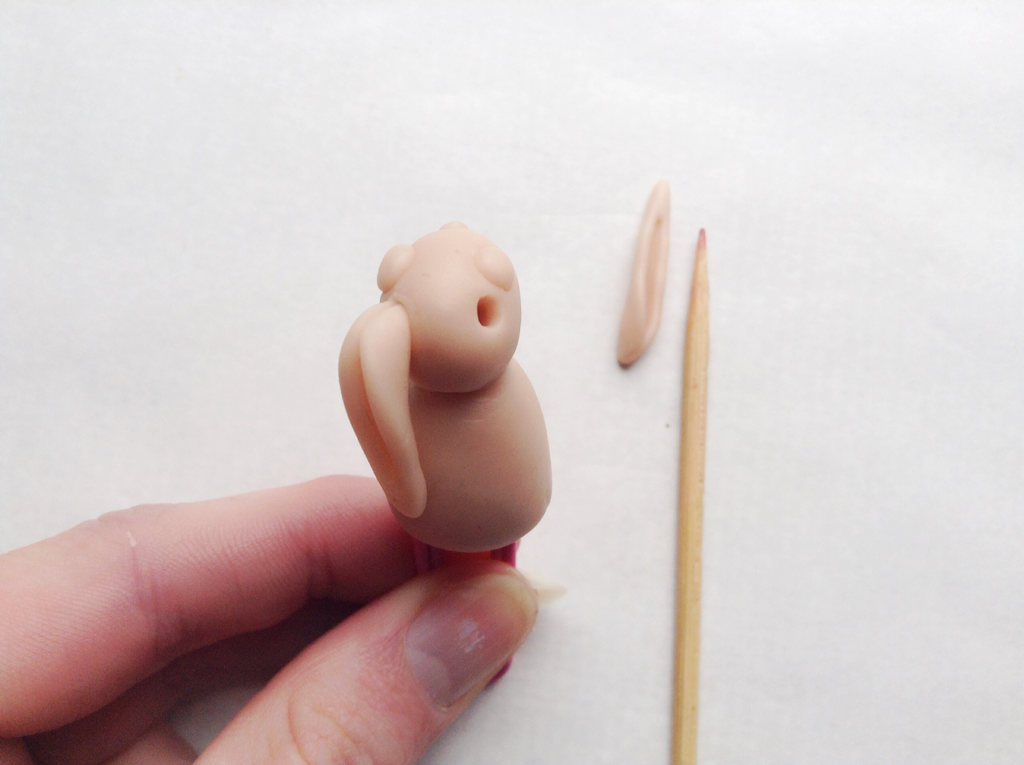
Roll out two long ovals, gently press between your fingers to flatten them slightly. Pinch one end into a point. Fold the ears over a skewer.
Press two holes into the back of the bunnys head where you want the ears to sit. Fit the ears into place, blending the clay to remove any seem lines.
Press two holes into the back of the bunnys head where you want the ears to sit. Fit the ears into place, blending the clay to remove any seem lines.
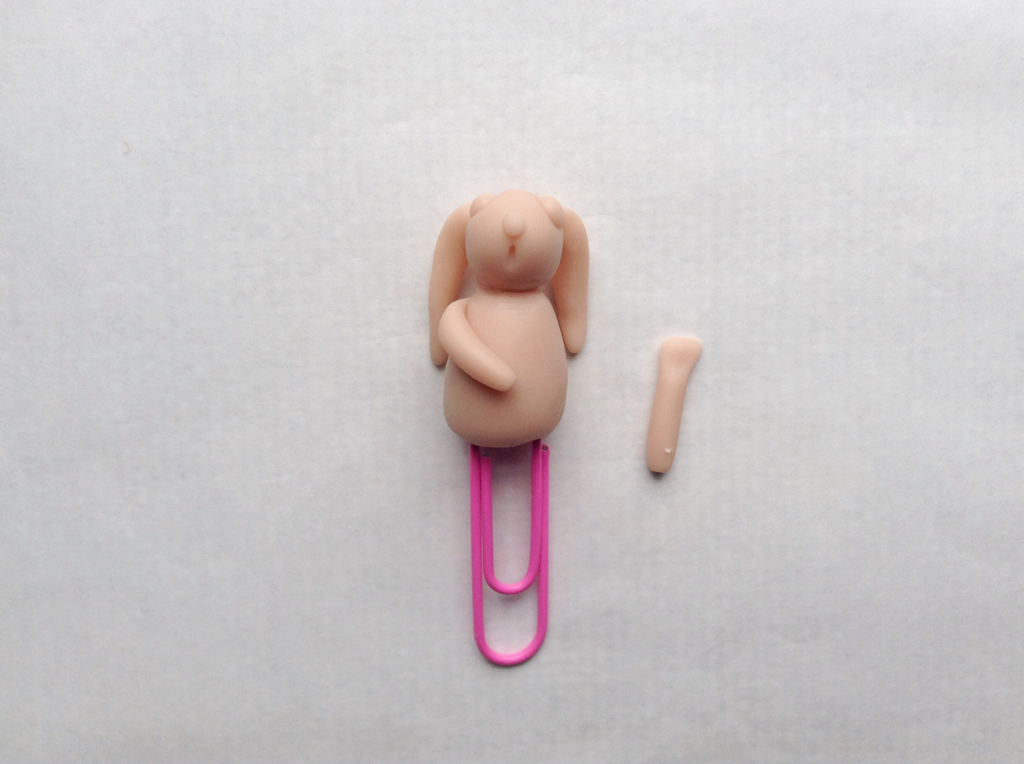
Roll out the clay and cut two arms. Press/flatten the end of each arm. Blend the back of the arm into the bunnys back.
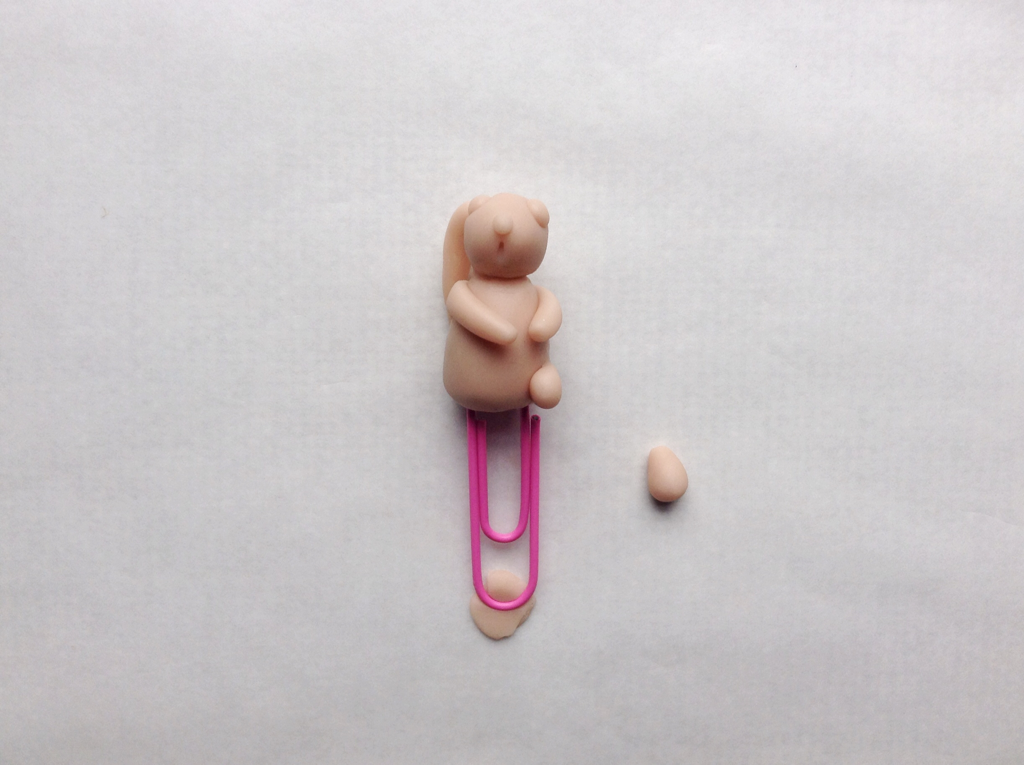
Roll out two balls for the feet, pinch the ends into teardrop shapes and blend onto the body.
Lastly add a little tail.
Bake the bunny according to the instructions provided with the clay.
Bake the bunny according to the instructions provided with the clay.
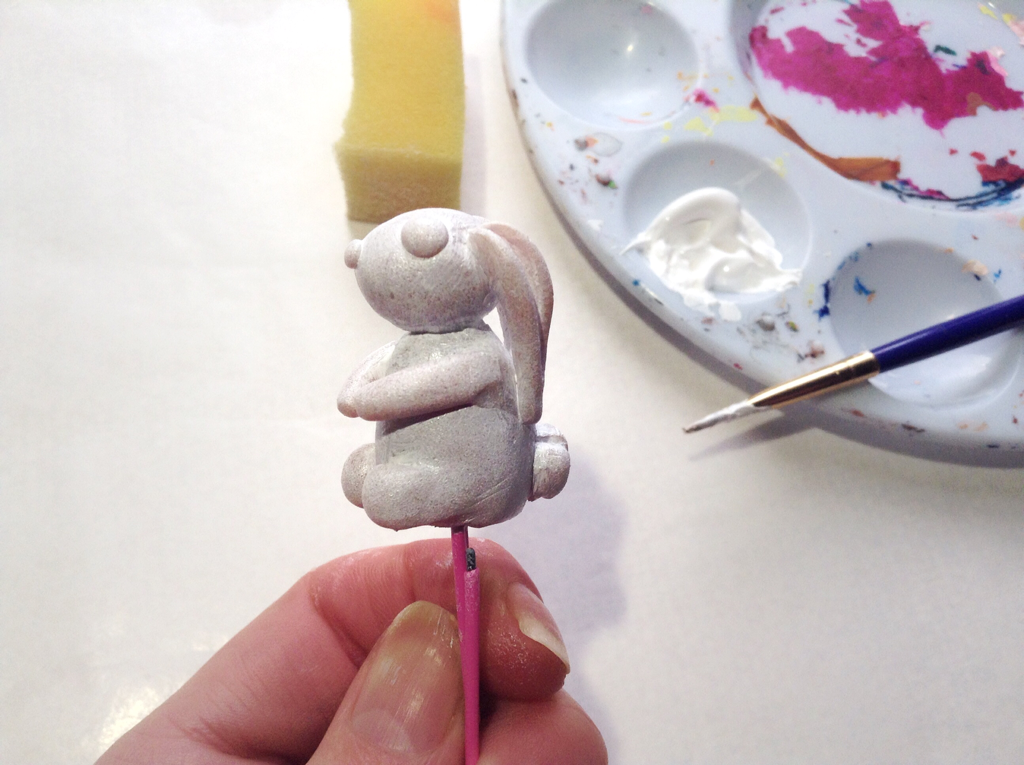
Give the baked bunny a base coat of white acrylic paint. I use a dry sponge to blot out any brush strokes. Leave the base coat to dry.
This bunny is going to be white with grey patches. Give the bunny a second coat of white then add some grey in patches, using a small paint brush.
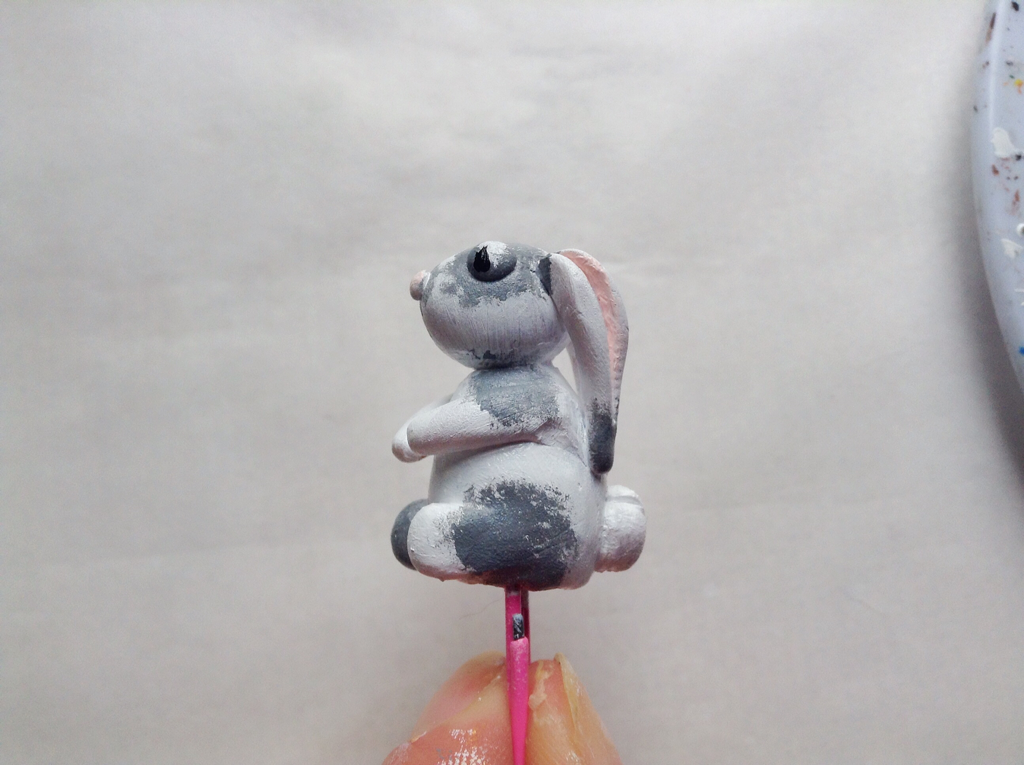
Add some pink highlights to the ears and nose.
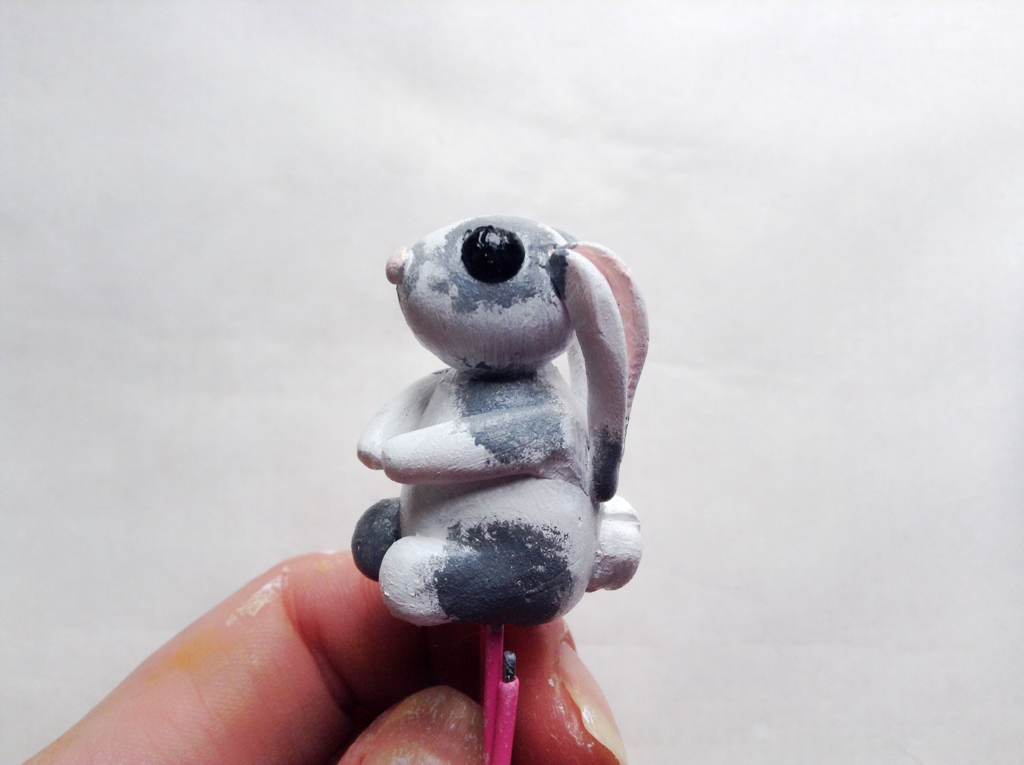
Finally paint the eyes black, I use a very fine brush for this.
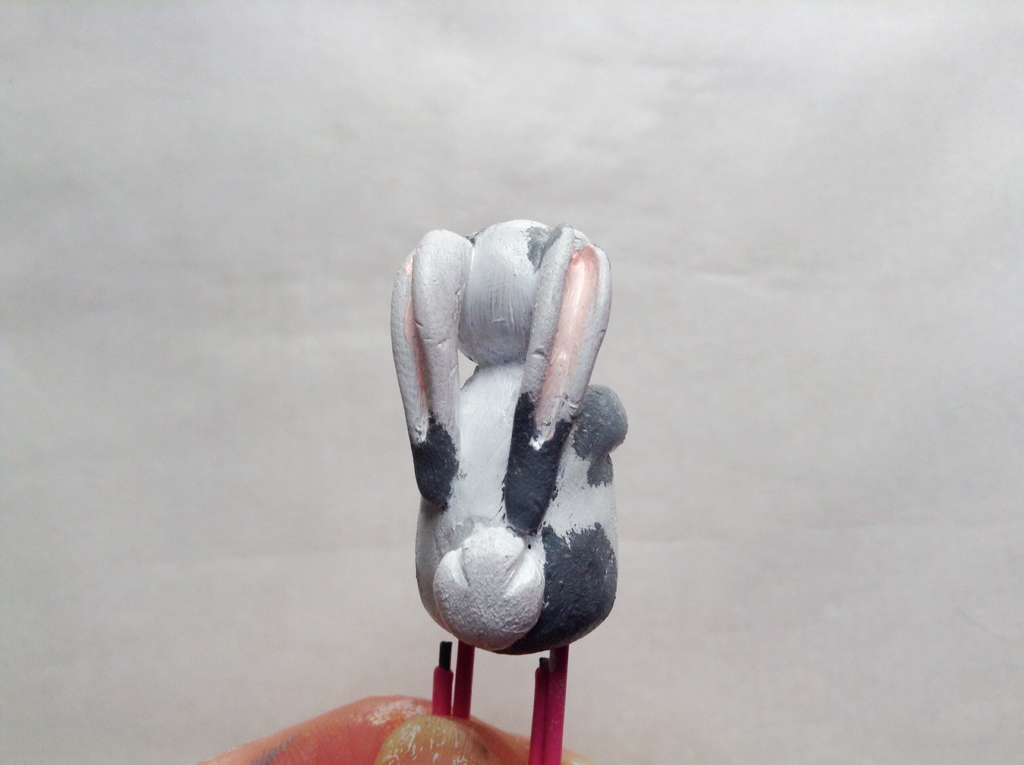
I like give my sculpts a coating of varnish to give them anice shine and to protect the paintwork. I use craft smart liquid gloss. It takes 24 hours to dry. I varnish each piece then hang upside down on a clothes airer. Keep an eye on the drying process for the first hour/hour and a half as the varnish will drip. Carefully wipe away the excess.
I like give my sculpts a coating of varnish to give them anice shine and to protect the paintwork. I use craft smart liquid gloss. It takes 24 hours to dry. I varnish each piece then hang upside down on a clothes airer. Keep an eye on the drying process for the first hour/hour and a half as the varnish will drip. Carefully wipe away the excess.
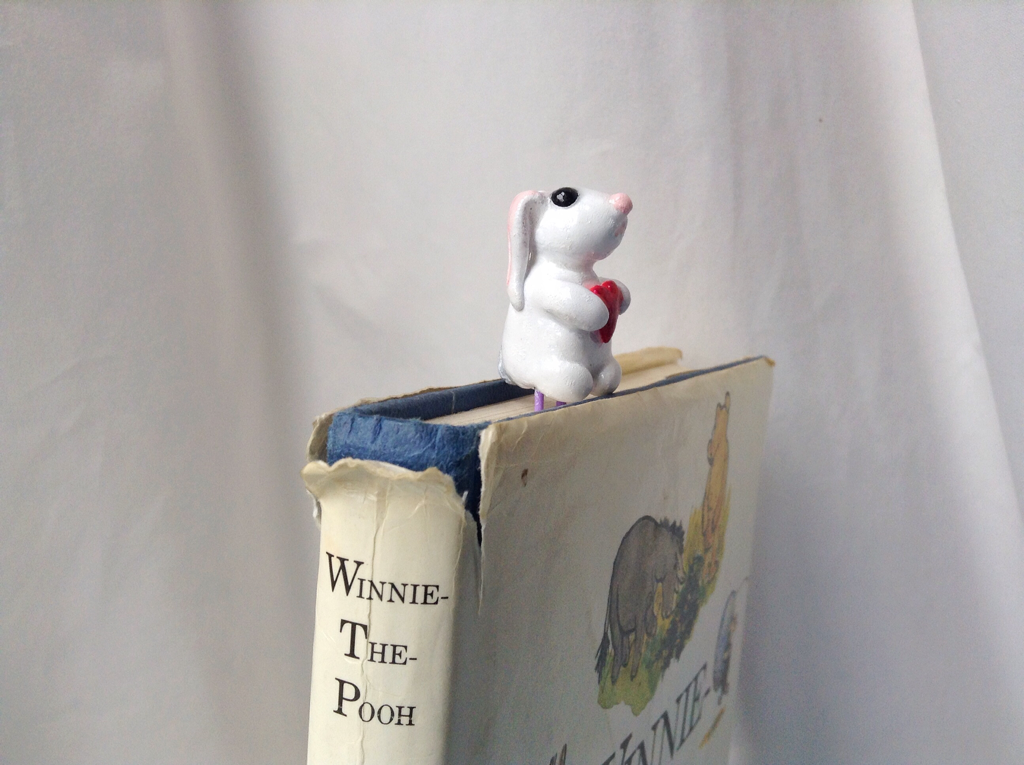
Here is another little bunny I made. This bunny is holding a heart.
The end. This bunny tail is over.
 RSS Feed
