I have many, many pictures of bias binding from various projects, I thought I'd collect them all up and make a bias binding post.
It's very easy to just write 'and add bias binding' to a tutorial. To someone who knows what bias binding is this is a simple instruction, but to someone who is new to bias binding it can be kind of nerve wracking.
I remember when I first started sewing I hated bias binding, okay I still hate bias binding, but I'm not scared of it anymore.
You can buy bias binding in a variety of colours from any craft/fabric store. Or you can make your own (this is a much more cost effective approach)
What is it made ouT of?
Most commonly bias binding is made out of a cotton based fabric.
But, in theory, it can be made out of any kind of fabric. I just made some out of burlap.
But, in theory, it can be made out of any kind of fabric. I just made some out of burlap.
On The Bias
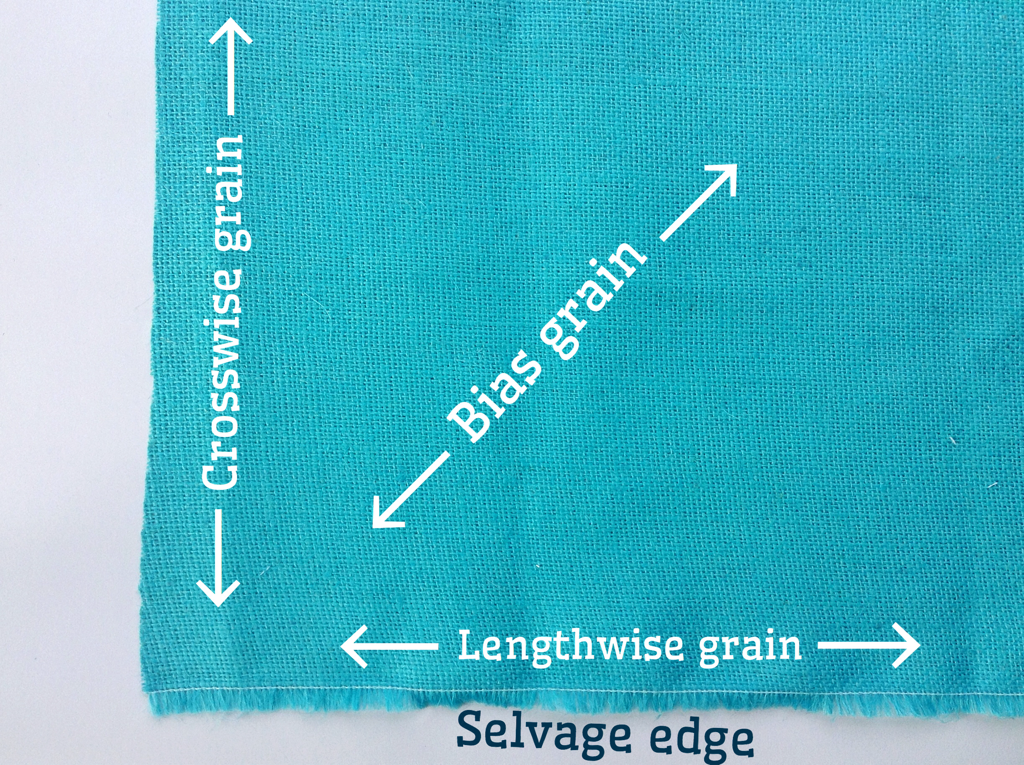
Hence the name bias binding is cut along the bias of your fabric.
The diagonal weave on a 45 degree angle from the selvage.
Cutting along the bias gives the binding more stretch and flexibility than the crosswise or lengthwise grains would have.
The diagonal weave on a 45 degree angle from the selvage.
Cutting along the bias gives the binding more stretch and flexibility than the crosswise or lengthwise grains would have.
Making your own
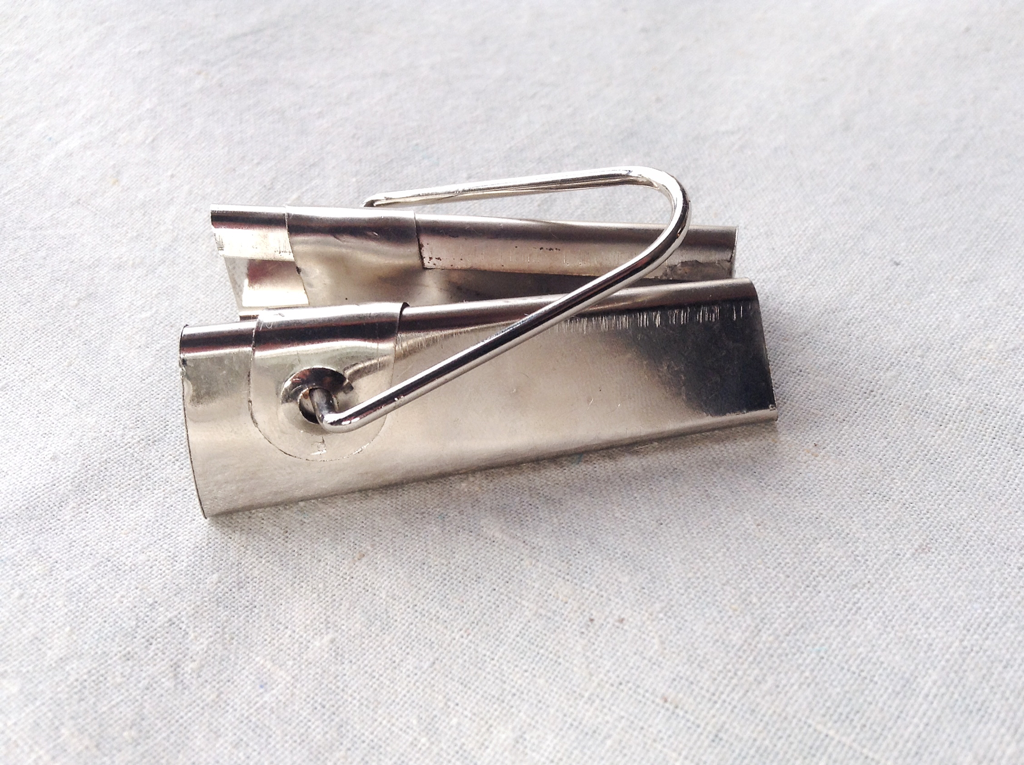
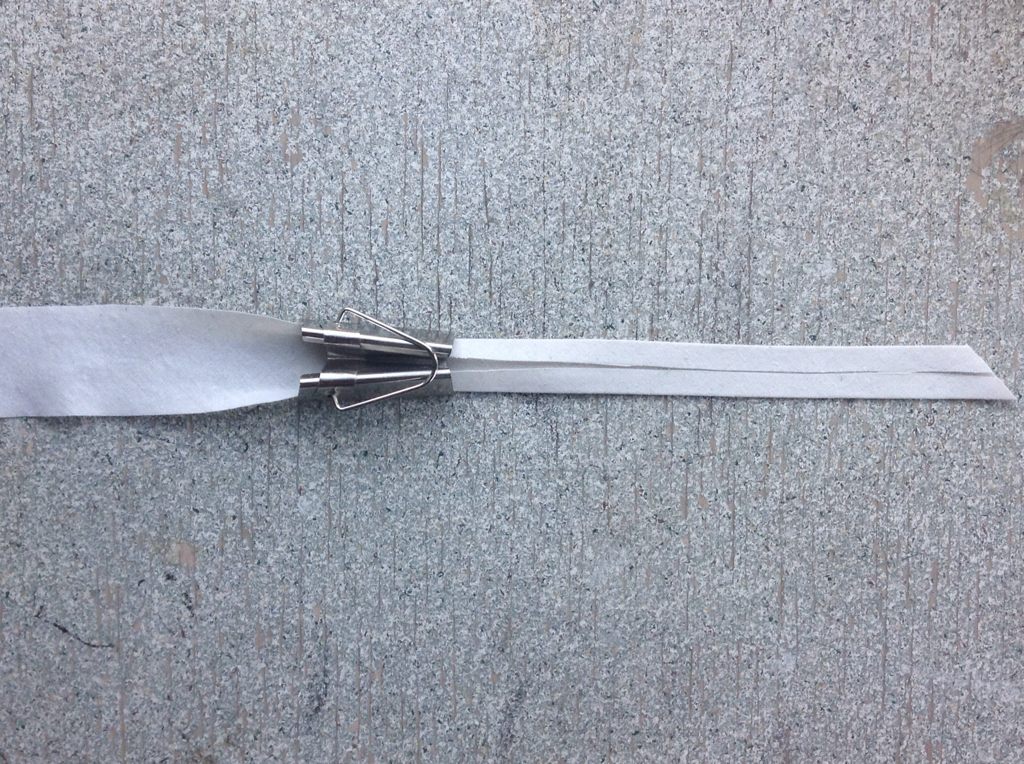
You can buy these bias binding ribbon makers, if you want to start making your own buy one, they are lifesavers. They look like the picture above.
They're available in a variety of sizes, the bigger they are the wider your binding will be, the smaller they are the thinner your binding will be.
They're available in a variety of sizes, the bigger they are the wider your binding will be, the smaller they are the thinner your binding will be.
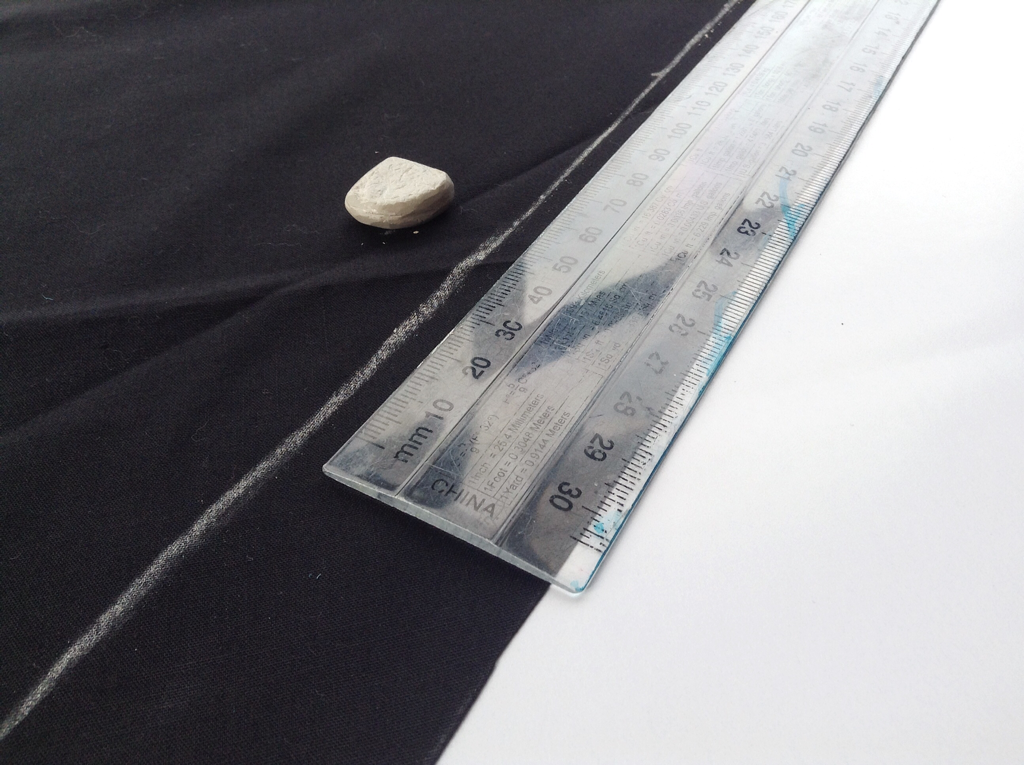
Its very easy, you cut strips of fabric along the bias of your fabric. I like to measure and draw the strips in tailors chalk.
Your bias ribbon maker will tell you how wide to cut the strips.
I remember in school we had a bunch of different ribbon makers. It's a real pain having to painstakingly measure out the width of each and every strip of fabric. So my teacher cut out width templates to go with each ribbon maker. They were long strips of card cut to the right width that you just had to trace onto your fabric.
My ribbon maker fits a strip of fabric that's roughly as wide as a standard plastic ruler, so I just use that as a template.
 |  |
Cut many, many strips of fabric and sew together. You'll notice the edges overlap and don't meet flush together. When you open the tape it should be straight and continue in one long straight line.
Press open all seems and trim away excess/overhang fabric.
Thread your strip of fabric through the ribbon maker. Thread from fat side to thin. And press. Make sure the side with all the pressed open seams is facing up.
Sewing bias binding
 | 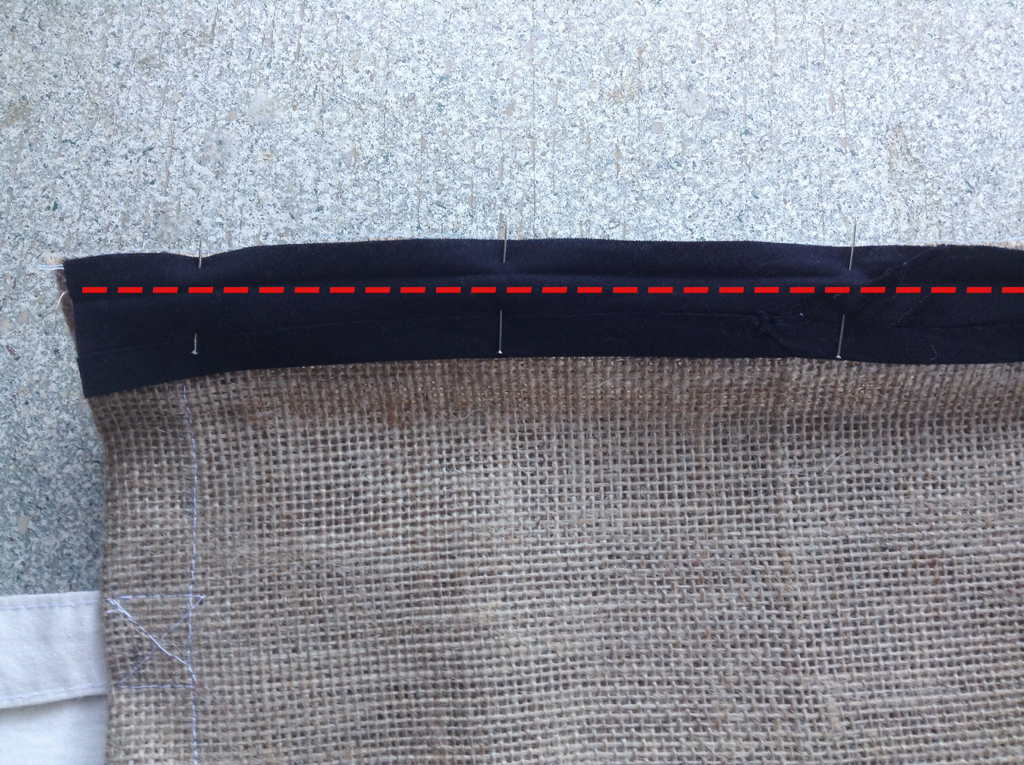 |
Open binding and pin to the good side of your fabric. Sew just shy of the crease.

Take out the pins. Fold the bias binding over the raw edge of the fabric/project. And pin.
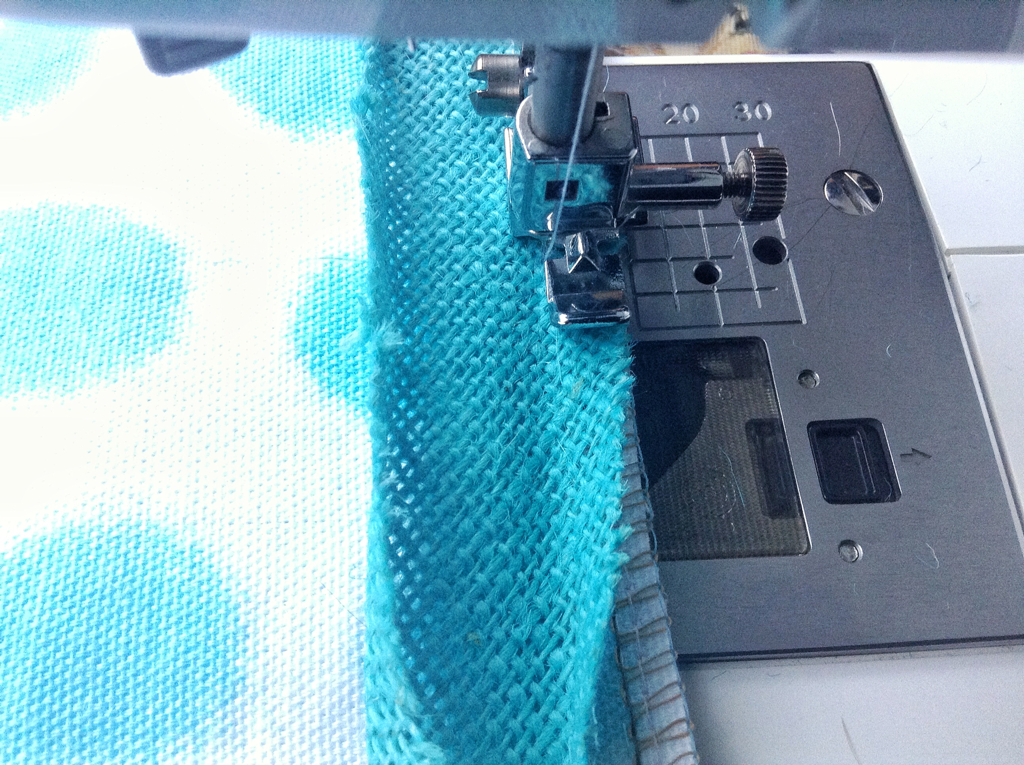
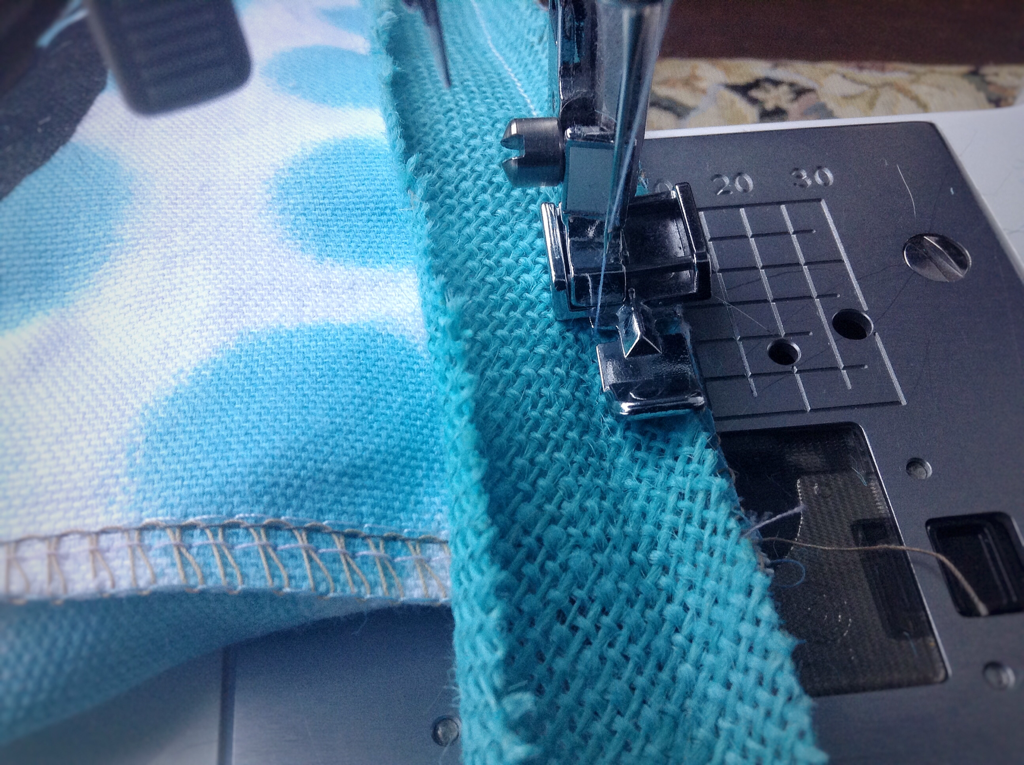
Ideally you'll need to pull it fairly taught. You want it to just cover the stitching that's visible on the other side of your fabric. Then sew it again, fairly close to the edge on the binding.
Ideally you'll need to pull it fairly taught. You want it to just cover the stitching that's visible on the other side of your fabric. Then sew it again, fairly close to the edge on the binding.
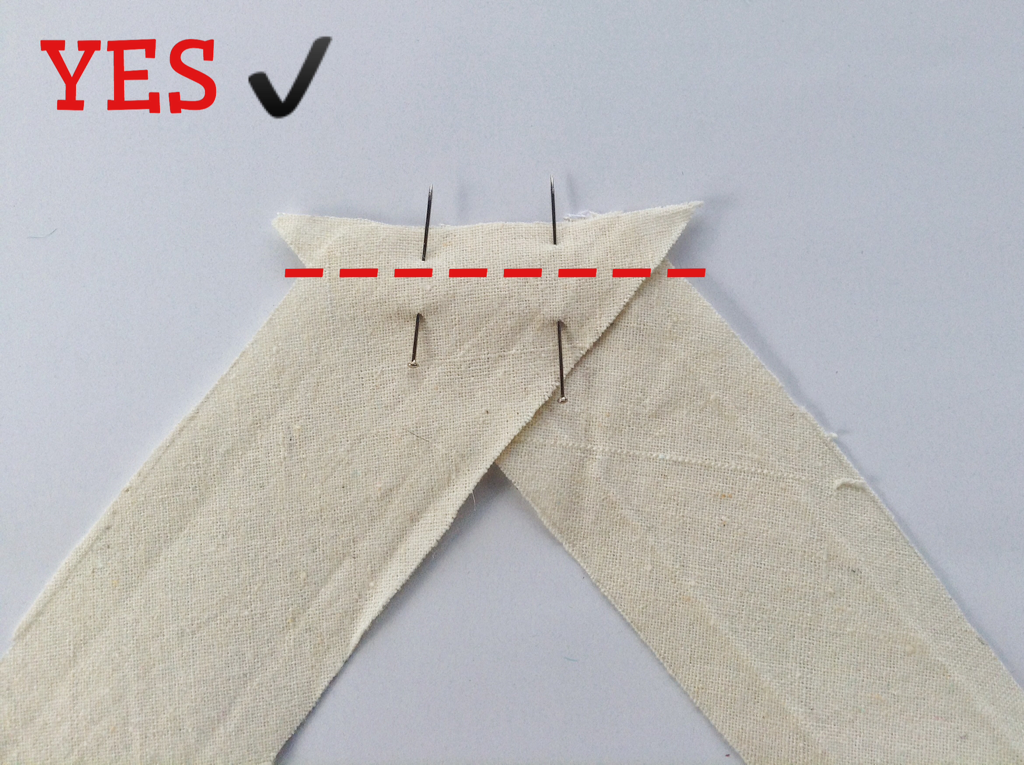
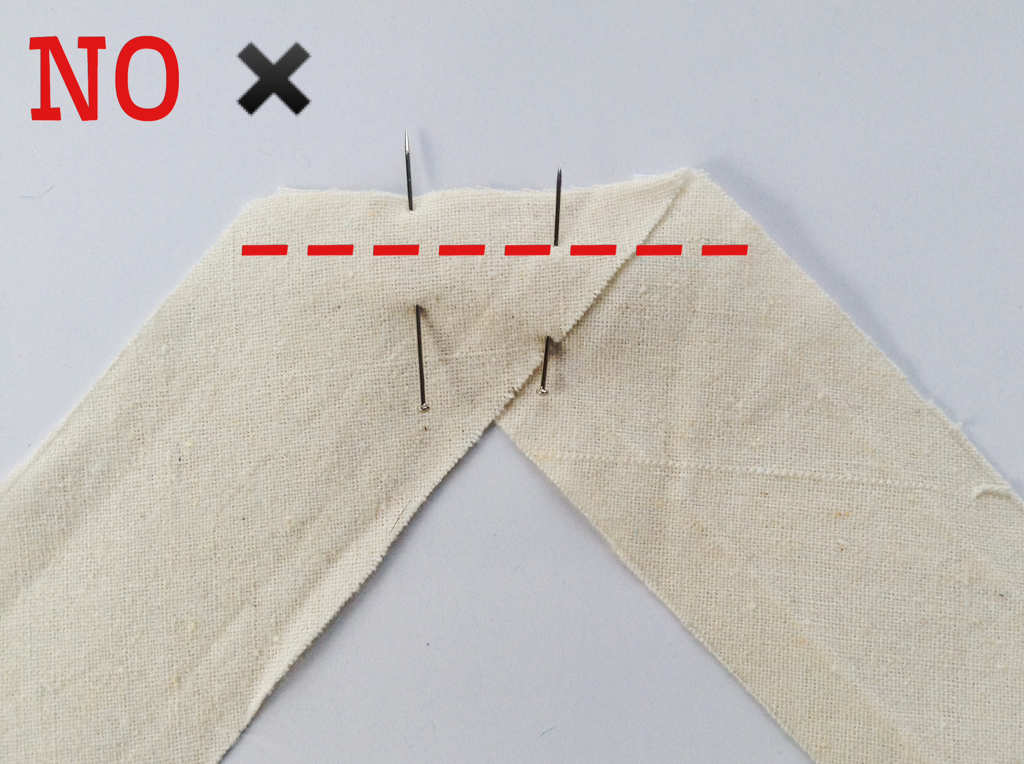
Cornering with bias binding
 |  |
Okay, so your sewing down the crease on you binding. It's all going good, your sewing straight, this isn't so bad But WAIT! There's a corner coming up. What do you do?
Keep sewing all the way down to the end, until you're a few stitches away from the end (maybe about half a centimetre away) Then you stop. Back stitch. And remove your project from the machine.
Keep sewing all the way down to the end, until you're a few stitches away from the end (maybe about half a centimetre away) Then you stop. Back stitch. And remove your project from the machine.
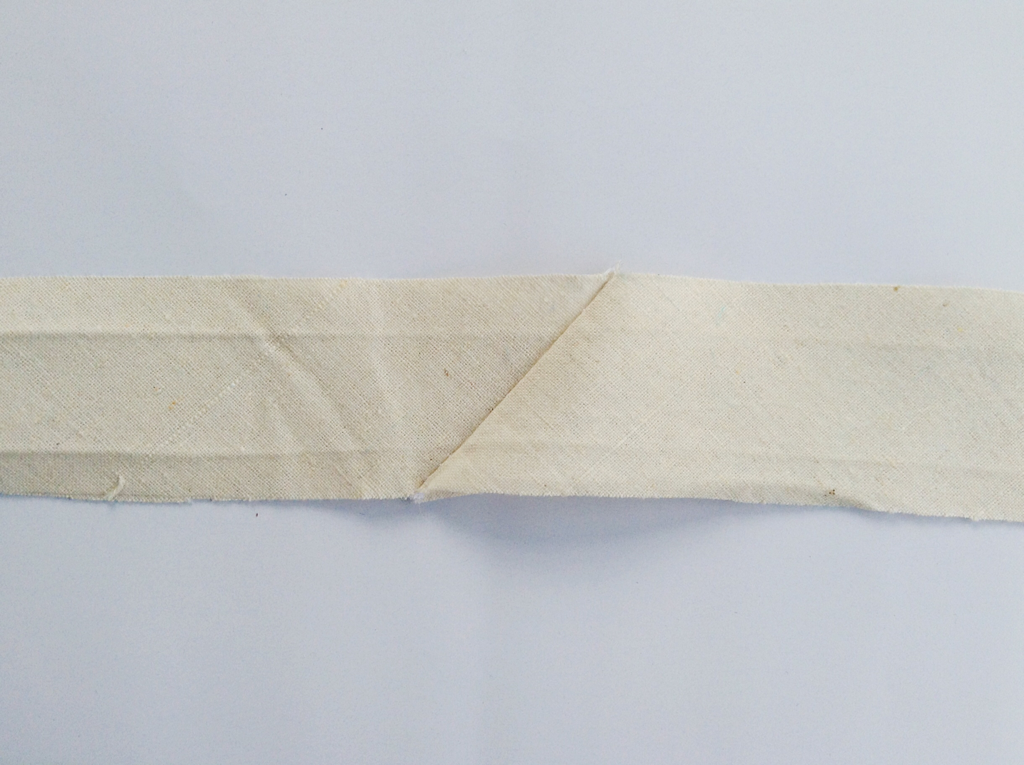
Fold the bias binding up at about a 45 degree angle.
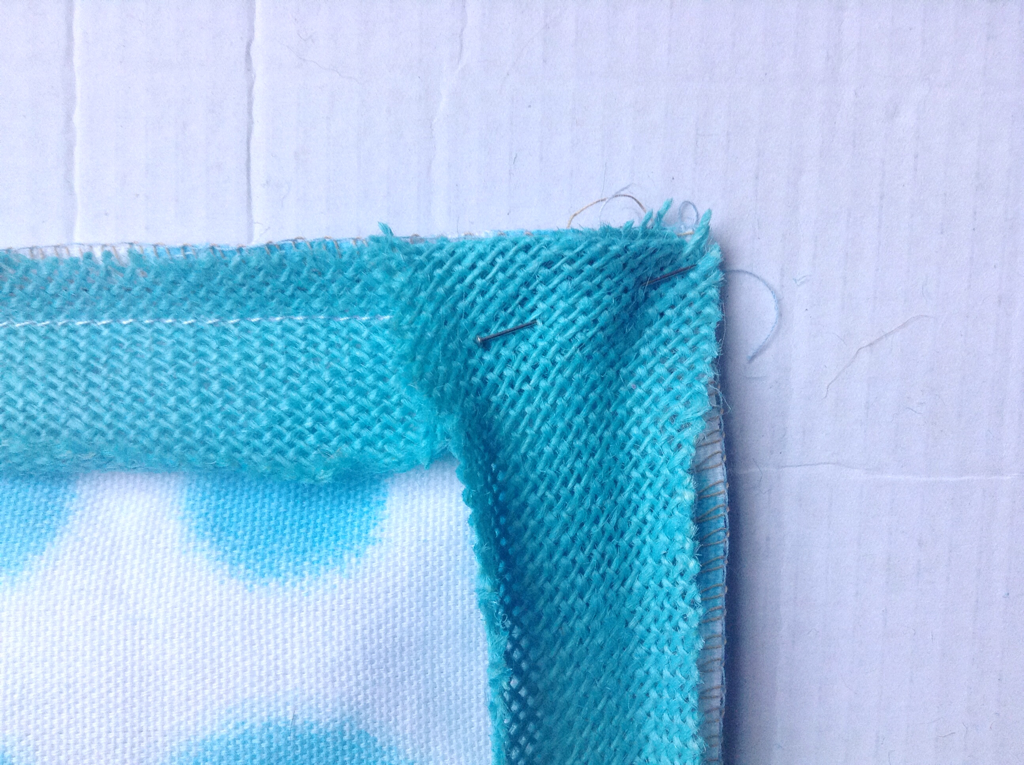
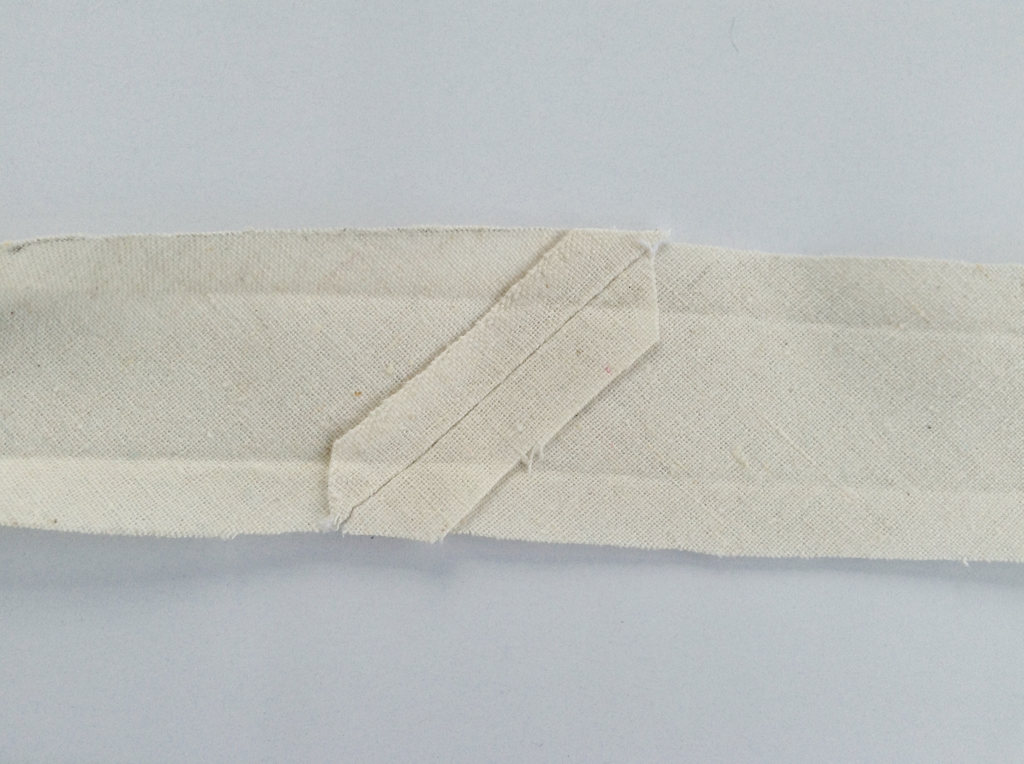
Keeping the 45 degree angle, fold the binding down at a 90 degree angle so it sits in line with the edge of the next side. Stick in a pin to keep the corner in place and continue sewing as you had before.
 | 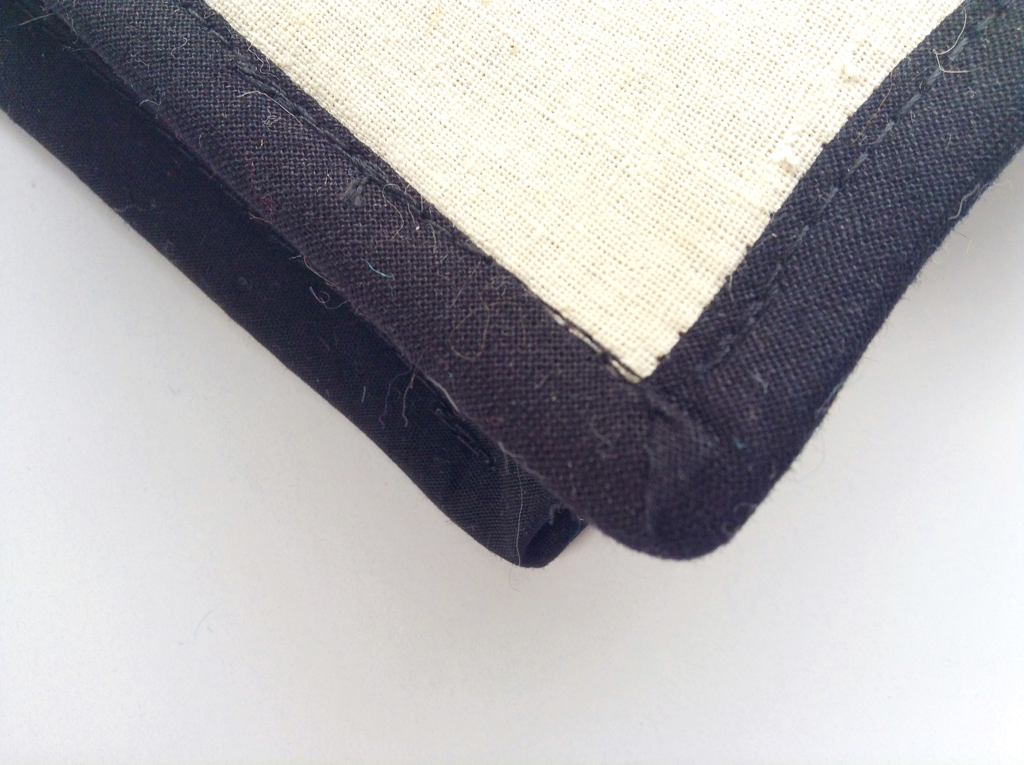 |
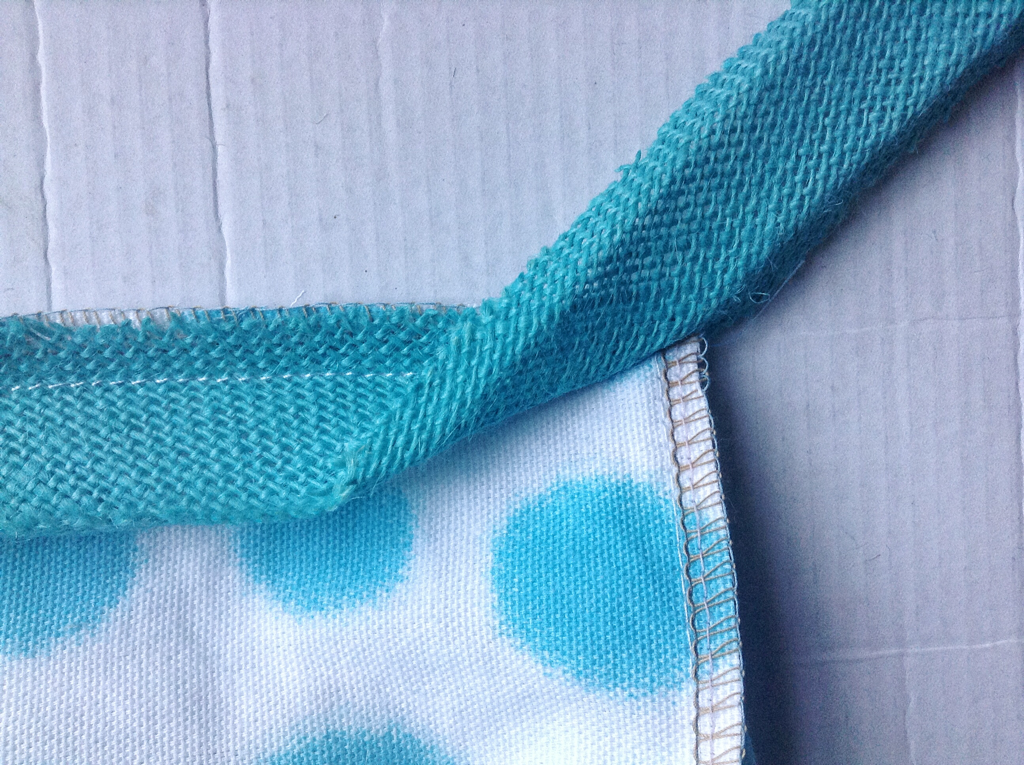
When you finish sewing the corners should look like this.
 RSS Feed
